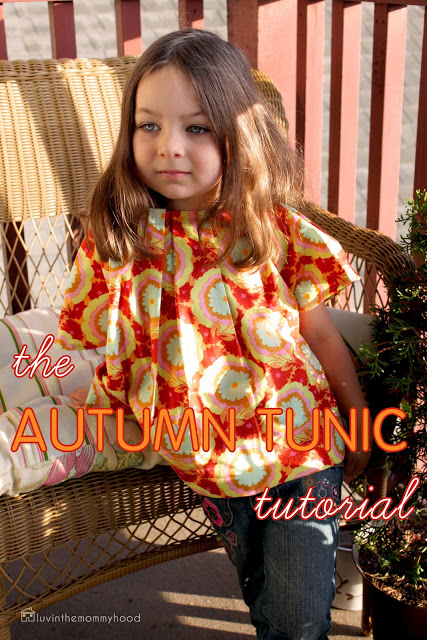
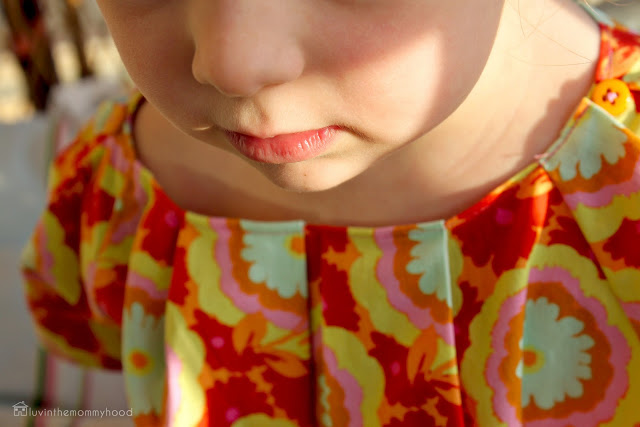
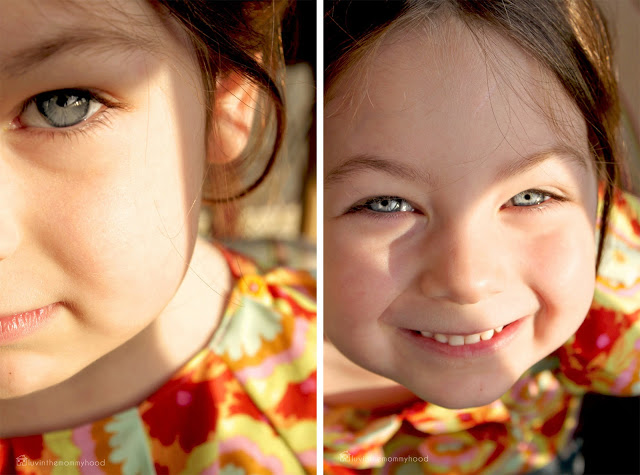
It's time for some Celebrate Color fun! I'm joining in on all the celebrate color excitement over on the lovely Rachel's blog - "Stitched in Color" by doing a fall inspired tunic tutorial for your wee ones today called the Autumn Tunic! I heart this top and want one for myself too! Have you all gotten your projects added to the linky party? (You can add them here.) I heart autumn and love this rich season filled with leaves and blooms left from summer. The color palette for this tunic was inspired by Stanley Park in Vancouver, BC. My ol'stomping grounds. I have very vivid memories of Mackenzie's first autumn there when we did a mini photo shoot of her romping in the leaves. The colors still stick out in my mind and they are still, to this day, some of my favorite photographs.


It makes me get all teary eyed to look at those pics now. A bad case of where has the time gone.....
I always have good memories of autumn. The rain hasn't started pouring in buckets for 6 months straight, the weather is still warm enough to go without a coat/sweater (sometimes), the sun peeks it's head out and man does it feel good. Nothing can bring me down on those days filled with crisp orange, red & yellow leaves....trees adorned with golden jewels, sitting and basking in the warm breezes, flowers still soaking up every last drop of sunshine just the same way we do. Mackenzie and I still love to stop and stare at those yummy moments of autumn just the way we did when she was a wee one and we hope Harper will be just as enamored as we are with autumn.
So keep those parkas at bay a bit longer...pull some leggings or jeans on your wee one, pack a sweater and add an Autumn Tunic and go soak in those autumn rays...I promise it warms the soul :)
Note: This pattern fits my almost 4 1/2 year old daughter. She is small/short for her age. Make adjustments accordingly for your child's size/age by simply decreasing/increasing the width/length of the top pattern (taking care to leave enough room to do your box pleats across the bodice, you will need to add the width of fabric for her size to the width of fabric needed to make the box pleats), length of armhole line and size of sleeve (again, making sure to leave enough width to make your inverted box pleat). All of these can be adjusted quite simply by resizing. I made a pattern using freezer paper and can usually eyeball her sizing by wrapping it on her and by also using other garments that she owns for calculations to match up to the measurements of her body. Measure a fave top of your child's to see the distance between the top of the shoulder to the armpit join or measure your child. Lay both pieces of fabric rectangles on top of each other and mark this distance on your fabric the same as you would in Step 2 of the tutorial below. For any other help resizing feel free to send an email my way to luvinthemommyhood@yahoo.ca, I'd be more than happy to help you out.
***Copyright 2011 www.luvinthemommyhood.com
All rights reserved. For personal use only. Please do not sell items made from this tutorial unless permission has been given.
All rights reserved. For personal use only. Please do not sell items made from this tutorial unless permission has been given.
Materials:
- one yard fabric - fabric marker
- coordinating thread - pinking shears (optional)
- 2 buttons
- iron
- sewing machine
- hand sewing needle
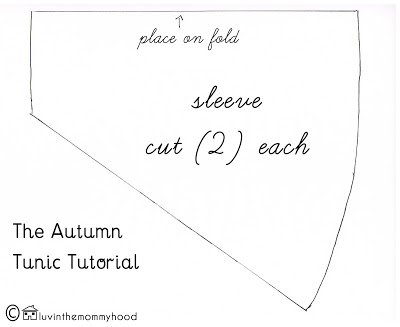
Pattern piece for sleeve:
you can download/print the pattern piece here or simply click on the image below so it's full size and print from there. I'm also fiddling around with using google docs for my pattern pieces now but don't trust what I did...lol...so you can find that version here if you prefer it. *When printing do not shrink or resize the picture. Print it out as is.
Instructions:
1) Prep your fabric by pre-washing and drying. I used Buttercups by Amy Butler and I got the fabric I'm using from www.stitchsimple.com and she does all the washing & pressing for ya with unscented & chemical free detergent. The fabric shows up all ready to go! Seriously...best thing evah!
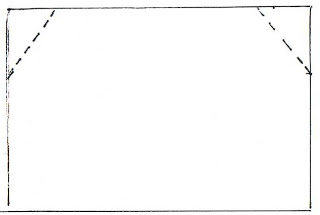
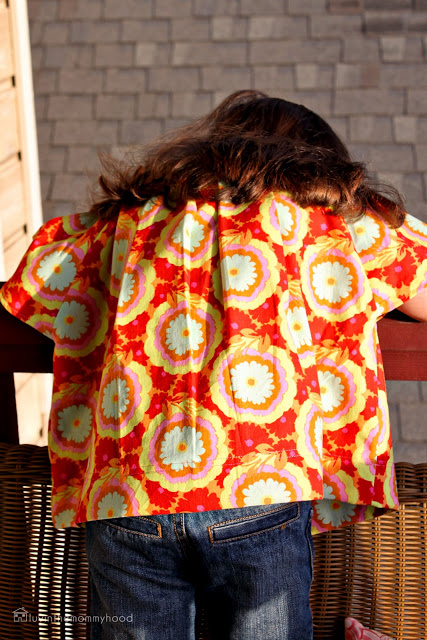
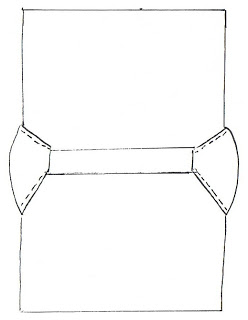
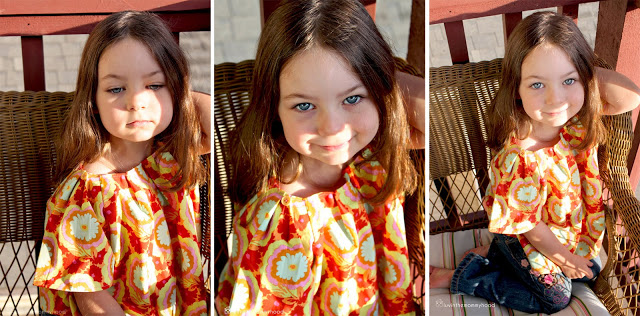
2) Cut out your pattern pieces for the sleeves and cut out (2) rectangles 22"W x 17"H (the top will look huge but when you put it on in the end it's almost like butterfly wings when your wee one lifts up her arms. My girl loved it!). Lay both rectangles on top of each other. Now we're going to use those sleeve pieces you cut out as templates to get your sleeve holes super accurate instead of doing some fussy measuring and trying to desperately draw a straight angled line..haha. Take your sleeve pieces and match up the side of the sleeve pieces (the side should be about 7 1/4") where I've shown the dashed lines in the diagram above. Mark this line with a fabric marker. Move sleeve piece off and cut along the line you just drew. Now just barely trim the top of your 2 rectangle pieces (your top - front/back) and the short end of your sleeves (this side is about 5") with pinking shears. Literally just enough to put the etches in..we don't want to lose fabric length here. Or you could choose to zig zag stitch these edges instead. We're doing this to finish the fabric & prevent fraying for a step later on in the tutorial.
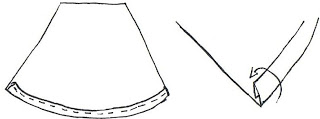
3) Take your sleeve pieces and press a 1/4" seam along the curved edge, fold 1/4" and press again. Stitch down the hem.
5) With right sides still facing (WS up) match the underarms together of your front/back pieces of top. Pin along the side seams of your rectangles from the armpit down. Do this for both the left and right side of the top. Sew this with a 1/2" seam allowance. Again, press your seams and finish the seams with a zigzag stitch or mock overlock.

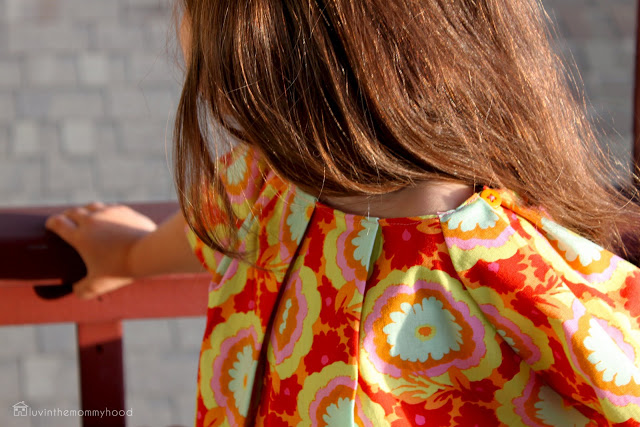
6) Mark with fabric pen (or use a pin) the center of both your front and back of your top. Fold and press (2) 2" box pleats (it takes 4" of fabric to make a 2" box pleat), (this video is helpful if you've never made a box pleat before), to the right and left of your center mark. Do this for both the front and back of your top making sure the space between the outer edge of your pleat to where the sleeves join the rectangle are equal on both sides (left to right) of the top.

7) Baste (you are going to do this to hold down the pleat when you finish the neckline to avoid shifting of the pleat) down "only" the top of the pleats with the smallest seam allowance you can.
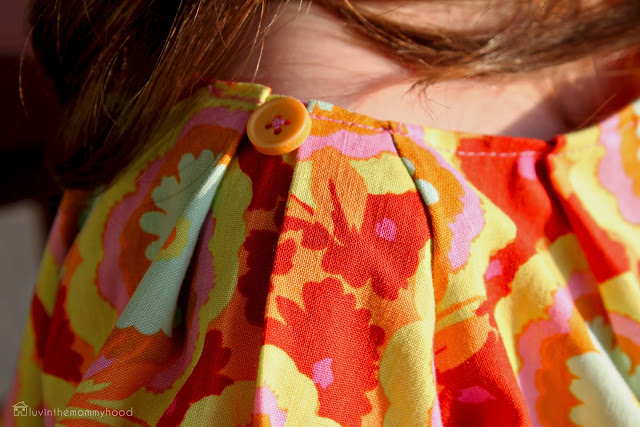
8) With WS facing fold and press entire neckline 1/4" around the top. Stitch this seam down and press.
9) Find and mark the center point of your sleeve. Fold in both sides equally to make one inverted pleat (here is a great post showing inverted pleats). Do this for both sleeves. Press.
10) Get your 2 buttons out and hand sew your buttons on to each sleeve on the neckline between where your pleat meets up.
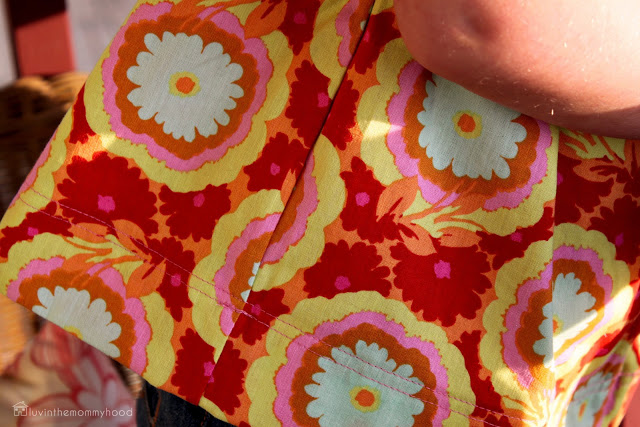
11) Try the garment on your child to check the length you would like to hem. I did a very wide hem so I will have lots of room in this tunic for Mackenzie to grow. I can take out the sleeve pleat and let down the hem as she gets bigger. I folded and pressed 2" and then folded and pressed 2" again to equal a 4" hem. I stitched this down the width of my presser foot in from the inside edge. I then topstitched 1/4" away from the first row of stitching to almost the edge of the hem. Press.
12) Attach your label. Press/fold your pleats (you can also blind stitch your pleats by hand down a few inches if they don't stay in place..mine were fine but this may change based on the fabric you are using) and go rock your new Autumn Tunic!!! So fun!
***Copyright 2011 www.luvinthemommyhood.com
All rights reserved. For personal use only. Please do not sell items made from this tutorial unless permission has been given.
All rights reserved. For personal use only. Please do not sell items made from this tutorial unless permission has been given.
I would love to see if you make an Autumn Tunic for your child! Come upload any of your projects to the luvinthemommyhood flickr group so we can all take a looksie! I hope you have fun with this top and feel free to add your personality to it. You could add a different fabric border for the hem, leave out the buttons, embroider the neckline..there are lots of ways to customize the tunic for your child. It's perfect for summer/fall as is and just as adorable with a long sleeve t under for the winter. So go get some yummy colored fabric and Celebrate Color! Have you entered yet? You don't want to miss out on those FABULOUS prizes that Rachel, I and the gang have rounded up!
Do you have a fave autumn picture/memory? Have you been doing any sewing for fall? What do you think of the tunic? What print would you make it in? Let's chat sewing ladies...I'm on my 2nd cup of coffee this morning (eek) and would love your company :)