

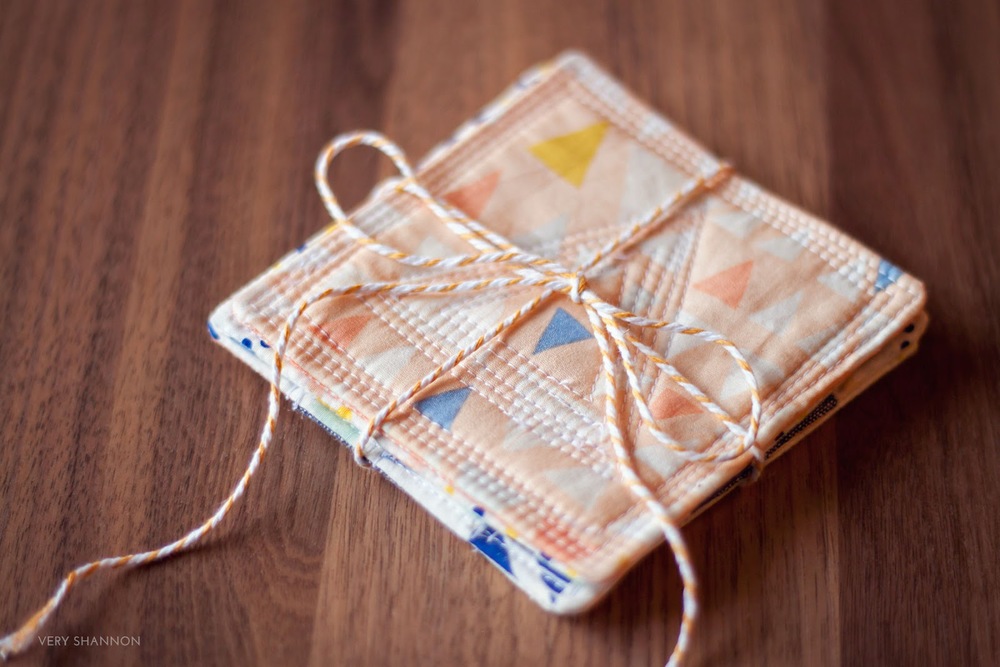
One of my favorite go-to handmade gifts are coasters. Everyone loves a pretty coaster.
I think they can brighten up a table or a room and bring a smile to your face when reaching for your drink. And when you think how many times a day we use a coaster and pick up and put down a drink that equates to a lot of smiles. The more people smile, the more the world is a happier place. Smiling is healthy and feels good. Just like sewing.

The best thing about making handmade coasters is the freedom. It’s a no pressure, no stress kind of project that is great for using scraps and bits of your favorite leftovers from your stash! You can’t go wrong with that! You can practice new techniques or perfect old ones, try out a new stitch on your machine, or go bold/simple playing with solids!
Been scared to start quilting but dying to try? This is a great way to jump in and get your toes wet! Whichever way you choose to make them it’s up to you! So whip up the coaster tutorials below as is or use them as a jumping off point to add your own flair and personality! Just remember to smile and have fun with them!


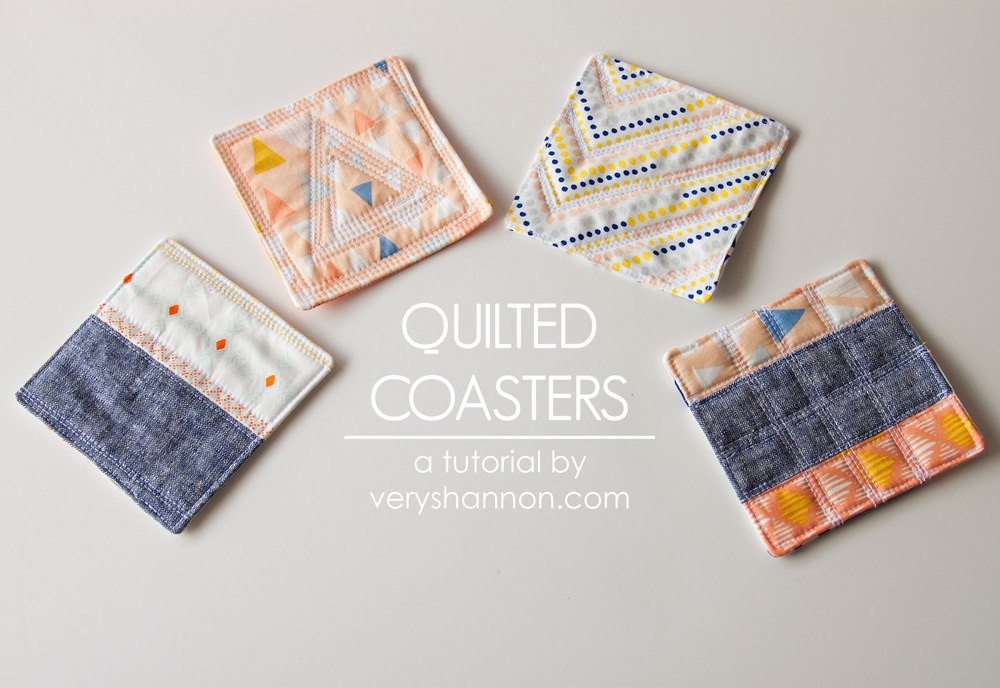
QUILTED COASTERS TUTORIAL

MATERIALS
Fabric for coasters cut to 4.5" x 4.5" or charm pack squares
- Coaster #1 & #2 requires 2 pieces at 4.5" x 4.5"
- Coaster #3 requires 1 piece at 4.5" x 4.5" and 2 pieces at 2.75" x 4.5"
- Coaster #4 requires 2 pieces at 2.5" x 4.5" and 4 pieces at 1.5" x 5"
4 pieces of batting cut into 4.5" x 4.5"
Co-ordinating thread
Rotary cutter & mat and/or scissors
Pins
Removable fabric marker
Iron
Helpful tip: You can measure out your squares as you cut or you can also cut out a cardboard template that is 4.5" x 4.5" to use when cutting out the fabric for your coasters.

COASTER #1 & #2
You will need the following pieces to make two coasters:
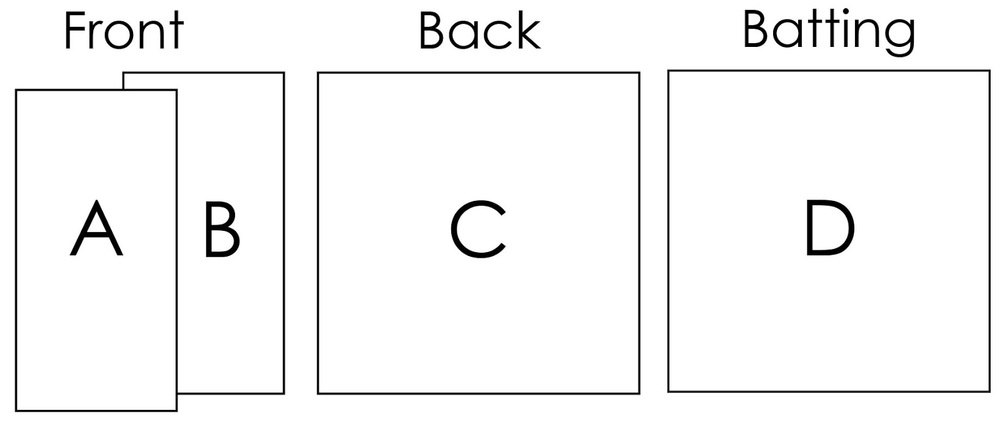
2 fronts - piece A, 2 backs - piece B, 1 batting - piece C

DIRECTIONS
Coaster #1 and #2 are made the same:
Press all fabrics before cutting.
STEP ONE /// ASSEMBLING YOUR COASTERS

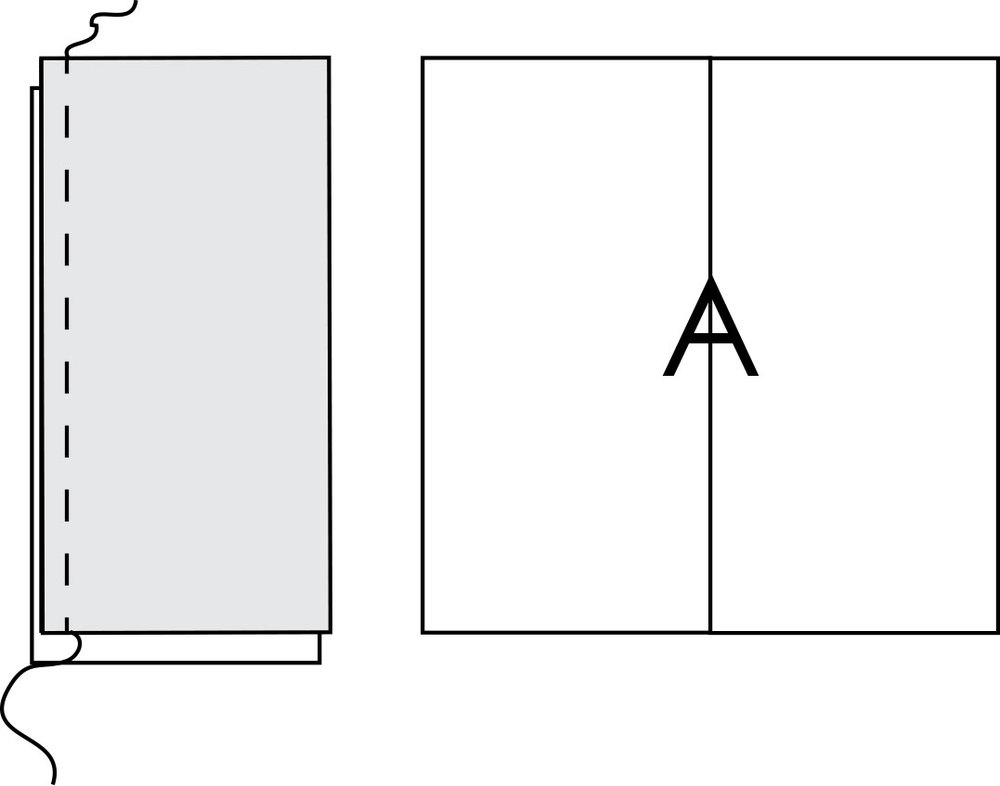
With your front (piece A) and back (piece B) right sides facing each other, lay down your batting on top. You will have a stack that is back, front and then batting. Pin your coaster along the edges. *See diagram above.
Sew along all 4 edges of your coaster with a 1/4" seam allowance making sure to leave a 2-3" opening to turn your coaster right side through.
STEP TWO /// QUILTING & FINISHING YOUR COASTERS
Trim your corners close to the sewing line but not too close to cut through your stitching. Turn coaster right side out. Make sure your corners are all nicely out and pointed. Press your coaster.
Get ready to quilt! Yay! This is where you can get creative with your coasters! Feel free to simply sew a line around the entire coaster close to the edge or make 3! Do shapes, a pattern or a design!

COASTER #1 QUILTING
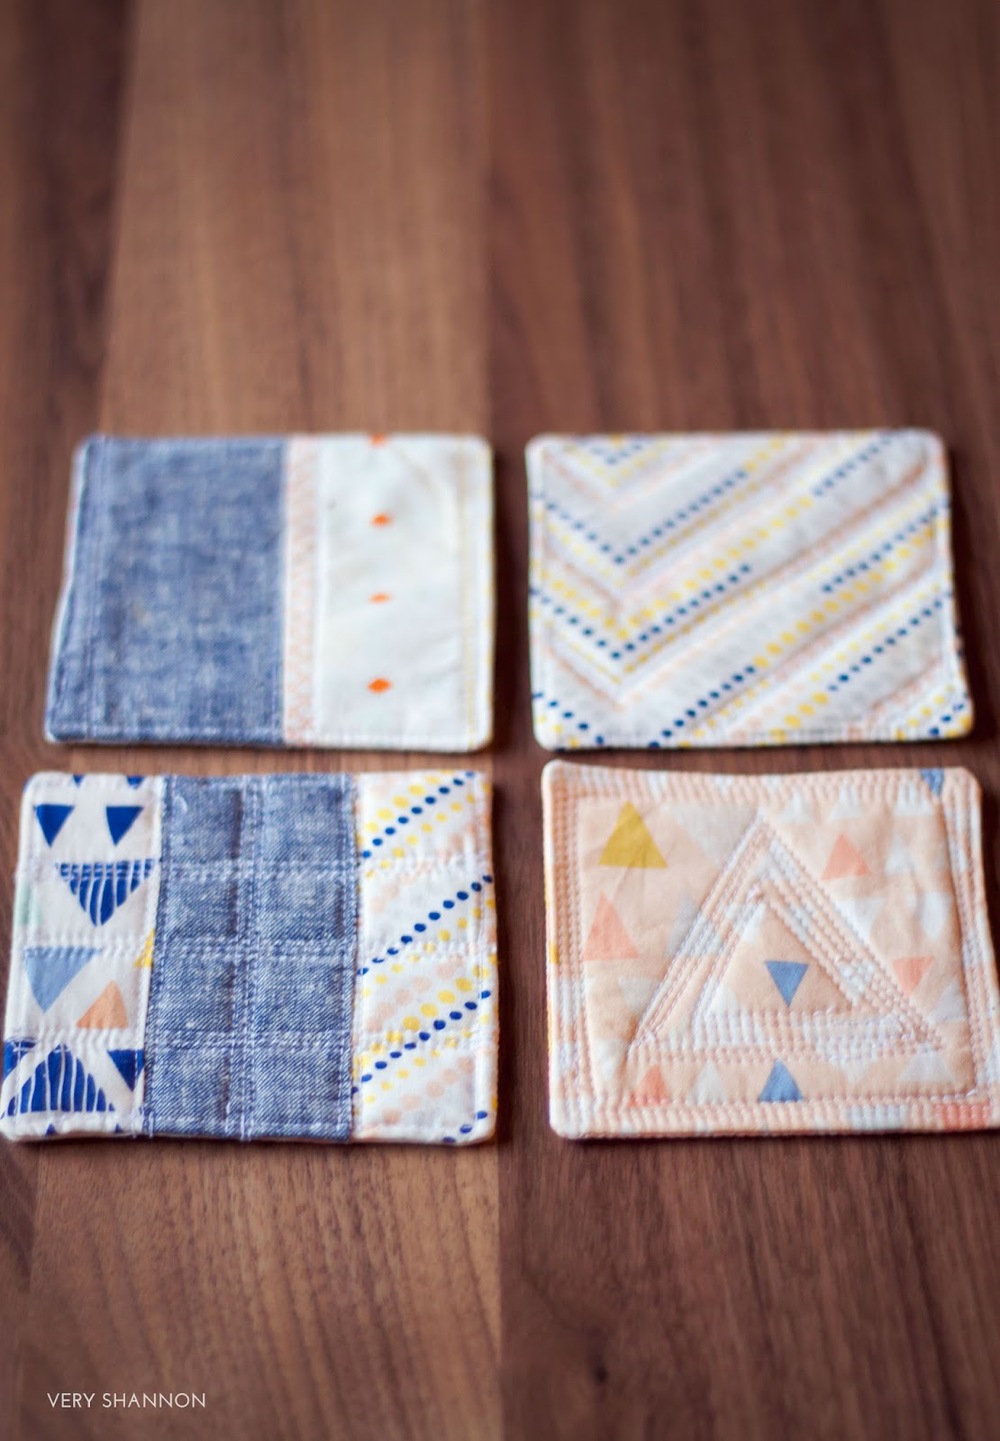
I chose to play up on the triangles of the fabric of Coaster #1. I first stitched around the border of the coaster 3 times (close to each other). I then stitched a triangle shape on the center of the coaster and then repeated this triangle inside and outside of it with my sewing machine. If you are nervous about winging the triangle, simply draw all your triangles with a removable fabric marker and stitch over your design. *See diagram above.
COASTER #2 QUILTING
On Coaster #2 I played up the chevron zig-zag repeat the pattern makes on my fabric. I first stitched a simple border around the coaster. I then followed the line of the pattern in the center of the coaster. next I stitched a line on either side of this line. I then repeated this pattern moving over 3/4" from where the last one was stitched. Repeat this design until your coaster is full. If you don't have fabric with a chevron design, simply draw one on your coaster with a removable fabric marker and sew over it - easy and fun! *See diagram above.
Press your coasters once again.
 Helpful Tip: Once you master the coasters above have some fun with scraps and shapes! You can piece together your front and backs or use different quilt block techniques too! The tutorials for Coaster #3 and #4 are a fun introduction into piecing your fabric!
 COASTER #3
You will need the following pieces of fabric:
2 pieces for front - piece A & B, 1 piece for the back - piece C, 1 piece batting - piece D
DIRECTIONS
Press all fabrics before cutting.
STEP ONE /// ASSEMBLING YOUR COASTERS
With pieces A and B right sides facing each other sew with a 1/4" seam allowance along one edge. Trim your seam allowance and press your seam towards the darker fabric.
Place piece C and your A/B right sides facing each other and sew with a 1/4" seam allowance. Trim your seam allowance and press your seam towards the darker fabric.
You can choose to topstitch along your seams here or leave unsewn.
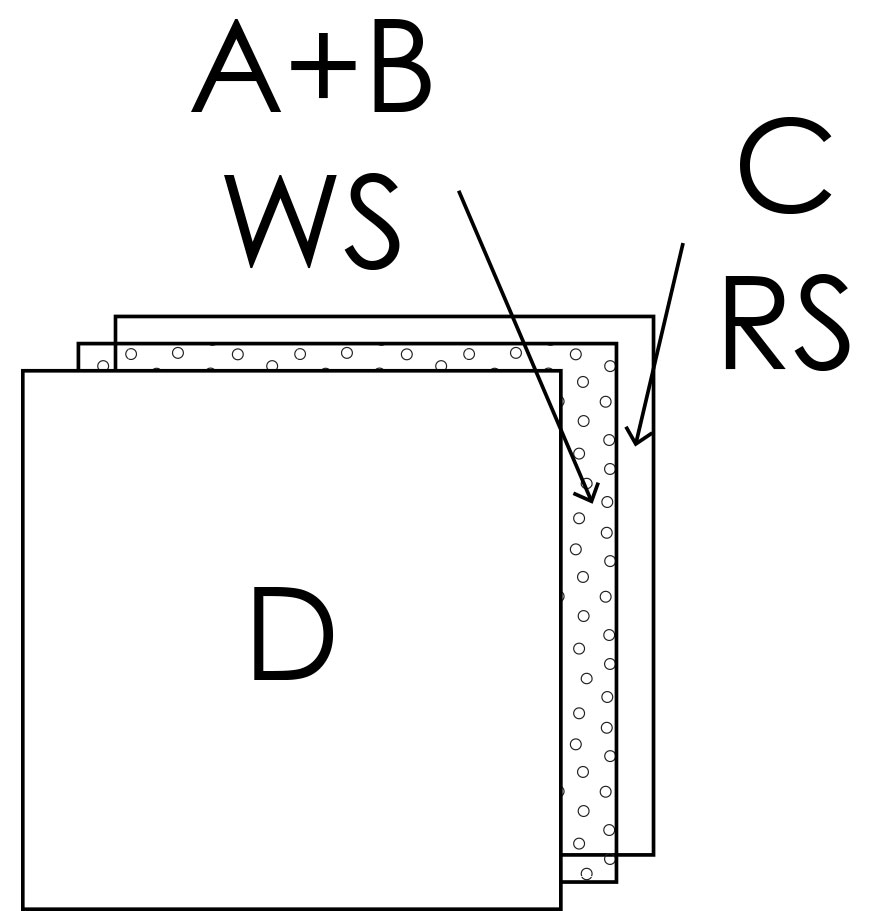
With your front and back right side facing each other, lay down your batting on top. You will have a stack that is back, front and then batting. Pin your coaster along the edges. *See diagram above.
Sew along all 4 edges of your coaster with a 1/4" seam allowance making sure to leave a 2-3" opening to turn your coaster right side through.
STEP TWO /// QUILTING AND FINISHING YOUR COASTERS
Trim your corners close to the sewing line but not too close to cut through your stitching. Turn coaster right side out. Make sure your corners are all nicely out and pointed. Press your coaster.
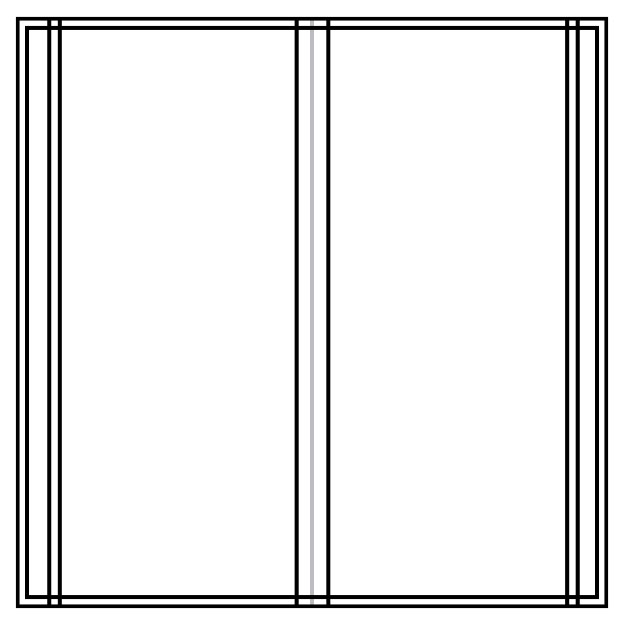
Quilt in desired pattern. I chose to do 1 simple border around the coaster close to the edge. I then did 2 lines down the center of where my front 2 pieces were sewn together. I also did a pairing of 2 lines close to the side edges of the coaster stitching border you already sewed. Simple horizontal pairings of lines to play up with the piecing are lots of fun! *See diagram above.
Press your coaster once again.
COASTER #4
You will need the following pieces of fabric:
3 pieces for front - piece A, B & C, 3 pieces for back - piece D, E & F, 1 piece batting - piece G

DIRECTIONS
Press all fabrics before cutting.
STEP ONE /// ASSEMBLING YOUR COASTERS
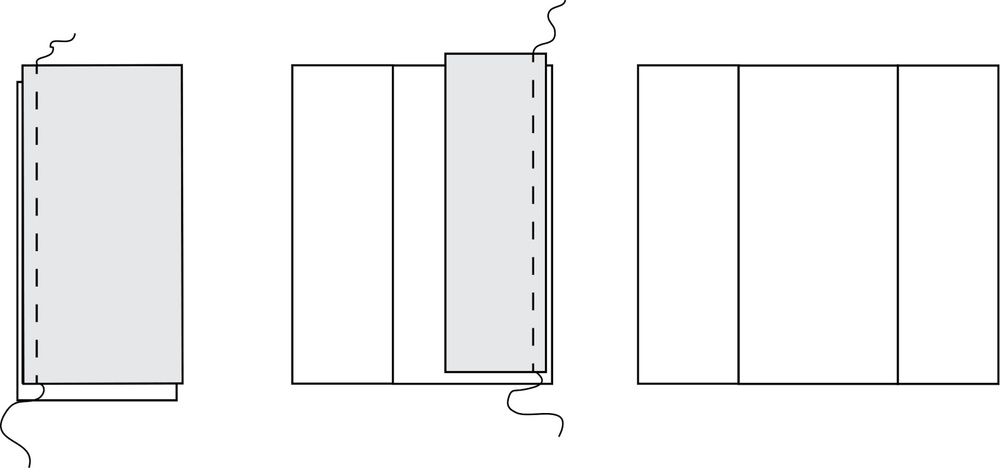
Repeat the steps above, this time using pieces D, E & F. Again, trim your seam allowance and press your seams towards the darker fabric.

With your front and backs right sides facing each other, lay down your batting on top. You will have a stack that is back, front and then batting. Pin your coaster along the edges. *See diagram above.
Sew along all 4 edges of your coaster with a 1/4" seam allowance making sure to leave a 2-3" opening to turn your coaster right side through.
STEP TWO /// QUILTING AND FINISHING YOUR COASTERS
Trim your corners close to the sewing line but not too close to cut through your stitching. Turn coaster right side out. Make sure your corners are all nicely out and pointed. Press your coaster.

Quilt in desired pattern. I quilted mine to play up on the 3 pieces we stitched together and replicated a grid pattern. I did a simple border around the whole square and then topstitched close to my 2 seam lines for the front and back on both sides of the center piece of the coaster. I then did 3 sets comprised of 3 stitch lines (close together) going horizontally down the coaster as well to form a grid like design. Press your coaster again. *See diagram above.
Helpful Tip: Once you are done all your coasters, bundle them up all pretty and give them as a lovely gift or treat yourself! These coasters make a great starter project to ease into quilting and practice your sewing skills!


I hope you enjoy the coasters!!! There are so many options and fun prints to play with out there! I'd love to see the coasters you make too! Use hashtag #QCoaster on social media so we can see your lovelies!
Happy sewing from my home to yours!!
Looking for more fun projects? You can find all of our other tutorials HERE and patterns HERE.