Throughout our annual knit alongs I like to bring in special guests to write helpful posts with lots of tips and techniques to help you all grow and expand your knitting skills. For this year's Summer Sweater Knit Along my dear friend, and designer/author Andrea Rangel is here to share her knowledge today and teach you all a bit about swatching in the round and doing it with colorwork as well! Andrea is a wonderful and patient teacher and has a great way of explaining techniques so I knew she'd be the perfect fit for this subject! She's my go to for things I'm stuck on all the time and is one of the most knowledgable knitters I know. Add on that her newest book "AlterKnit Stitch Dictionary" (watch for a full review here as well as a giveaway soon) is filled with swatches that are knit in the round (and feature colorwork) that she knit all herself I'd consider her extremely experienced...lol. I hope you all enjoy this post and learn something new today and a huge thank you to Andrea for lending her knowledge here today.
Let's here from Andrea....
SWATCHING IN THE ROUND - COLOR WORK
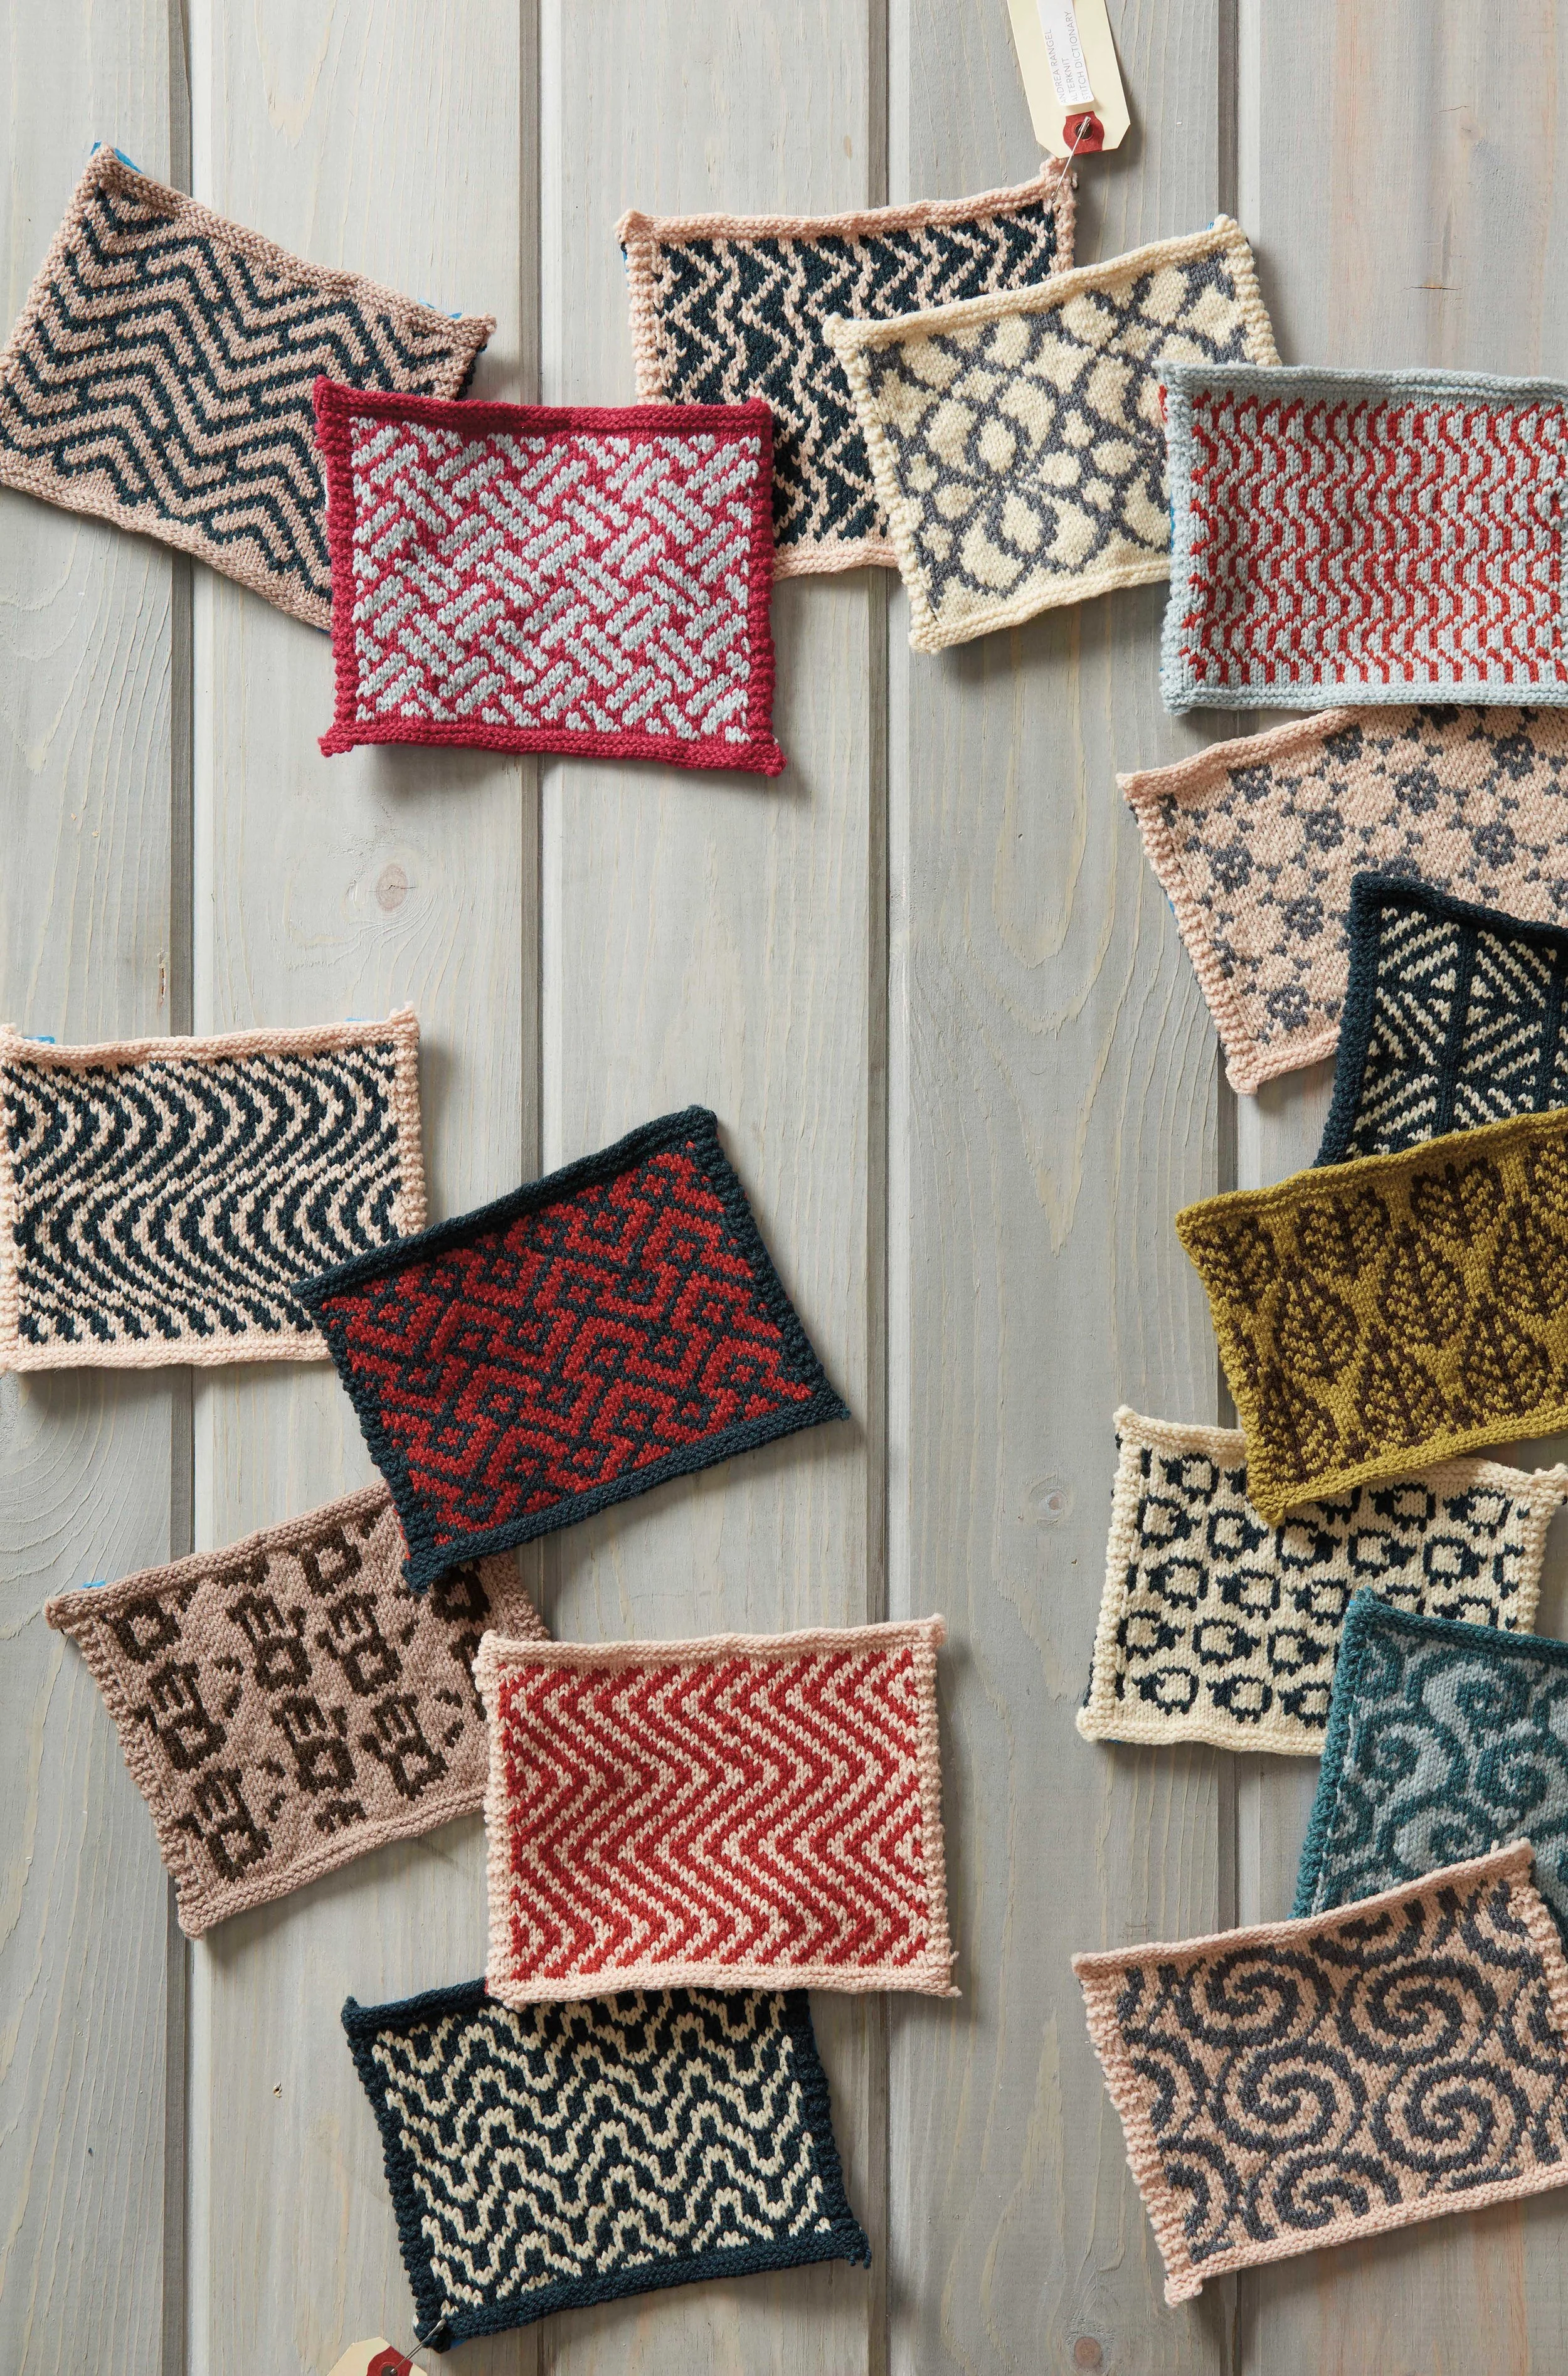
When I was creating my new book, "AlterKnit Stitch Dictionary", I made a lot of swatches (probably around 250, though only 200 of them ended up in the book. Yes, I did all the knitting for the book myself!) I’ve had a lot of practice swatching, and I know how important it is, so I want to pass on some swatching knowledge to you all.

If you want to get accurate information from your swatch, it’s important that you work it in the same way your finished project with be worked - if it’s worked in the round, swatch in the round; if it’s worked flat, swatch flat.
A flat swatch (worked back and forth in rows) poses the challenge that you need to work colorwork on the WS. That’s tricky because it’s hard to see the pattern on the WS, and because it can be annoying to work colorwork while purling. It’s definitely do-able, though, and you can even catch floats on the WS of your work if your floats are long enough to make that necessary (check out this tutorial for videos on catching floats both on RS and WS rows). You can work a flat colorwork swatch in the same way as you do any swatch - just be sure you’re reading RS rows right to left and WS rows left to right on your chart.
Most of the time, though, stranded colorwork is worked in the round, so here are a couple of methods for swatching in the round:
Leave Long Strands at the Back of Your Swatch
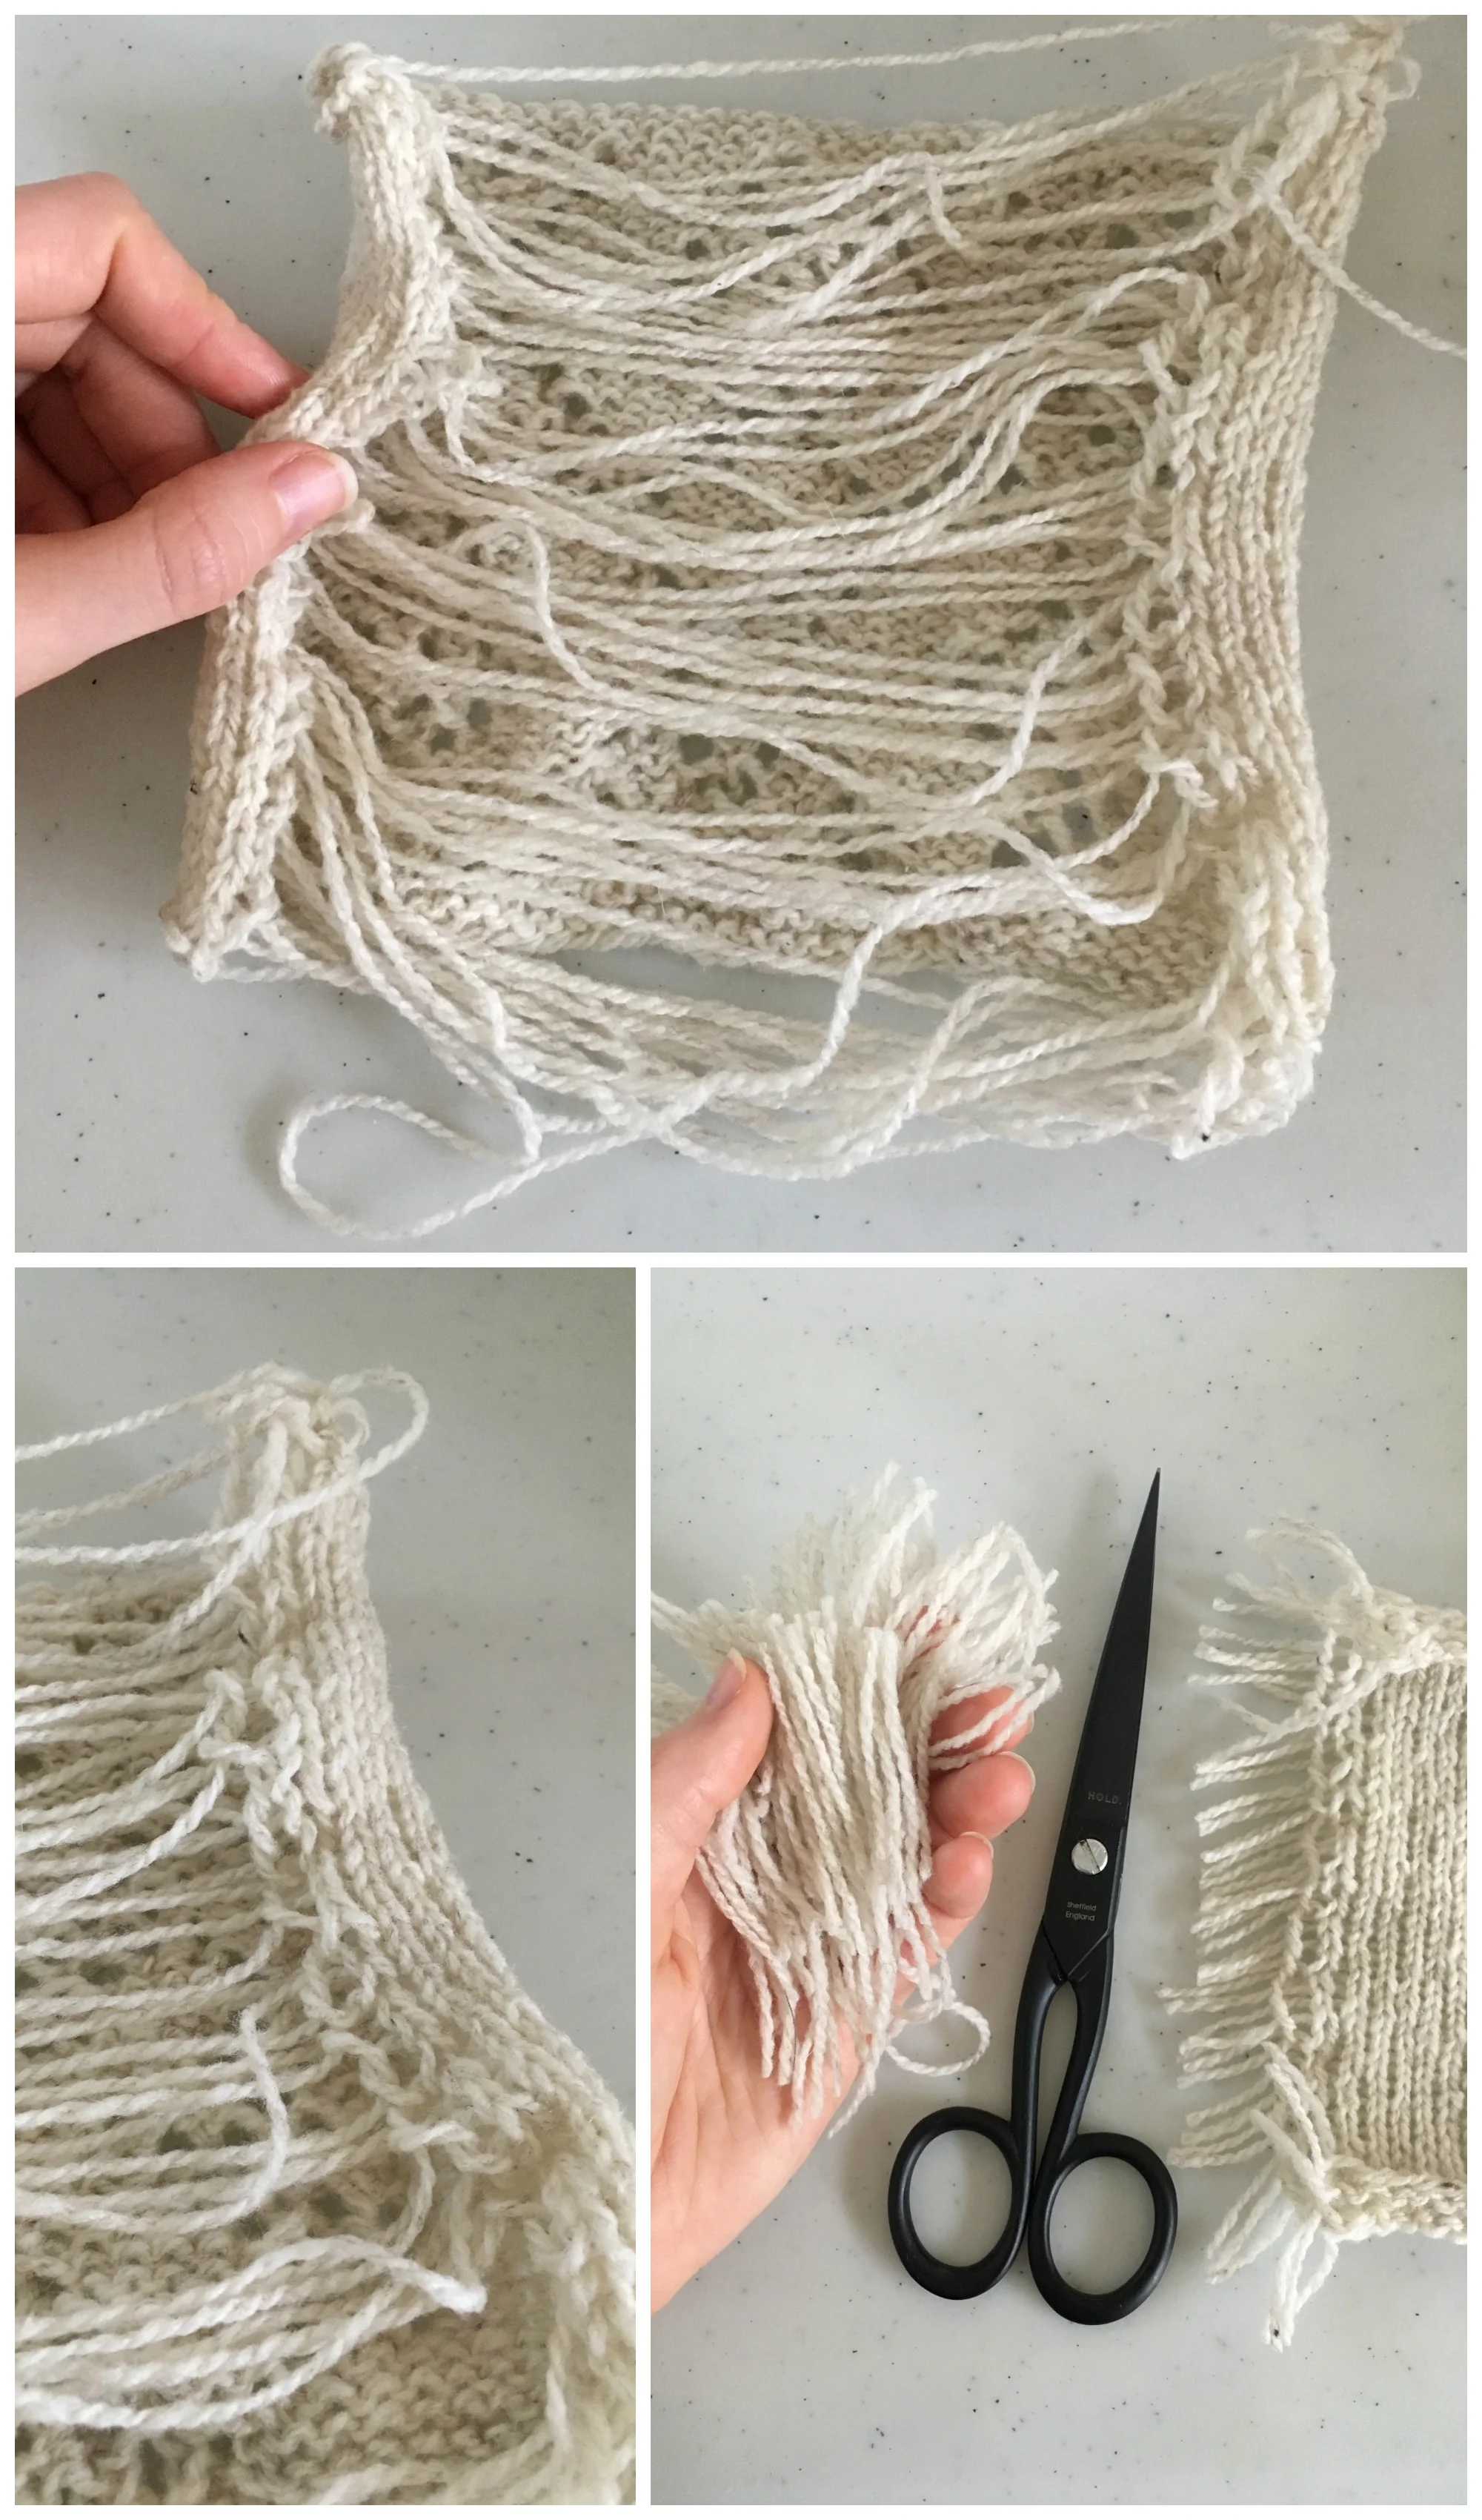
Use a circular needle and CO about 6" (15 cm) worth of stitches on the needle you hope to use for your project. Work a few rows in single-color stockinette or garter stitch to get things estab- lished (working back and forth in rows). Then knit your first color pattern row. Instead of turning your work to the wrong side to purl, slide the stitches back to the other end of the needle so that they’re positioned to begin working another RS row. Leaving strands of both color yarns loose across the back (the length of these strands should be about the width of the swatch), work Row 2 of your pattern, again on the right side. Repeat this until you’ve got about a 6" (15 cm) square of fabric. Then work a few rows in single-color stockinette or garter and bind off. You can then cut through the middle of the long strands and trim them, leaving the strands about 1" (2.5 cm) long so that the swatch lies flat, or, if you want to re-use your yarn, you can just leave the strands uncut. (If you don’t want to cut your strands, be extra careful that they’re long enough that they don’t draw your swatch in.) This method is great because it can give you a fairly accurate gauge measurement without you needing to knit an enormous swatch. The disadvantages are that the edge stitches can be very loose and that can be awkward as you work. It also means you need to make a swatch big enough that those wonky edge stitches won’t interfere with the center of the swatch, where you’ll measure your gauge.
Work Your Swatch Like a Sock, but with a Steek

With double-pointed needles, a long circular needle for magic loop, or two circular needles, cast on about 6" (15 cm) worth of stitches, then add 3–5 extra (steek) stitches at the end of your round. Place a marker and join for working in the round. Work a few rounds of single-color stockinette or garter, then work Round 1 of your color pattern, ending the round with your steek stitches—knit them by alternating colors every stitch. Then continue in this manner until you’ve worked about 6" (15 cm). Work a few more rounds of single-color stockinette or garter and bind off. You may wish to change the position of the needles every few rounds to avoid laddering at the separation points. After binding off, cut through the center of your center steek stitch, then block. If you want some practice reinforcing the steek, this is a great place to do it (see the next section for more info on steeks.) If you’ve got that down, though, there’s really no need to reinforce, since it’s just a swatch and won’t be worn. I don’t actually bother with steek stitches any more, and always just cut my swatches! I prefer swatching this way because I find it more natural and less cumbersome than leaving long strands along the back. However, some knitters actually work more tightly on small circumferences than on large ones because you have to fuss with multiple needles, and that finickiness can cause gauge to tighten up. You’ll have to experiment to find out your own knitting style and whether this method is reliable for you.
Whichever method you choose, be sure to wet-block your swatch before evaluating it. (I cut before blocking, but if your yarn is slippery, like cotton or silk, you may want to give yourself some extra edge stitches since you may get more unraveling than you would with a sticky wool. You can also just avoid cutting altogether by measuring your swatch as a tube or with the long strands along the back un-cut.) Pinning your swatch about every half inch will help it to dry flat without scalloping edges. (If your edges aren’t straight, use more pins!) I also recommend measuring at several different spots on your swatch to get an accurate measurement.
And finally, my top swatching tip is: Record your needle size right away - maybe this is in a notebook or on the yarn label, or maybe mark the swatch itself by creating yo/k2tog's to indicate the size or tying knots in the tail. Just don't leave this step out and assume you'll remember. You will not remember.
There’s lots more info like this in AlterKnit Stitch Dictionary [https://www.andrearangel.com/books/] to help you make use of the 200 new colorwork motifs and five new projects. I hope you all take up the challenge and make the motifs and projects your own! If you’re posting on social media about your projects, use #alterknitstitchdictionary so we can all follow along, and if you’ve reviewed the book, let me know so I can add it to the list on my website. Curious what people have said about the book so far? Here’s a link to that list [https://www.andrearangel.com/alterknit-reviews].
Happy knitting!
P.S. If you want to learn more about colorwork, I’ll be teaching a workshops on the topic this fall! Join me at Knit City in Vancouver on Friday, September 29, 2017, and at Vogue Knitting Live, in Bellevue, WA on Sunday, November 5, 2017. I’ll also be offering a class on Knitting with Charts at Knit Fit in downtown Seattle on Saturday, November 11, 2017. Here’s a link to info about all my upcoming workshops - https://www.andrearangel.com/events/.

ABOUT ANDREA RANGEL
You can find me on the web at andrearangel.com, on Instagram as @andrearangelknits, and on Ravelry. Sign up for my email newsletter at https://www.andrearangel.com/newsletter/ (and get a free hat pattern!), and learn more about AlterKnit Stitch Dictionary at https://www.andrearangel.com/books/.
This post is proudly sponsored by Brooklyn Tweed.
