beginner quilting

FREE PATTERN || EMBRACE BABY QUILT: BEGINNER QUILTING SERIES

Free Embrace Baby Quilt Pattern on luvinthemommyhood.com

it's time for another beginners quilting pattern!!! the embrace baby quilt pattern is here!!!! 

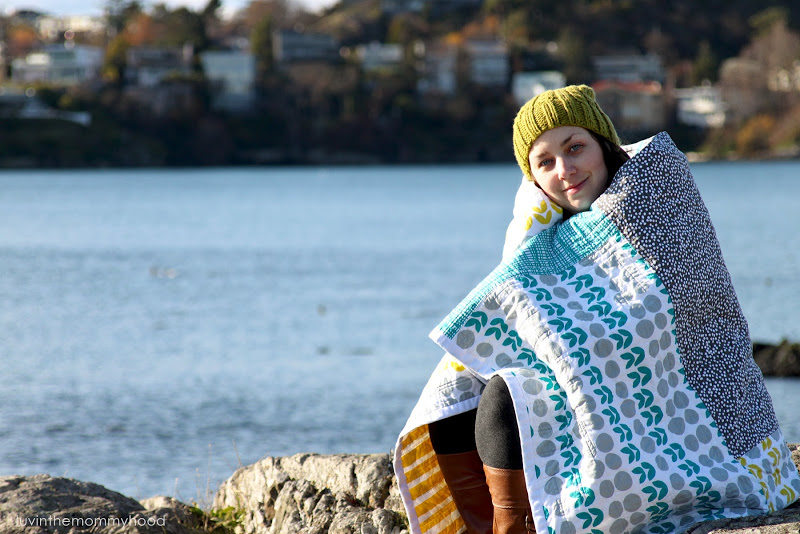
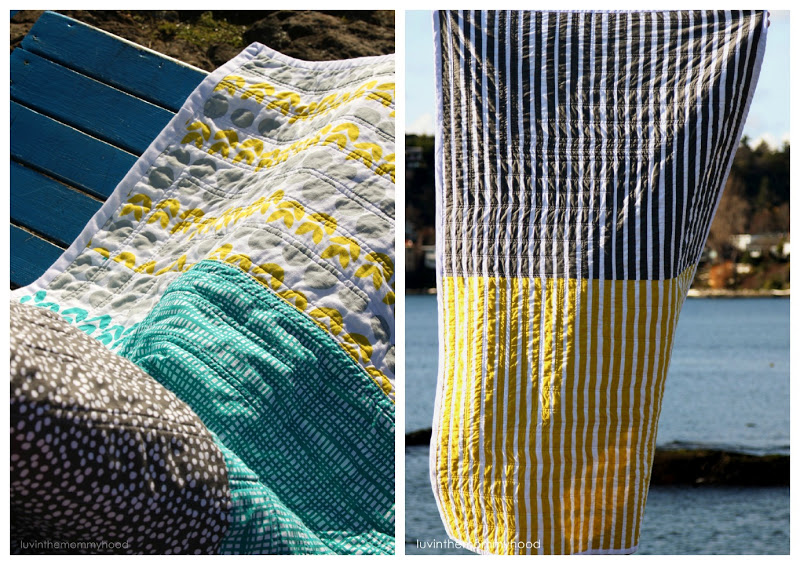
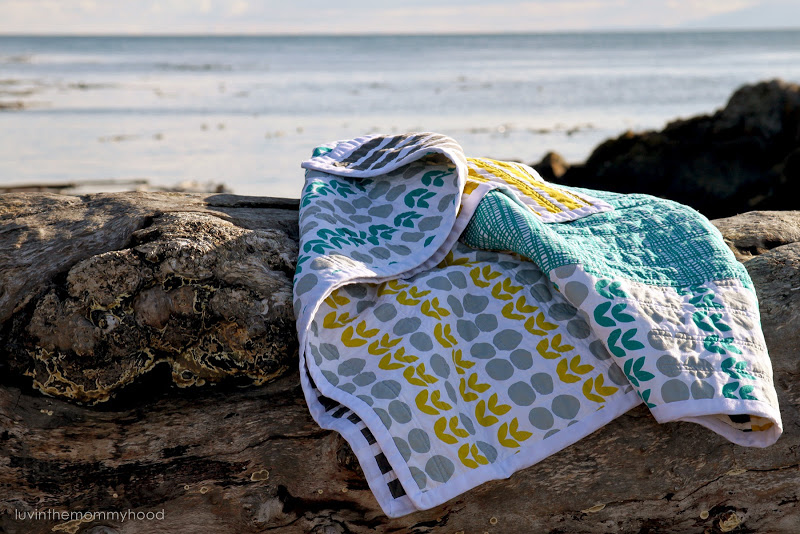
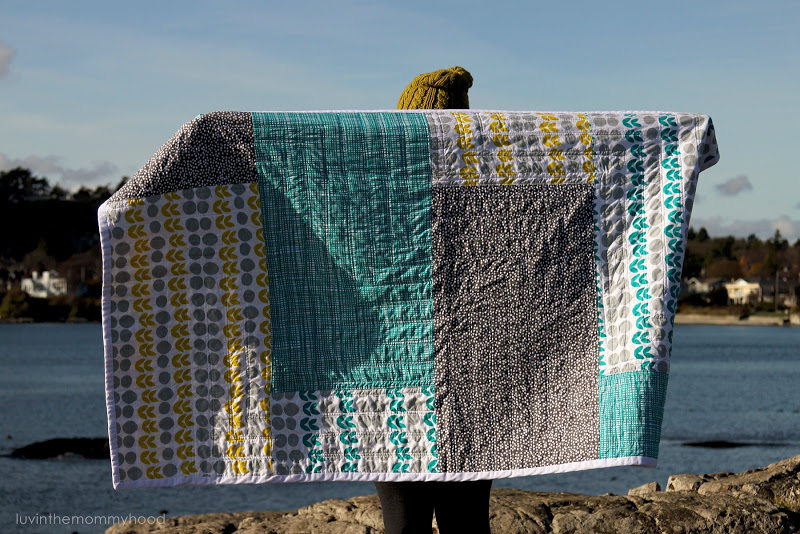
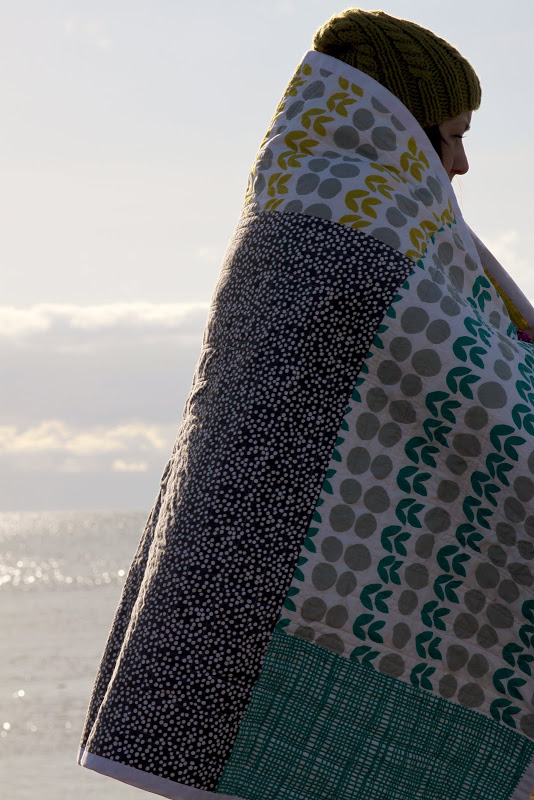
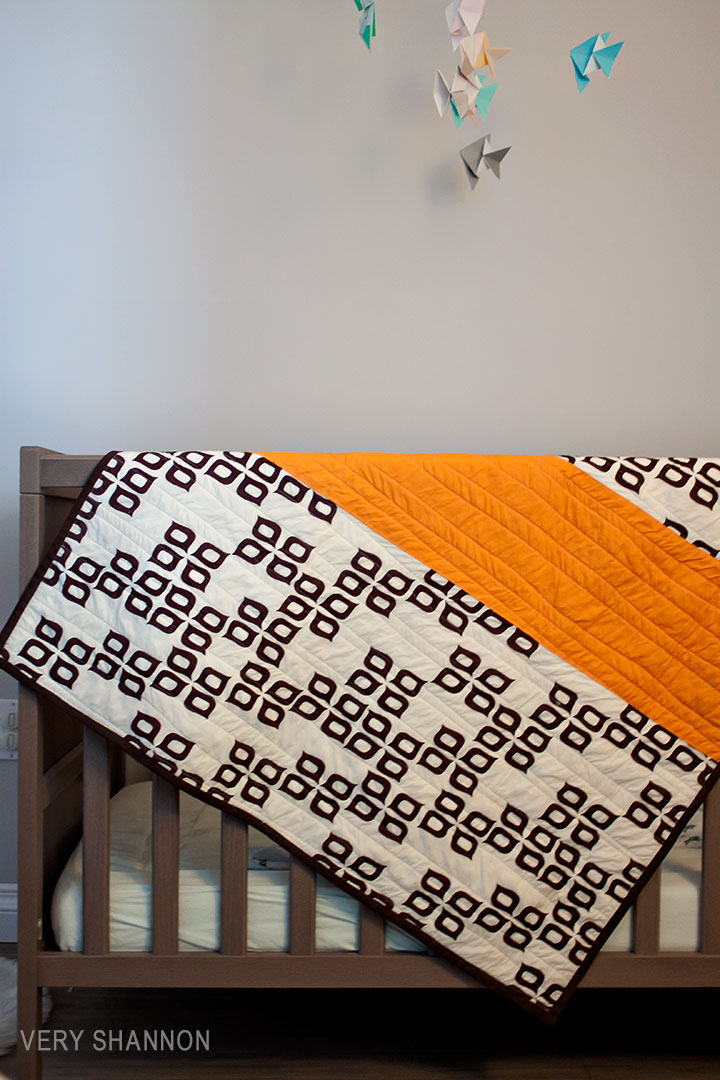
i whipped up this bad boy in a few hours for the lovely tanis of tanis fiber arts for her new baby boy a few months ago. it literally has taken me from then to get pics and to hand sew my binding on...lol. oh my...how's that for a "better late than never" gift right? i loved making this quilt and it was a lot of fun to whip together. the whole idea is to "embrace" your stash. embrace those leftover chunks that don't really fit for anything else. turn them into a new quilt or play mat for that special wee one in your life!

Free Embrace Baby Quilt Pattern on luvinthemommyhood.com

the embrace quilt is fast, fun and easy to make. it's a great introduction into quilting and and also whole cloth quilting.  i also got to go all willy nilly on my quilting which was extra fun!!! if you're looking for another great beginner's quilt pattern you can find my free Bella Collage Quilt Pattern here.

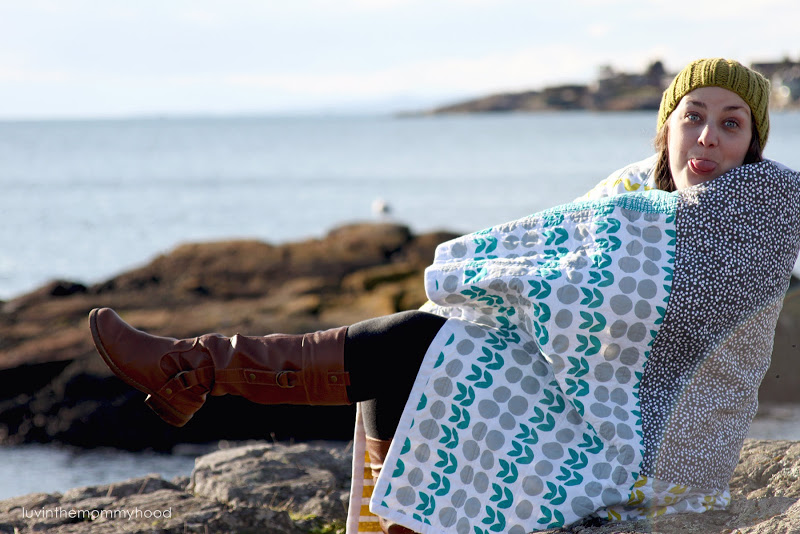
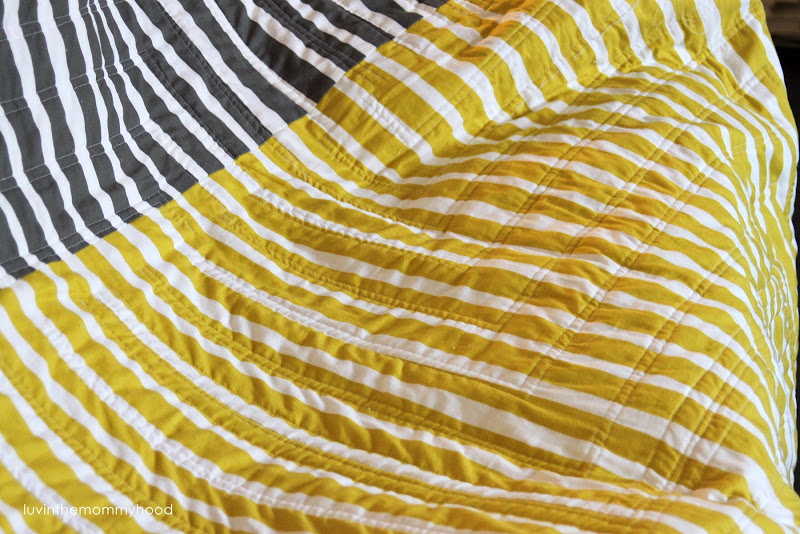
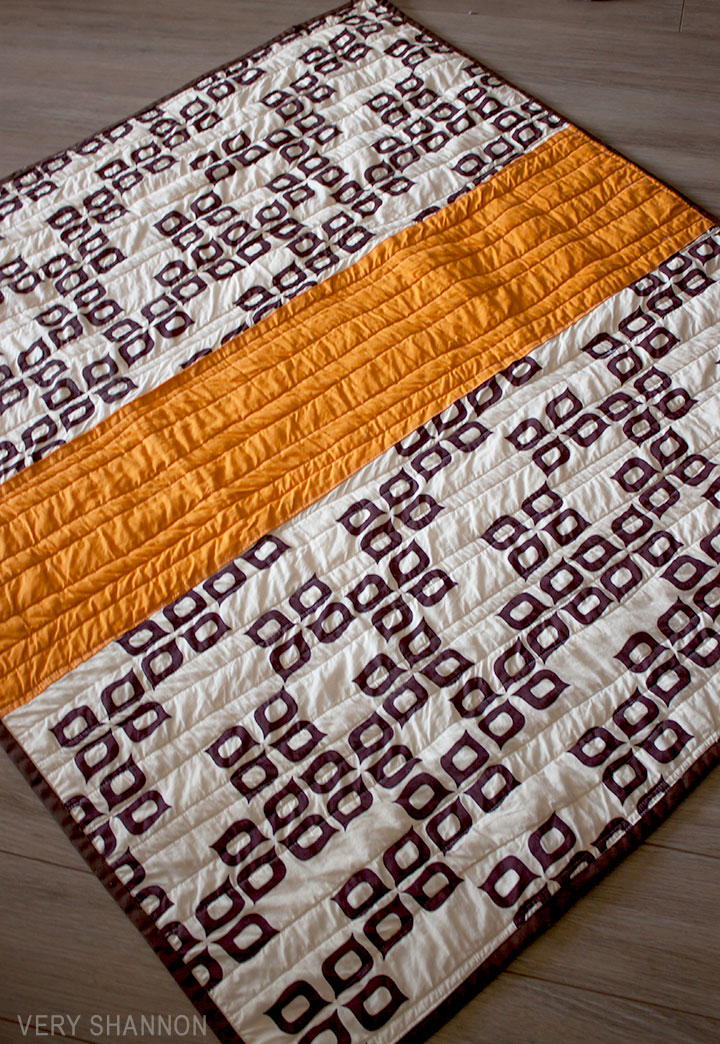
those lines aren't straight and they aren't supposed to be and i. loved. every. minute. of. it. 

Free Embrace Baby Quilt Pattern on luvinthemommyhood.com

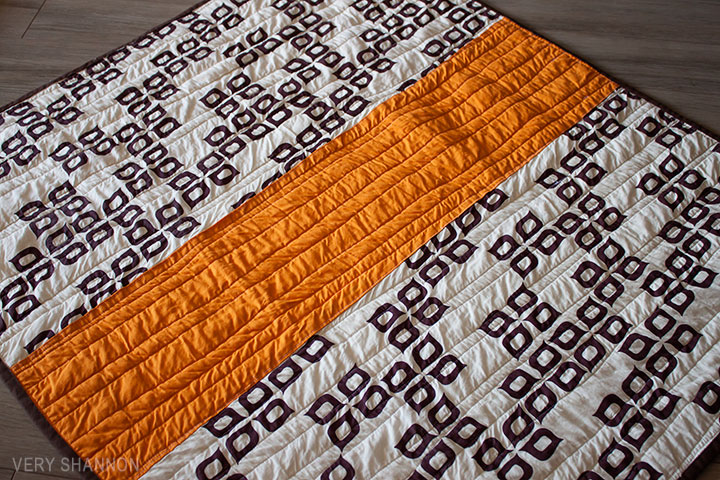
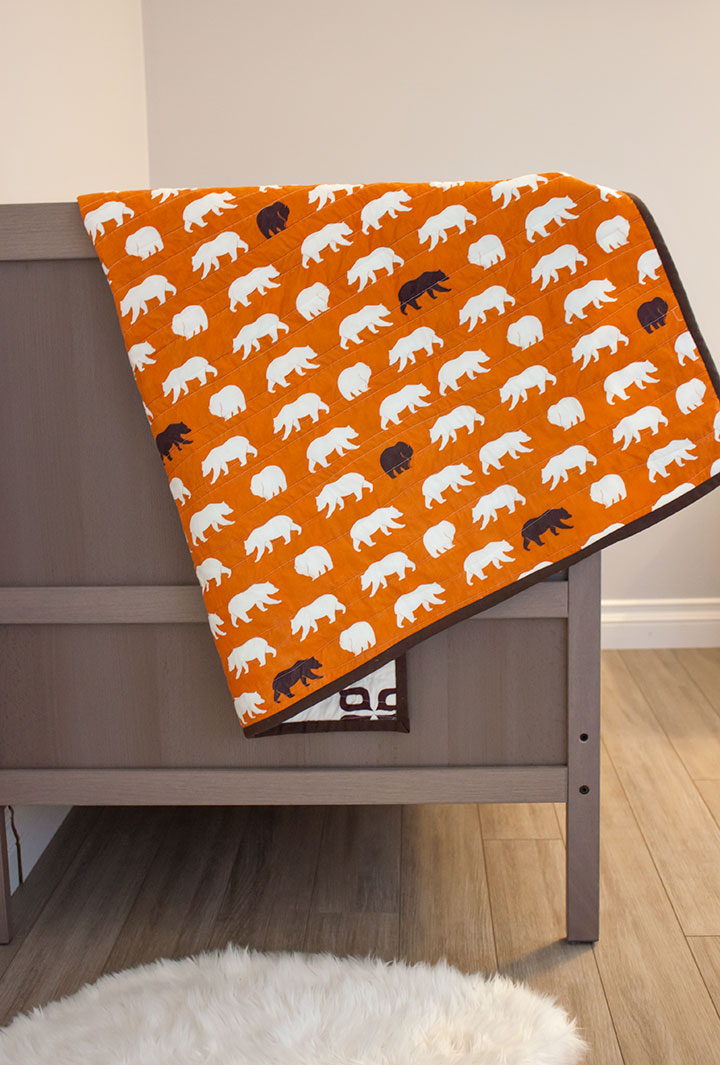
so don't worry about being a perfectionist this time round. casual disarray can be fun! let go of the straight lines and get a bit wonky. let your creative side take over. you could easily quilt this in any pattern you'd like. free motion, straight lines, curved whatever floats your boat with the fabric you're using. i really liked the idea of playing with the lines and the idea of mountains and bears. so some of my lines are straight (like the horizon) and the others are curved and rounded (like the forest hills/mountain slopes). i dig it and hope tanis does too.

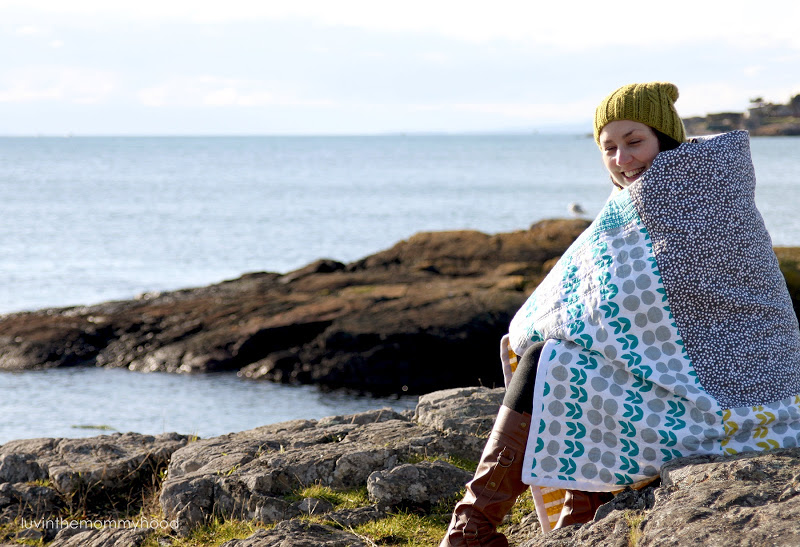
keep reading for some more pics of this cozy quilt and the FREE pattern!


Free Embrace Baby Quilt Pattern on luvinthemommyhood.com
embrace your fabric leftovers...embrace the freedom to go wild with your quilting, and embrace that cute little baby when you're all done!

EMBRACE BABY QUILT PATTERN
*Copyright 2013. All rights reserved luvinthemommyhood.com. For personal use only. 

SUPPLIES
 You will need various pieces of fabric to make your desired quilt size. I used the following:
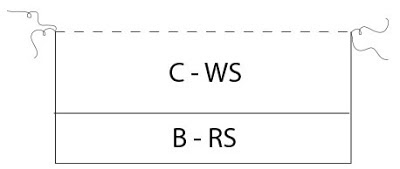
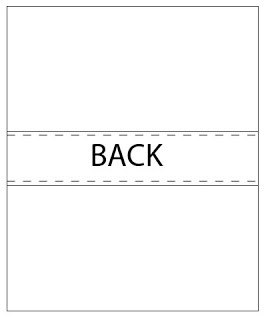
- 1 piece of fabric 38"W x 42.25"H (this is your quilt top), this will be known as "A"
- 2 strips of fabric 38"W x 17"H (this is for your quilt backing), this will be known as "B"
- 1 strip of fabric 38"W x 9.5"H (this is for your quilt backing), this will be known as "C"

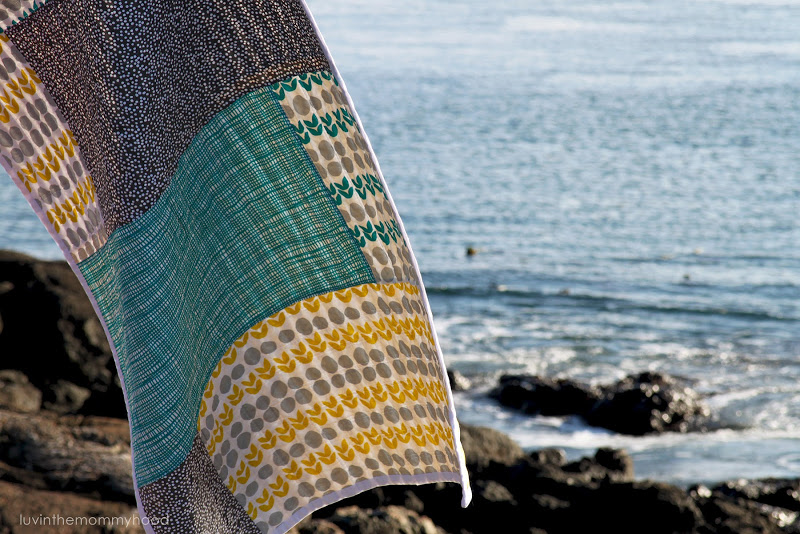
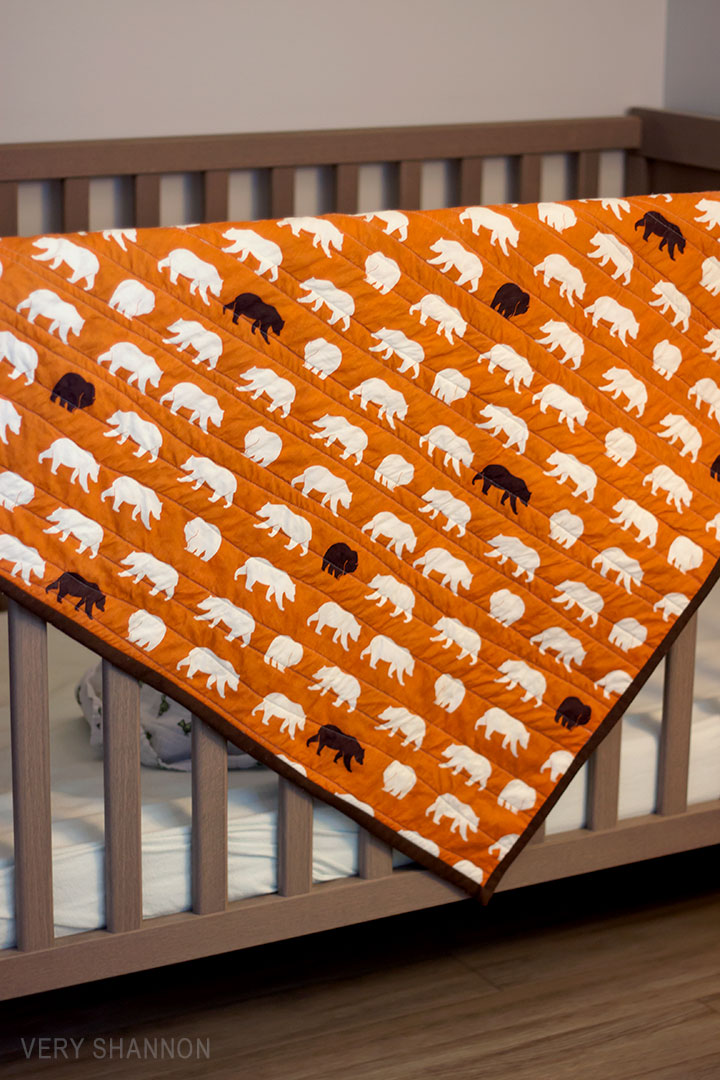
Fabrics Used: I've used Bear Hike Orange and Las Flores Mahogany from Camp Modern by Jay-Cyn for Birch Organic Fabrics, and an orange solid from my stash.

You will also need batting cut to about 3-4" bigger than your overall quilt size once sewn. My batting was 41"W x 45"H. I like to use cotton batting.

- quilting needle for your sewing machine
- basting pins (if desired)
- co-ordinating double fold bias tape to fit finished size of your quilt
- scissors
- coordinating thread
- hand quilting needle (if desired)

INSTRUCTIONS

STEP ONE: SEWING YOUR QUILT  BACKING

With right sides facing each other, sew one of your "B" pieces to the long side of your "C" piece. Press your seams toward the darker color. Repeat this step for your other "B" piece this time stitching it to the other long side of your "C" piece. This forms your quilt backing. *See diagram below.
Next your are going to do a wee bit of topstitching because you all know how much I love to topstitch..lol.  Topstitch along the the two center seams of your quilt backing close to the seam line. Press. *See diagram above.

STEP TWO: ASSEMBLING YOUR QUILT

We're now going to make your quilt sandwich so we can have some fun with quilting! Yay! You can find a great tutorial on one way to make a quilt sandwich here. Make your quilt sandwich as desired. This is a personal preference. I like to baste my quilt layers together using quilting pins. Feel free to make your quilt sandwich however you find is the most successful for you. There are many methods for doing this.

STEP THREE: QUILTING YOUR QUILT

Now it's time for the fun part - quilting your quilt! I recommend using a quilting needle for your machine. It works better. I also have a walking foot on my Pfaff Ambition 1.0 and loooove it! This really helps make machine quilting a breeze.

When quilting I always start at the center and quilt my way outwards but you can feel free to use whatever method works best for you. I simply did random lines alternating between some sort of straight to some more curved like a gentle slop per se. No precision here this time! Whatever you do - have fun with it!

STEP FOUR: BINDING YOUR QUILT

It's time to finish that quilt up and get our binding sewn on. You can choose to either make your own bias tape or you can use pre-made bias. I used pre-made. Here is a link to a "How to Sew Binding Roundup" I did all on how to sew binding. Lots of great tips and links here. Remember to trim your excess batting off and make sure your quilt edges are nice and even before sewing on your binding. My fave method is to machine sew down the first side of my bias and then hand sew the rest. It's very relaxing to curl up with your fave show on the couch with some tea, your lovely quilt and your sewing needle. It's soothing and very methodical.

STEP FIVE: WASH IT UP

This part is almost my favorite step of quilting. I love, love, love putting them in the wash.  Once they come out of the dryer it's like magic! The change is so fun and it's just the best feeling when it comes out all crinkly and soft with your stitches looking all purdy! If you're new to quilting you'll know what I mean once you do it. It's fun!

Free Embrace Baby Quilt Pattern on luvinthemommyhood.com

Guess what? You're done! You did it!!! Whether it's your first quilt or you're a seasoned pro I hope you had fun embracing some of your stash! This quilt is economically friendly as well! I even used up leftover batting too! Wouldn't this look great along with our free Simpatico Pillow Tutorial? Adorable!

Free Embrace Baby Quilt Pattern on luvinthemommyhood.com

Now I get to send this quilt off with love to a cute little boy to chew on, roll on, play on, burp up on and just generally cuddle with. Does my heart good :)

For more of our Beginner Quilting Patterns see our Free Bella Collage Quilt Pattern.

What fabrics would you use to make your Embrace Quilt from? Do you have a favorite way to quilt up your larger stash pieces? Don't forget to add your pics to our flickr group if you sew up an Embrace Baby Quilt! I'd love to see them!

p.s. a big thanks to my baby sister and nephew for letting me take over her gorgeous nursery to do my photo shoot.

Bella Collage Quilt Tutorial!!


i'm so excited to tell you all that we finally had some gorgeous weather here and i got the "bella collage quilt" photographed!! yay!!!! i heart this quilt.  it was such a fun one to whip up.  it's all about the fabrics on this one. i'm a huge fan of lotta jansdotter's work and fell head over heels for her new line bella.  i wanted something that was a great beginner quilt for all you fellow newbies but also something that let you have some wild fun with quilting if you were more experienced.  you know me...i'm all about a bit of wild fun :P


one of my main goals for designing the bella collage quilt was to enable the sewer to use 6 yards of fabric fully with minimal cutting.  i'm always looking for a way to use full yardage (i gotta thing for it) and i'll admit it...i suck at cutting.  so if i can't get a pre-cut bundle i tend to lean towards yardage and fun quilting to add some flair.  the finished size of this quilt is perfect for one adult. i'm all for that. i believe in selfish sewing these days and heck if my toes are warm and i'm all cozy and snuggled i'm happy.  when the hubs is out and i need a warm me up i go straight to bella now.  she keeps me nice and toasty.

i had the most fun with the layout of the quilting pattern for bella.  from far away she looks unquilted but if you look close - bam....tetris baby!  i wanted to highlight the outline of the blocks in the quilt front but also play up the 2 pieces on the back by splitting the pattern in half so to speak.  it enables a new quilter to jump in and make something that looks complicated but is fairly straightforward.  all straight lines (no curves). if you can sew straight lines you can make the bella collage quilt.


being a blogger i make collages a lot...and i mean a lot.  so the idea came to me when i was trying to figure out how to preserve as much of my yardage as possible to just make a collage.  i lurve it and it is going to be well loved by this momma in our little apartment.  i've been snuggling up with it non stop since i finished hand sewing the binding on and it really brightens up my sofa (which is definitely not as nice, or clean, as my friends whose is pictured above).

the bella collage quilt tutorial features:

: : 4 page full color pdf pattern complete with clear & easy to understand step by step instructions with bright photos and digitally drafted diagrams

: : instructions for a finished quilt including the tetris style quilting pattern.

: : fabric requirements, notions needed

: : a fun quilting/sewing experience :)

the bella collage quilt tutorial is available as a FREE DOWNLOAD here:


we had a blast photographing the bella collage quilt.  this is one of my fave places in victoria.  a beautiful lookout bluff that has 3 bright colored anorak chairs perched atop it.  when you sit there you feel as if you're floating in the air above the ocean.  it's one of my fave places to go and just breathe.  it reminds me how amazing this place is and how to not sweat the small stuff.  i can tell you that i needed it that day.  it ain't easy photographing quilts peeps. i freely admit i stressed with this one.  i wanted some shots that i could look back at and enjoy that weren't just for tutorial purposes.  something to document that moment and our little family.  i'm thankful the hubs & even the kidlets helped me out!  i adore the pics and i get relaxed and calm just looking at them.  i think one of these bad boys is going in a frame cause i need all the help i can get these days to just remember "to breathe".

so come, grab your fave quilt and a thermos of coffee and join me on the bluff...let's chat...and dream away an hour or two atop the ocean......
i hope you all enjoy this quick and easy quilt as much as i did. sometimes it feels good to whip something up that makes you feel fabulous that you adore that doesn't take months and months to make.  it was refreshing to just let my mind go and have some fun and just make what i felt like making and not worrying about how tricky or "new" it was.  i just enjoyed the whole process and i hope you will too.  so if you've been scared to try quilting now's the time to jump in.  i promise i'll hold your hand if you need it and i'll be here cheering you on!  you can do it...i know you can!


happy sewing from my home to yours!  xoxoxo  oh, and if you make one please upload some pics to our flickr group so we can all see your lovely quilts!  i can't wait!

what do you think? do you think you'll make one? what fabric line are you crushing on that you would use? i can't wait to hear your thoughts!