mommyhood guests

SUMMER SWEATER KNIT ALONG || HOW TO BLOCK YOUR KNITTING WITH GUEST JANE RICHMOND

blocking your knitting with guest jane richmond #sskal

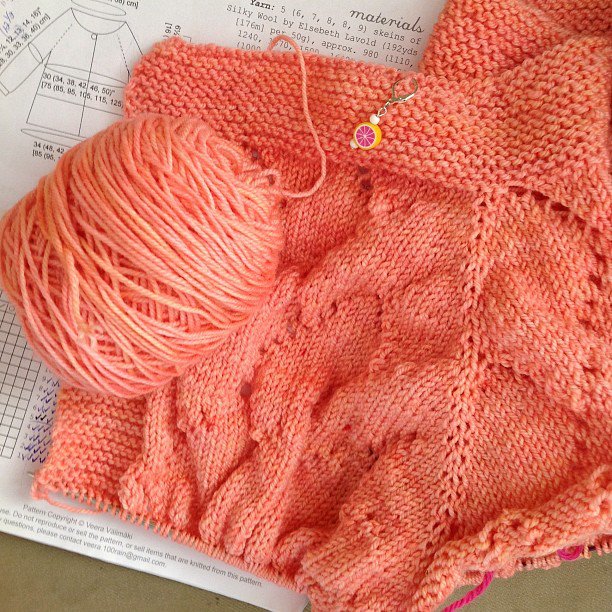
some of you are coming up on the home stretch of your summer sweater knit along projects and one question we hear a lot about in our ravelry group during this time is blocking. how to do it, why to do it, the methodology behind hit, drying times etc.

i was super excited when my bestie and partner in crime jane richmond offered to guest post on this important subject because if you knit - you will need to know how to block and block properly.

build your own custom blocking screen by jane richmond

i'm so super jealous of the sweet set up jane's got going on that puts my poor methods to shame. honestly...my mind is blown. after you're done reading the post you can find the tutorial on how to make your own sweet blocking set up just like jane's over on her blog today! 

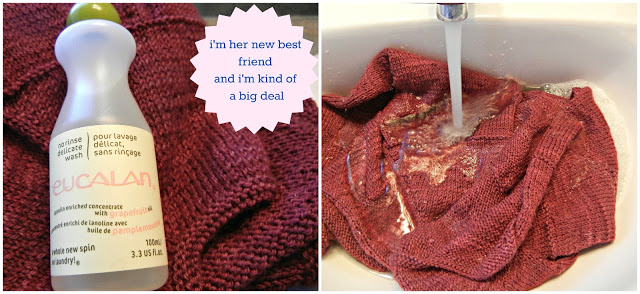
aside from wearing my knits when they are done blocking i have to admit that one of my favorite parts of blocking is not the blocking itself but the soaking. i love the adrenaline rush from taking that item you've SLAVED over and plunging it into soapy water. it's scary and fun all at the same time. i'm also obsessed with what i use to soak my knits. currently i am IN LOVE with eucalan's newest scent - wrapture. obsessed. i've been finding myself hunting around my condo looking for things to block in this lovely scent. in fact i had a handful of samples of wrapture and i'm almost all out. time to buy a big bottle :) think of it as shampoo/perfume for your hand knits. the magic potion to put that extra bit of va va voom to your hand knits! i also really like the brand SOAK as well. i recommend both for your hand knits.

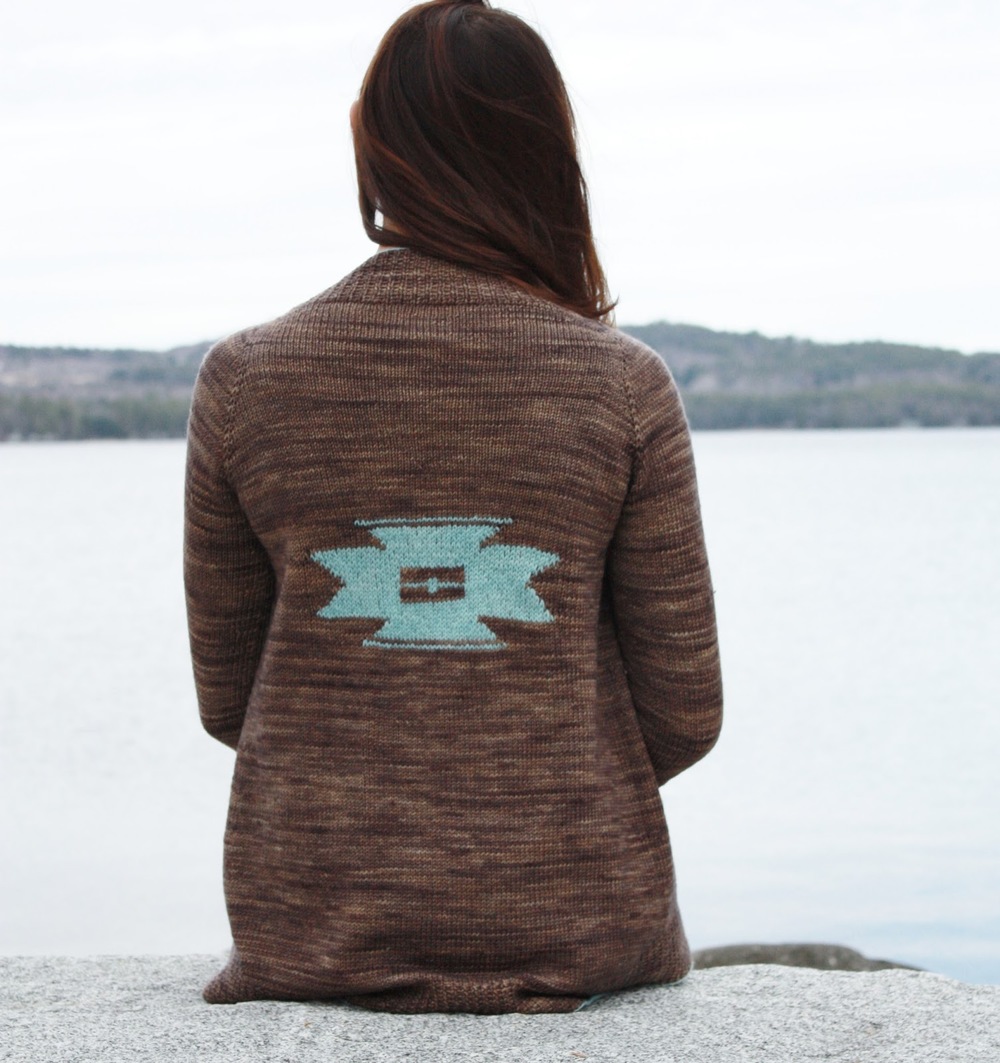
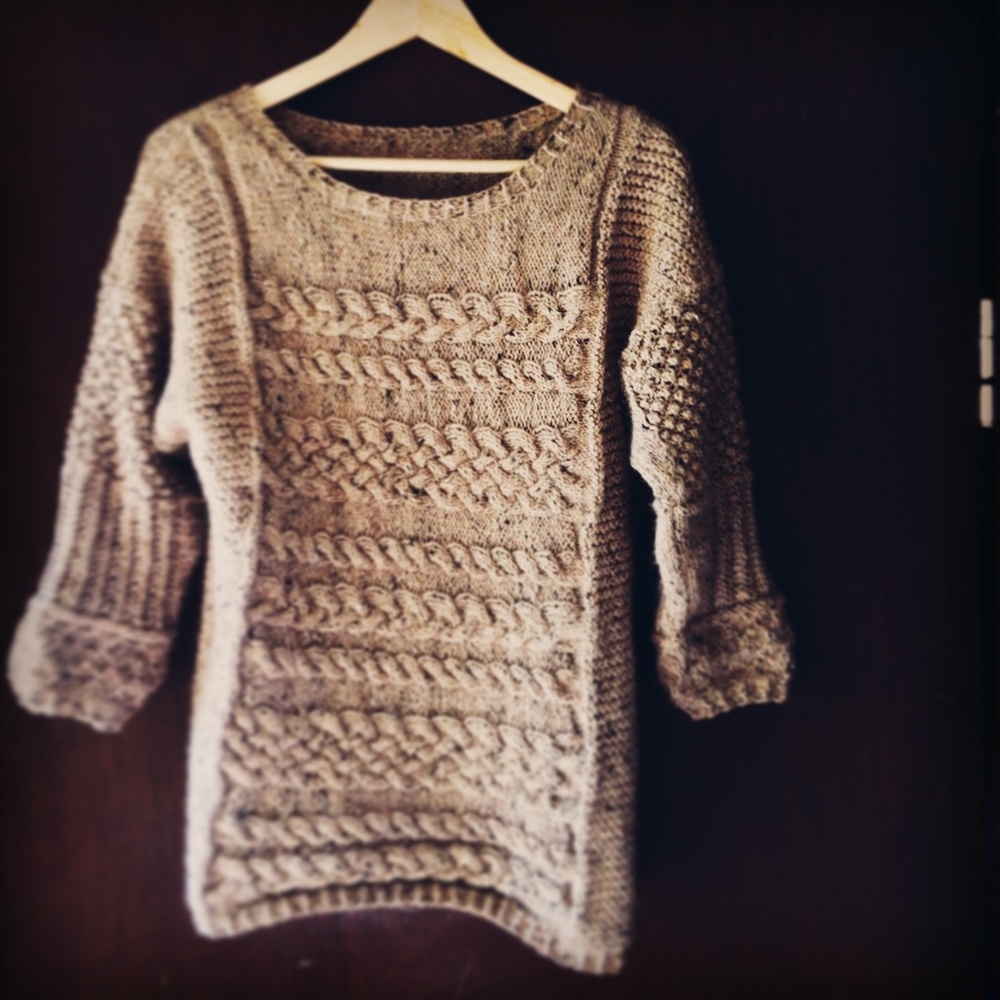
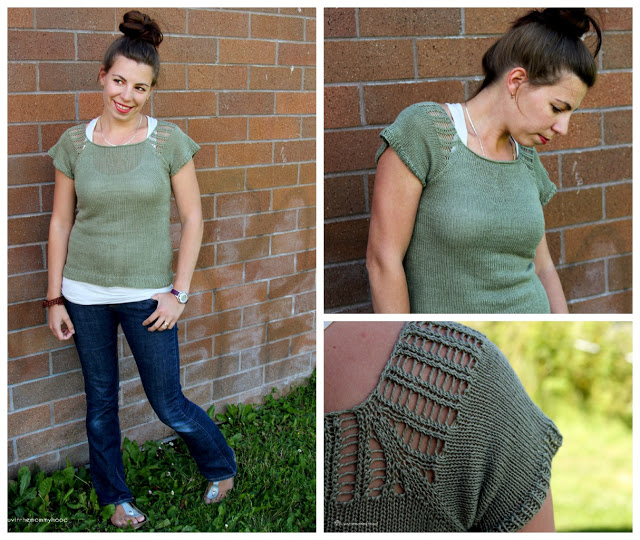
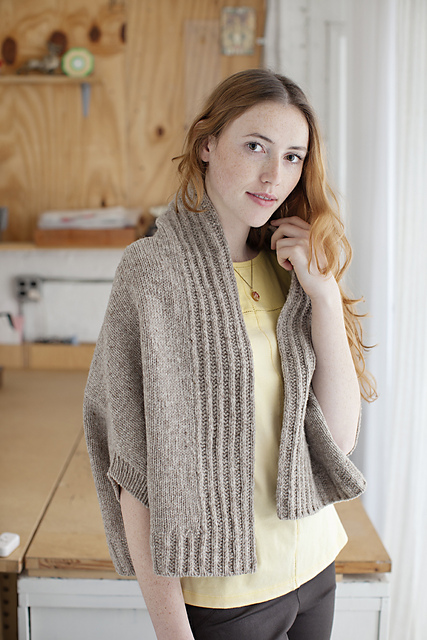
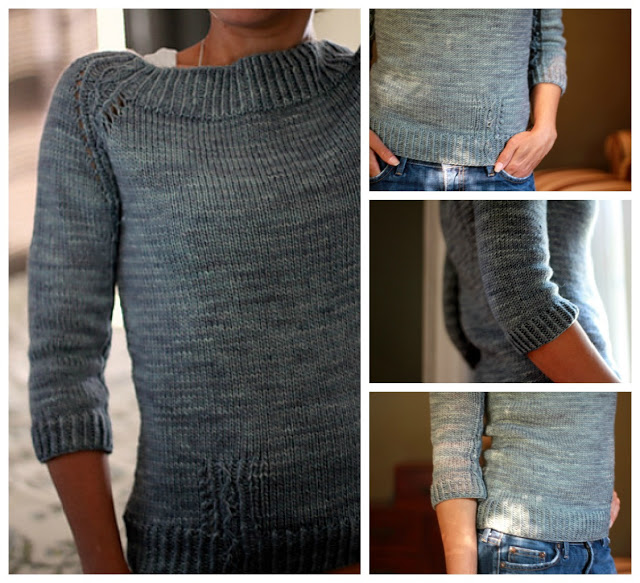
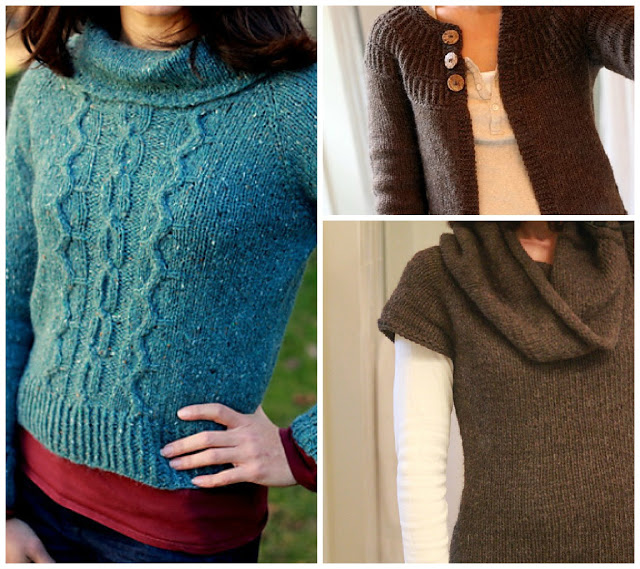
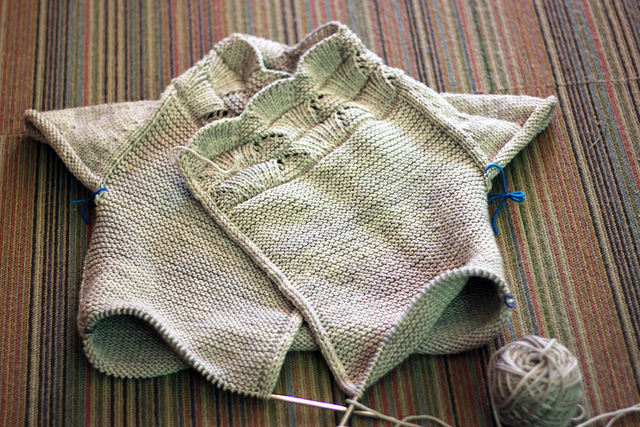
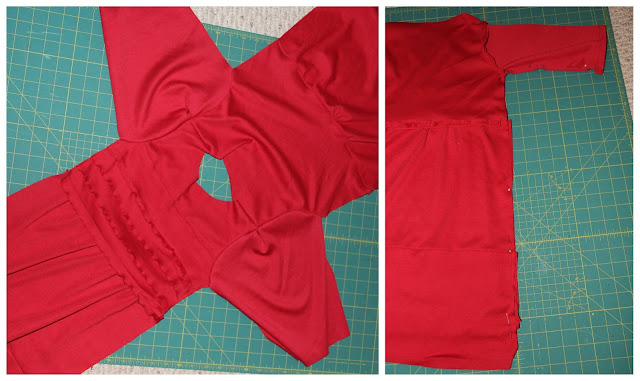
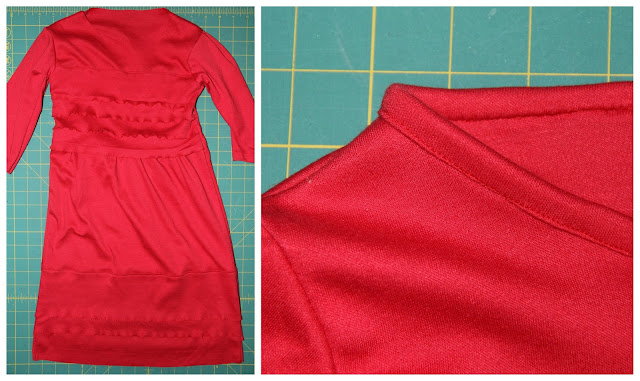
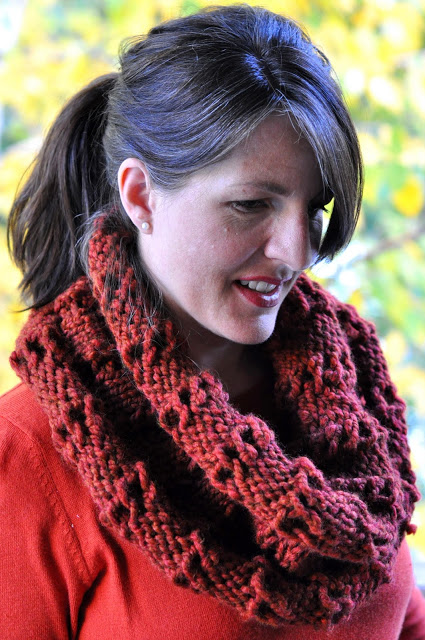
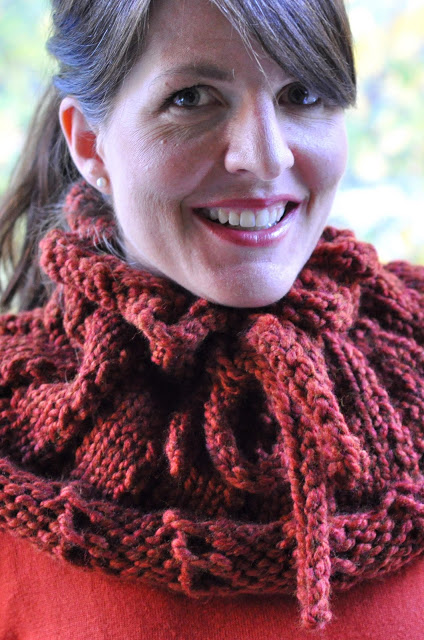
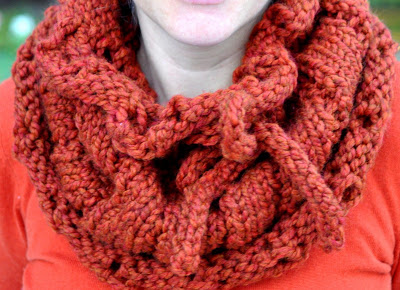
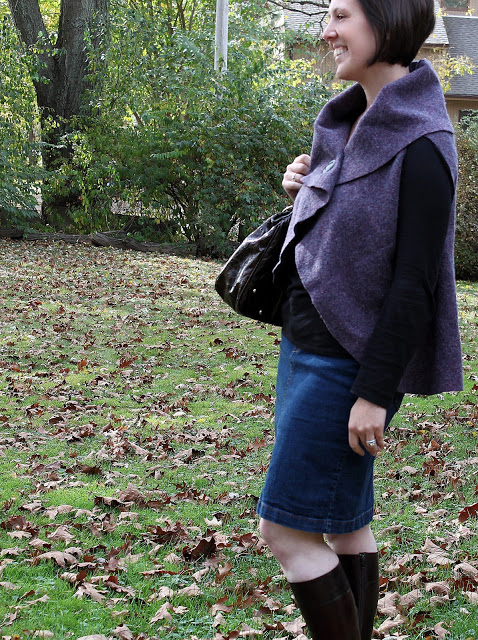
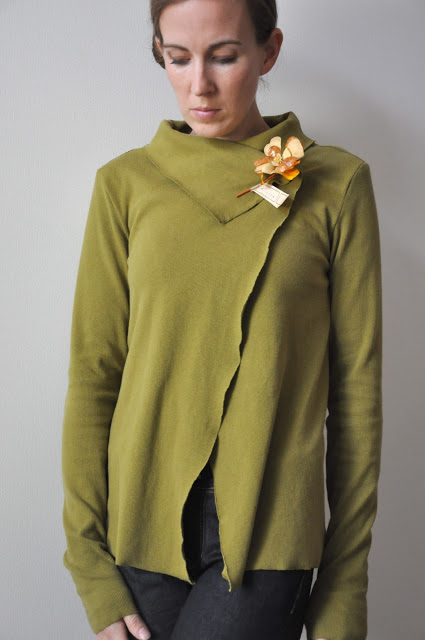
strathcona by jane richmond
so while i daydream of my knits soaked in wrapture i'll let you hear from the lovely jane richmond and her awesome tips on how to block your knitting! let's get soaking!

let's hear from jane....

Fairly recently Shannon had a blocking emergency. It was the day before a photo shoot and she realized she hadn't blocked her knitting so she immediately wet blocked it and laid it flat on her living room floor to dry. By 10 o'clock that night the garment was still damp. After a quick phone conversation, it was decided, I would come and rescue the knitting with the promise that I could have it dry by morning. I kept my word, the crisis was averted, and it got me thinking about putting together a tutorial on how I like to block my knitting. 

Ready? Here we go!

blocking your knitting with guest jane richmond #sskal

1) I fill the bathroom or kitchen sink (depending on size of knitted item) with tepid water and a no-rinse wool wash such as Eucalan or Soak.

blocking your knitting with guest jane richmond #sskal

2) I toss in my knitting and squish the soap suds through the fabric. 

blocking your knitting with guest jane richmond #sskal

3) I let it soak for a minimum of 15-20 minutes. 

blocking your knitting with guest jane richmond #sskal

...I always set a timer otherwise I forget all about it!

blocking your knitting with guest jane richmond #sskal

4) Then I drain the sink and squish out as much excess water as I can. It's important to squeeze only, DO NOT wring out your knitting!

blocking your knitting with guest jane richmond #sskal

5) I lay the item flat on a dry towel and roll or fold it up. If you are blocking a sweater or other large piece of knitting try to support the weight of the entire piece when transferring it from the sink to the towel, that way you won't stretch out the fabric accidentally as wool can get very heavy when it takes on water.

blocking your knitting with guest jane richmond #sskal


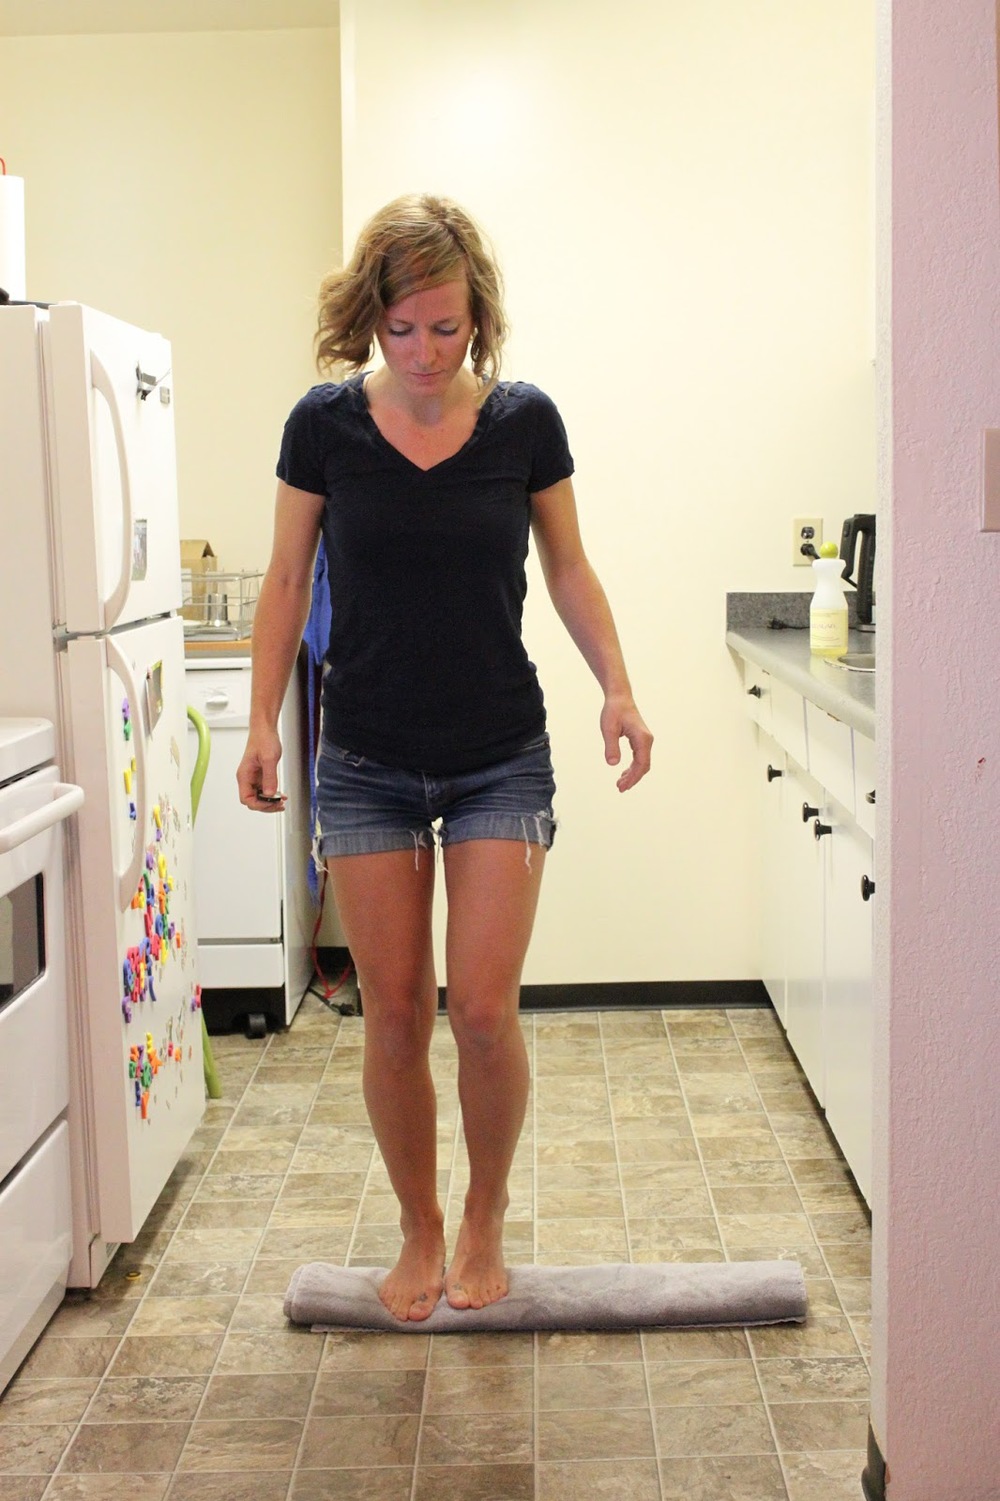
6) I jump around on the towel to squeeze most of the remaining water out of the knitting. I recommend doing this on laminate floor in your kitchen or bathroom otherwise you'll end up with a wet spot on your carpet!

blocking your knitting with guest jane richmond #sskal


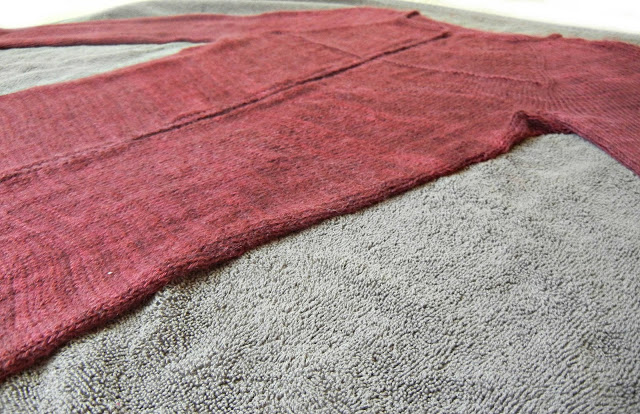
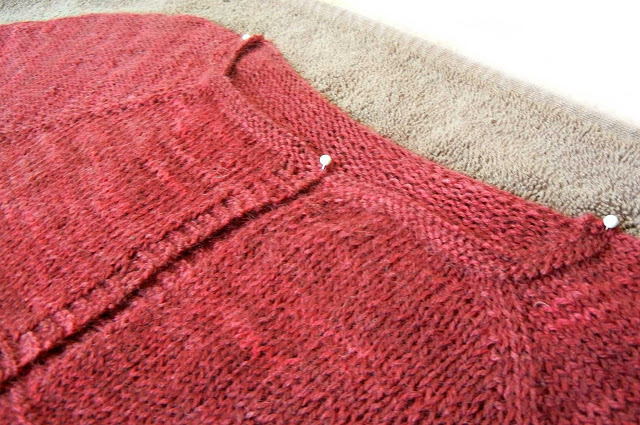
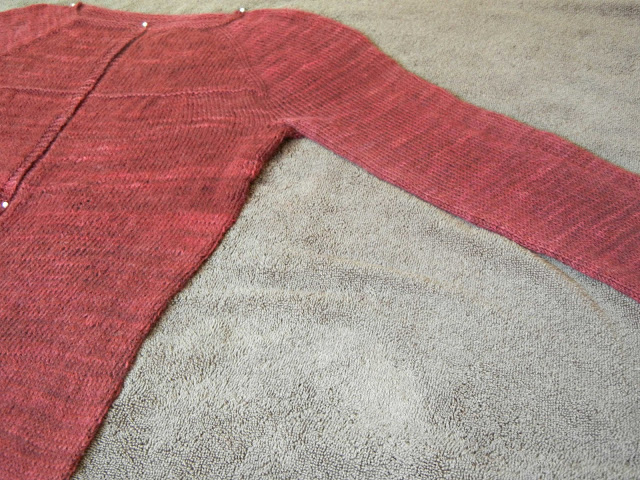
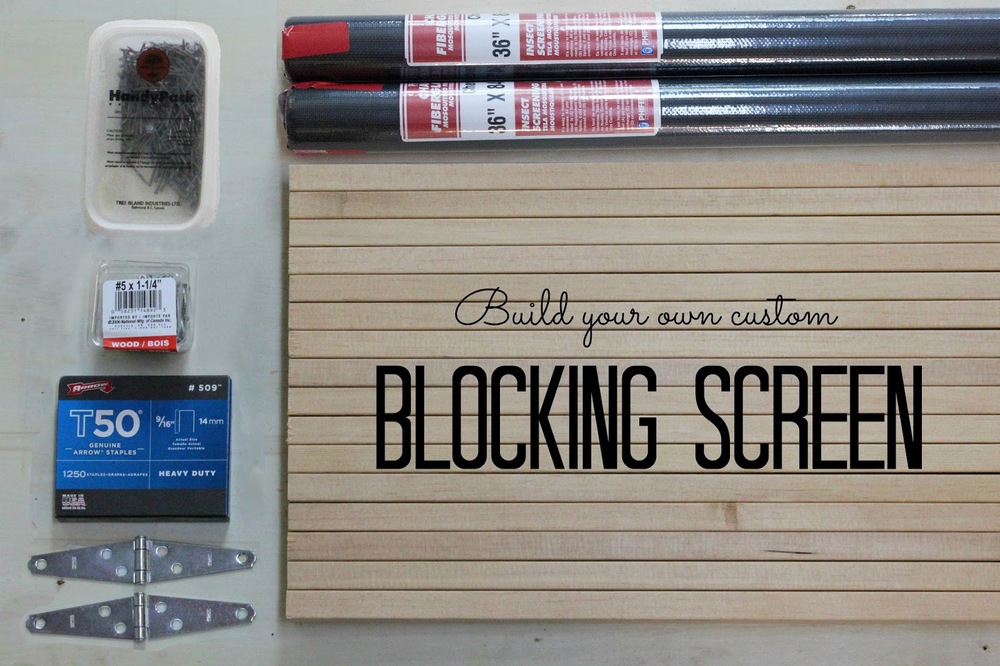
7) Then I unroll the towel and bring my slightly damp knitting over to my blocking area. I've heard of people blocking directly on their carpet, on towels on their bed, on blocking mats, the possibilities are endless really and we as knitters are creative by nature. I like to use window screens which I set on top of my Costco drying rack, this way the entire piece can lay flat and still get air circulation from above and below. Pieces dry in a flash this way and if I have a very urgent deadline I'll set up a standing fan and it does the job in half the time! Just recently Chris and I put our heads together to make a custom drying screen for my knitting (as seen above), if you'd like to see how we made ours you can find the full tutorial on my blog

blocking your knitting with guest jane richmond #sskal

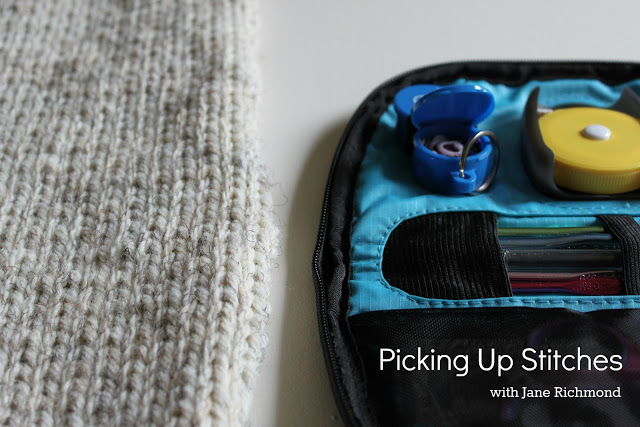
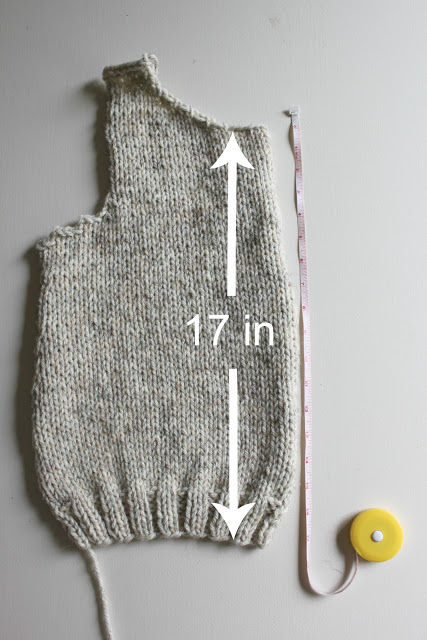
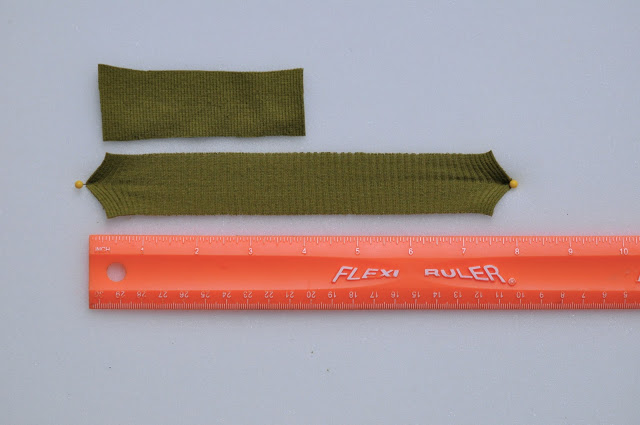
8) Once I've laid my piece out flat I use a measuring tape to ensure I am blocking to the intended measurements.

And that's that! Easy peasy.

Blocking is a great way to help your knitting look it's best. Even if a pattern does not require it as one of the finishing steps it's always nice to give your finished work a little soak to even out the stitches and allow the yarn to bloom and soften. 

Thanks for having me on your blog as part of the Summer Sweater Knit Along Shan! It's always a fun time dropping in on this wonderful space 

yay! thanks for stopping by hun! if you wake up tomorrow and that screen is gone you know it's at my house! lol!!!! wink wink... you can find all things jane richmond here:


what do you use to do your blocking? do you have a fave method or wash that you are loving? let's chat blocking!!!

>> JOIN IN & SIGN UP <<
- sign up for the knit along by clicking "here".
- get inspired by checking out our kal pinterest board
- take part in all the fun conversation & make new friends in our ravelry group
- find out more and find all the posts and info "here" on our kal homepage.

- remember to tag your instagram/facebook/twitter/google+ pics with #sskal.

>>> OUR AWESOME SPONSORS <<<


SUMMER SWEATER KNIT ALONG || EASY EASE WITH GUEST ALICIA PLUMMER OF TWO LITTLE PLUMS

Easy Ease with Alicia Plummer on luvinthemommyhood.com
Pattern: Portside by Alicia Plummer || Image Src: PostScriptLove
i'm so excited to have one of my fave knitting designer pals on the blog today for our summer sweater knit along! the lovely, talented and oh so funny alicia plummer of two little plums is here with us today talking about all things ease. i know a lot of you are always chatting about ease. how much, how little, where, how it works, how to change it etc...so i thought it was fitting to have the designer of the sweater actually called "ease" (which is currently at the top of my "to make list") come and chat with us all about ease.

alicia's designs are so perfectly northeast cozy with modern lines. they are the sort of designs you will stop everything to knit and that you love to wear when you are done. true wardrobe staples with clean and comfy design aesthetics. i'm so lucky to know alicia as a friend as well as a designer and this girl has some mad skills people. she also sews! so make sure you pop by her blog or ravelry page and give her a nice warm hello!
Easy Ease with Alicia Plummer on luvinthemommyhood.com
and now let's hear from alicia......


Ease. The word alone conjures up images of effortlessness, breezy weather, and relaxed emotions.

It sounds “easy”…(not in the negative connotation! Ha.) In the knitting world, however, it can cause a lot of anxiety and confusion for the knitter. How can something so simple sounding be so…so…frustrating?

Simply put, Ease is the difference in measurement from the finished garment to the wearer’s actual body.

Negative Ease is what you see when something appears “skin tight”, like many popular tank tops these days. Chances are, you have some layering tanks in your closet now. Curious? Take one out, lay it on the floor and measure across the body directly under the armpits. More than likely, it’s smaller than your chest circumference. Since it’s a knitted fabric, it stretches and gives where it needs to. Something from a less forgiving fabric like canvas or linen wouldn’t even fit over your head! Most knitted hats and fingerless mitt are written with negative ease so that they stay put! In this case, negative ease is necessary. My upcoming Thoroughbred mitts (shown at bottom of post) are written with just .5'' of negative ease, but they hug the hands nicely.
Easy Ease with Alicia Plummer on luvinthemommyhood.com
Ease by Alicia Plummer
No ease is when the finished measurements are identical to your own. My version of Jane Richmond’s stunningly simple Oatmeal pullover is a good example of no ease.

Positive Ease, my personal favorite of the Eases, is larger around than the wearer’s measurements. I find it the most flattering because not every single aspect of your anatomy is on display, and I have parts that should be in baggier clothing (sigh. The mummy tummy). Positive ease does not necessarily mean you’ll look like you’re wearing a big potato sack. When I put a test call out on my sweaters, a lot of the time I hear testers say “I don’t want it to be too baggy. Can I modify it?” (we will get into modification in the next paragraph). Well, a lot of ease with the right shaping can be downright gorgeous.

My favorite sweater I’ve ever designed is Ease—I don’t think there’s a knitter out there who doesn’t look amazing in it! 

Ease has an intended 3’’ of positive ease at the bust, but less at the waist and hips. That gives it a slouchy yet flattering look. Portside, however, has almost no intended ease at the bust but increasing ease at the hips and waist. Heathered, by Melissa Schaschwary, has 3’’ of positive ease throughout—also flattering.
Easy Ease with Alicia Plummer on luvinthemommyhood.com
But will it fit me? I’ve seen (and been!) a paralyzed knitter who is stuck trying to decide on a size. 

Because a knit fabric stretches, more than likely your sweater will fit unless your gauge is terribly wrong. (This has happened to me before. 31’’ bust for an 18m old child? No thanks. Lots of ripping there!) Modifying for intended ease is simpler than you think.

Easy Ease with Alicia Plummer on luvinthemommyhood.com
Let’s say that there is a sweater you love with 2’’ of intended ease in a gauge of 5 sts to the inch and you’re a 33’’ bust, but the sweater is based on a 34’’ bust (so pattern garment 36’’ total, but you need 35’’ for the ideal fit). Your stitch count for the bust in pattern would be 36 x5, which is 180 sts. Simply take your gauge and multiply by your bust plus intended ease (so 33 plus 2, is 35). 35 x 5 is 175 sts. Work to that number instead of the number in the pattern. Schematic measurements are a great help when doing this. You can take the schematic and write down your numbers (with intended ease—don’t forget this step!) and multiply by gauge to determine your ideal stitch counts.

Easy Ease with Alicia Plummer on luvinthemommyhood.com
Viola! Perfection!

In closing, ease of all types can be flattering depending on how it’s used. The thicker the yarn, the more ease you’ll want. Happy knitting! xoxo
Easy Ease with Alicia Plummer on luvinthemommyhood.com
thank you so much for coming on today alicia! thank you for being a wonderful friend and for all the chuckles my cute little space bar you xoxoxo you know how much i adore you.

you guys can find all things alicia plummer on her ravelry page here or on her blog here.

what are your favorite tips about ease? any tricks you use to help keep it all straight? a fave sweater you love that plays with ease? come chat! i can't wait to see how all of your projects are coming along! 

>>> OUR AWESOME SPONSORS <<<


SUMMER SWEATER KNIT ALONG || KNITTING WITH LINEN WITH GUEST HANNAH FETTIG OF KNITBOT

knitbot linen by hannah fettig
image src: knitbot
one of the things i find the most exciting about our summer sweater knit alongs are the yarns. ohhhh...the choices. so many gorgeous and drool worth yarns being knit with! 

watching all the chit chat about project choices and pairing the right yarns, colors, etc together is just so darn inspiring! during all these discussions one of the most chatted about fibers is linen. there's always questions about knitting with linen, which in case you're wondering, makes a beautiful, light weight garment. it's an interesting fiber to work with and one our ravelry group is always chatting about.
knitting with linen on luvinthemommyhood.com
image src: quince & co
when thinking about a post on knitting with linen i thought who better to bring in to give us the low down on knitting with linen than hannah fettig herself! swoon! her newest collection "knitbot linen" for quince & co speaks for itself. clean, modern lines let that linen just shine! quince & co's linen yarn - sparrow is just lovely.

i'm so excited to have hannah fettig as a guest today! she has been one of my favorite designers for years now and her pattern the "effortless cardigan" was the reason our summer sweater knit alongs even started to begin with. it was my first adult sized garment. so thank you hannah - for all your inspiration & for being here with us today!

knitbot linen by hannah fettig
images src: knit bot linen
now let's here from hannah...
I have worked with linen and other plant fiber based yarns in the past.  But this year I truly discovered just how wonderful it is, both to work with and to wear.  If you're familiar with my design work you know about my love affair with open front drapey cardigans.  Linen fabric naturally drapes and knit at a looser gauge, well, it's doesn't get much drapier than this.
Recently I shared some tips for working with linen yarn on my website.  I wanted to share them here with Shannon's readers since some of you may be venturing into linen for her summer KAL. 
Linen yarn is spun from a plant fiber so it isn't forgiving the way wool is.  Any stitch you create is going to be frozen in time exactly as you make it, no amount of blocking is going to change what those stitches are.  But no worries!  If you work with it correctly you'll still achieve beautiful finished garments.  Here are a few tips I have and maybe other knitters can leave comments with some things they've learned.

TIPS FOR KNITTING WITH LINEN
1. Joining a new ball: You want to be mindful of not running out of yarn on the front or back centers of any pieces.  When starting a new ball, do so at the side seam or some other inconspicuous spot.  To join the new ball, knit the next stitch with the tail of the previous ball and the new ball held together.  This will secure the yarn - you can now proceed with the new ball.  If it's still feeling unsecured you could temporarily knot the two strands.
2. Duplicate stitch: You'll want to weave your ends in using a duplicate stitch on the WS to make sure those ends won't be visible from the front.  Here Jerusha demonstrates how this is done, tracing the yarn through the purl bumps:
knitting with linen on luvinthemommyhood.com

3. Washing: Yes, I say washing instead of blocking because unlike wool, you can throw you're linen garment right into the washer and then DRYER and it won't shrink.  In fact, the fabric will be all the softer for it.  Below, the hand washed and dried swatch is on the top, the machine washed and dried swatch on the bottom.  Go ahead and conduct you're own swatch wash test if you're nervous about laundering your entire garment.  I do like to pull the piece out of the dryer while it's still a little bit damp, not all the way dry.

knitting with linen on luvinthemommyhood.com

So is your interest peaked in linen?  May I suggest checking out my new collection Knitbot Linen which features six designs in Quince & Co. Sparrow, a fantastic fingering weight yarn available in Pam Allen's beautiful palette.  Also, if you've had the Featherweight Cardigan in your queue for awhile, or maybe Breezy Cardigan or Wispy Cardi, these would all be fantastic in Sparrow.  If I weren't knitting away on a collection for fall, I would be casting on a Featherweight for myself right now!
knitting with linen on luvinthemommyhood.com
thanks again for joining us hannah! you can find all things knitbot and hannah here:
website ||  facebook  ||  ravelry  ||  pinterest  ||  twitter

what are your tips for knitting with linen? do you love working with this fiber? come chat! it's sskal day! i want to hear all about your projects this week!

>> JOIN IN & SIGN UP << 
- sign up for the knit along by clicking "here".
- get inspired by checking out our kal pinterest board
- take part in all the fun conversation & make new friends in our ravelry group
- find out more and find all the posts and info "here" on our kal homepage.

- remember to tag your instagram/facebook/twitter/google+ pics with #sskal.

 >>CHECK OUT OUR AMAZING SPONSORS<<


SUMMER SWEATER KAL || HOW TO TAKE GREAT PROJECT PICTURES WITH GUEST MY SO-CALLED HANDMADE LIFE

photos by my so called handmade life
if you're a member of our regular knit alongs you will know who today's guest is. she is one of my favorite knitters and i just swoon over all of her projects. her photos always leaving me wanting more and whether it's on her ravelry page, blog, kollabora, instagram - you name it...i love michelle (or as us knitters know her - mamatronic) of the blog my so-called handmade life's work.

there is something that comes across in her imagery...a sense of calm and peace, a feeling of warmth, caring and home. she makes me want to just jump into her photos and curl up in them. 

so when organizing this year's summer sweater kal i knew exactly who to ask to come do a guest post on taking your wip pics, selfies etc - michelle. i'm sure you will recognize some of her pics below because more times than not her images are at the top of my knitting posts during kals. i can't resist a mamtronic image i tell ya. love em. and i hope you will all too.

photos by my so called handmade life

now let's hear from the lovely michelle herself....


I'm guessing that if you're reading this you already know how satisfying it is to make something with your hands, even more so to wear it.  But sweater styles change and gifts get worn away from us, leaving us with only the memory of the hours spent working on it; that is, unless we have a photo of the experience.

photos by my so called handmade life

Having a nice image of your finished object is a lasting keepsake from that time in your life.  

I can look at a photo of a sweater that no longer fits and remember what was happening in my life while I knitted those stitches: how I braved a modification or tried my first fair isle.  I can look back on a photo of that hat I made my daughter and savor the memory of the small girl who once wore it. These images are as meaningful to me as my old school photos because they chronicle a different aspect of my life through the years.  Since Shannon asked me to share about my finished object photos, I have enjoyed reminiscing about how the whole process has evolved in a short amount of time.

Here's a hint: it is very basic.

My Ravelry page had no photos of me wearing my hand knits in the first year I was a member. Though I loved to take photos, I didn't want any of myself and, let's face it, most of us knit for ourselves... alot.  However, a 365 self-portrait challenge broke that phobia fairly quickly.  My attitude went from, "Ugh, photos of me... delete...delete...delete..." to "Okay, whatever.  Let's just get this done."  Slowly, I began adding images of my knits as they would actually be worn to my Projects Page.

photos by my so called handmade life

I learned to keep the setting simple. For instance, I use a simple background that enhances  the color of the yarn, not one that my knit would get lost in. I also take most of my photos outside where I won't have to include the chaos of my cluttered house. The same simplicity applies to photography equipment. I only need:

1) Any camera at all - I've gotten decent results from cell phones, vintage cameras, and my dslr.  My favorite is my Canon Rebel with a cheap 50mm fixed lens opened up to a wider aperture for a nice soft depth of field.  If I do edit, it's just basics in Aperture and maybe a vintage photo preset.  For iphone photos I use Snapseed.  I love that a photo can be taken, edited, and uploaded to my Ravelry page in moments.  There's really no excuse for a "No featured photo" box on my Projects Page now.   The cell phone is also handy for WIP shots.  If I take those in the same place at the same time of day it really shows off  how the project is "growing."

photos by my so called handmade life

2) Something steady if you're photographing yourself - If you don't have a willing partner, get a cheap tripod and use your camera's timer.  At this point I have a $20 tripod, but at one time it was books stacked on a chair that steadied my camera.  I also have a remote now too, but haven't actually used it yet.  I am the queen of set, run, and click photos.  There's only one word for my self portrait process- ghetto.  First, I put something in the place where I'll be standing for the photo (This could be a garden hoe or patio plant) and I focus on it manually.  Then, I set my f-stop no wider than 3.5 or 4.0, ensuring the sweater will be in focus even if I step out of position.  Next, I move my garden hoe stand-in, click the shutter on timer, and run to my place.

photos by my so called handmade life

If I have a partner to take the photo for me, I use them as my stand-in to focus on and compose around, getting closer and lower than I used to think I needed to, unless it gives me a fun house mirror look.  In that case, I take it from a higher vantage point.  Then we switch places.  I just remind them to keep the camera level and still.  The shots below were taken that way.  I had supper on the stove and company over but I wanted a fast FO photo because my hair was decent that day.  (Just being honest.)

photos by my so called handmade life

This leads to the most important component of a great photo:

3) Light - It softens, brightens, hides and exposes.  Light can change the whole mood of a moment.  I can be in the ugliest place but the quality of the light can mercifully hide one thing while bringing another out.  In the cell phone photo below a blah background is cloaked by the quality of the light, while the knit is allowed to shine, bathed in a lighted foreground.

photos by my so called handmade life

Natural morning or late afternoon light is the best bet, but if that's not an option I can always open some windows and use the tripod with a slow shutter speed indoors.  I sometimes use an inexpensive bounce flash device to neutralize shadows and red eye.  And there's always white balance adjustments in Photoshop.  My best opportunity to take photos is in the middle of the day when outdoor light is harsh.  I've found nice, even shade on our breezeway, using the utility room door as a backdrop.  If you've seen my Rav page, you've seen this door... many times.   We work with what we have, right?

photos by my so called handmade life

Sometimes a seemingly frustrating lighting situation can be used to my advantage, as with the project photos of Lady Bat.  

When I raced outside for that  quick photo shoot I was disappointed that the sun was so low and it was almost dark.  I decided to let the waning light share the focus with my sweater, rather than just keeping it behind me to fully illuminate my sweater.  I played with the camera position for more or less flare.   My knit wasn't quite as visible, but I loved the overall effect.  I then added a few detail shots with direct sunlight to make the stitch pattern clear.

photos by my so called handmade life

I really like detail shots, especially if they are of a particularly tricky or beautiful part of a design that I want to remember.  For these I use a wide aperture for shallow depth of field and get close.  I can get excessive with these.

photos by my so called handmade life

One last thing to consider is what you like about your knit.  How you imagine it looking?  Where do you imagine wearing it?  Maybe you could incorporate this into your FO photo.  Try different locations

photos by my so called handmade life

or different times of day.  (I know I have a million utility room door photos and I say this.)  As with the Lady Bat photo,  the knit doesn't always have to be front and center to be best enjoyed. Sometimes just viewing your knitwear from a different perspective can give you a new appreciation for the construction.

photos by my so called handmade life

I think I love photographing things I make almost as much as I love making them.

thank you soooo much michelle! you rock girl! thank you for so much inspiration, kindness and for being you! hugs!

you can find more of michelle and her beautiful handknits below:

BLOG  ||  INSTAGRAM  ||  FLICKR  ||  RAVELRY  ||  PINTEREST  ||  KOLLABORA

do you love taking pictures of your projects? do you have tips to share on taking selfies and project pics? we'd love to hear all about it! plus share how your project is coming along this week!

>> JOIN IN & SIGN UP <<
- sign up for the knit along by clicking "here".
- get inspired by checking out our kal pinterest board
- take part in all the fun conversation & make new friends in our ravelry group
- find out more and find all the posts and info "here" on our kal homepage.

- remember to tag your instagram/facebook/twitter/google+ pics with #sskal.

>>> OUR AMAZING SPONSORS <<<


Blocking with Guest Rebecca of Nook

the mallory cowl pattern
today's guest poster is one of my besties - rebecca of the blog/shop nook.  she's the fastest knitter i know.  her hands literally could start a fire when she gets going.  she knits in the dark people...lol.  seriously...you just can't stop her.  we all love it about her and we also can't help ourselves from teasing her about it too (sorry becca...lol).  she pretty much knits no matter what she's doing. fo'reals. this gal doesn't stop.  she also teaches knitting.  i swear if she could knit in her sleep she could.  she's also my fave model...purdy lady..xoxox.  so who better to ask to chat about finishing all those fancy knits you're all cooking up than rebecca herself. 
ready to start blocking all those gorgeous sweaters you have all been making?  here's rebecca....
 
thanks so much shannon, for having me here! guys i have to say i'm so impressed and so proud of you all in this summer sweater knit along event. some of you made multiple sweaters! and some of you made your very first sweater! hurrah!! there's really something chest-pouffing (it's a word i checked, so you ...ahem...don't have to *cough*cough*) about that first sweater you make for yourself, hey?
and since you've put in alll of that effort into your sweater. and allll of those hours... don't skimp out at the end! your very last step (unless you like to sew your buttons on as the very last step, like i do) is blocking.

block-wha? yah. blocking. it's really a very simple step to your knitting that essentially does to your knitting what ironing does to your clothes. just makes everything nice and smooth and even. and that's what we want.


last year, i actually had the opportunity to chat about blocking on the summer sweater kal, but this year i thought i'd show you more of what i like to do. there really are lots of ways to block your garment. depending on fibre choice, type of garment (bulky sweater, vs. lacy shawl) and lots of tools out there to help you out. for more tips and specifics on blocking check out my post here. it goes into lots more detail. but i do think that for sweaters, this way is pretty straightforward. :)

so let's get started. i'm a creature of habit, really. even if i've knitted something lacy (which doesn't happen often) i still do the full on soak in the sink block. it's what i do. it's what works for me.
i start off with my new fave blocking tool. eucalan. there are other things out there, like soak, and it works great too. the awesome thing with this is it's a conditioning treatment for your knitted work. so you don't have to rinse it out. yah. i love that! ok. so i just put about a half tsp maybe into the palm of my hand and throw it in the sink with the sweater, and some cool to lukewarm water. just fill'er up and let it become completely submerged. (you kind of need to push your sweater down a bit as wool likes to drink up all of the water.) just give it a good soak in the sink, and then gently squeeze out the liquid. do not wring it out. wool is very delicate when it's wet, be nice to it :)
then i just bring it on over to a towel in a separate room and i lay it out to the shape i want it to be in. not stretching it out too much. your knitting will grow a little when it's wet though. as it gets heavy with water.

there are blocking mats out there, but a towel works fine for me. then for this specific project i didn't think i needed too many pins. so i just pinned it down in a few spots. depending on the garment though, i sometimes use a lot more. the pins i have aren't special blocking pins. (shhh don't tell).
so basically i just block it to dimension and leave it alone. check it here and there with the fan on it, to make sure it's dry...

that's pretty much it! you only need to block once though, as wool has memory.
and now i have a very pretty sweater to wear. i think this has to be my fave cardi that i've knit. but it's really the little things that make me the most proud of it. and blocking is one of them :)
so there you have it! easy peasy, lemon squeezy. hope this helps you out in properly finishing your sweater(s) :) xo

thanks so much becca!  luv ya girlie!!!! you guys can find all things nook here:

you can follow along with all things summer sweater knit along:
 

and a big thank you to our wonderful sponsors! thanks everyone!

additional sponsors:

join our linky party by linking up your "summer sweater kal" blog post!

Seaming Video Tutorials with Guest Kelly of Celtic Cast On

we've got one of my fave knitty pals on the blog today.  kelly from the blog "celtic cast on" is here today to so sweetly talk to us about one of those things most of us knitters don't enjoy - seaming. thankfully she's got some skills when it comes to seaming (and to just about all knitting things) and she even filmed us videos!!! can i get a woot woot!!!  thank. you. kelly.  awesome! 

kelly's always knitting up the most gorgeous projects and her images are equally as lovely (isn't she so purdy? i couldn't resist embarrassing her with a collage of her cute self).  she's a big part of our knit alongs and also one of my trusted moderators in our ravelry group.  this gal has some serious knitting mojo.  you all ready to learn from her and tackle those seaming skills? i know a few of you made an aidez....so pay attention :P

here's kelly..... 

inversion cardigan
SEAMING....

It's one of those words a lot of knitters CRINGE over when they hear it...same as GAUGE and SWATCH.

I used to cringe too...that is until I realized that the sweaters I had knit without swatching and getting gauge were complete flukes and would come back to haunt me.

The same can be said for seaming. I was one of those knitters who HATED seaming. I'd knit a sweater and then the pieces would sit in a basket forever just waiting to be seamed or I'd seam it up as quickly as I could not taking into consideration the best way to seam that part of the garment. I avoided it like the plague because I could never get my seams to look right and I was never fully happy with the knit.

1. gelsomina aran 2. aidez
Don't get me wrong I do absolutely love top down knitting, being able to try on as your go and adjust for a perfect fit is amazing but there are time's when you DO need seams to make a design hang and fit the right way.

1. fable cardigan 2. linney cardigan
 I"m going to show you the three seaming techniques I use most often, the invisible seam, the shoulder seam and joining a sleeve.

The easiest and probably my favourite is to seam the main body. Usually it's just matching up knit stitches and the work goes smoothly. Once you get used to this technique it becomes a great tv companion.

SEAMING VIDEOS


Invisible Seam 
NOTE: During all these seaming techniques take the time to straighten out your work every now and then to make sure one side isn't getting ahead of the other. It will save you from ripping back later when you come to the end and discover one side still has 2 inches of fabric left.... been there done that!
Now for the shoulder seam!

Shoulder Seam
Last but not least, the sometimes tricky one, joining the sleeves. This is actually a combination of the two techniques I have already shown you so once you master the previous two you will have no problem's joining a sleeve.


Seaming a Sleeve
If you plan on making garments you want that entire sweater, tank or tee to be a reflection of your knitting skills. Don't cop out on the most important parts of the process just so you can say it's finished. Take the time to learn the skill of seaming, practice and hone it so that when people look at it they say ""Wow that looks like its right out of a store!"

Now make yourself a cup of tea, grab that sweater that's been sitting in a basket forever waiting to be seamed and take the plunge!!

thank you so much for all those awesome videos kelly! you rock girl!  i don't know how many times i've gotten stumped over seaming. these will definitely be a huge resource for us!  you guys can check out all of kelly's awesome knitting and read more about her on her blog here and on her ravelry page here.

you can follow along with all things summer sweater knit along:
 

and a big thank you to our wonderful sponsors! thanks everyone!

additional sponsors:

join our linky party by linking up your "summer sweater kal" blog post!


The Source of Inspiration by Guest Annie Claire


we've got a lovely guest poster today!  one of my fave rav buddies & summer sweater knit along sponsor - the lovely annie claire of "by annie claire".  this talented gal originally from england now lives with her hubby where they are both goat dairy farmers!  can you imagine!  she knits, spins, designs, weaves, felts, dyes....and more!  she has a gorgeous line of patterns and even more scrumptious hand dyed & spun yarns!  annie's here to talk to us today about her sources of inspiration when it comes to knitting.

now let's here from annie...

Inspiration, sometimes hard to find, but constantly all around us, is the spark at the beginning of our journey as a knitter of taking a really really long piece of string and turning it into something beautiful.

aria cardi by cecily glowik macdonald
I don't know about you, but there are many places from which I find those tiny sparks. One of the biggest, which I'm sure you'll agree, is other people's work. Just trawling through ravelry and the many knitting blogs out there I will stumble across FO's and new patterns that just leap out at me. Patterns that I just have to knit, and right now. Naturally a great photograph is key, and there are some fantastic people out there producing so many wonderful patterns and capturing them in perfect settings that its no wonder my queue is exploding. Gorgeous close ups of squishy garter and the simple fabric of stockinette stitch exploding with the beautiful tones of hand painted yarn.... OK, I'm drooling.

fortune bay by mercedes tarasovich-clark
For me, being a girl that spends most of her day outside, I am a sucker for a shot that is in the great outdoors, full of motion and life. There is something that makes a hand knit more practical, tangible and easy to imagine in my wardrobe when photographed outside of the studio and in natural light.

1. champagne by thea colman 2. tundra kristen tendyke 3. winnowing by bristol ivy
 In fact, the fellow knitter, local yarn stores, books, magazines, yarn, anything fiber related... brushing against any or all of these will encourage me along my knitterly way.... Oh, and you can't forget fiber focused shows and events - a whole weekend of knitting and all things sheep? Inspiration overload!! I'm sure the above is not unfamiliar to you, us knitters and be pretty predictable at times, but when you go a little deeper and start designing your own hand knit patterns, I've found that inspiration can come from all sorts of places.

jaavesi by annie claire
I have always tried to do things my way. Ask anyone who knows me. I don't mean in an aggressive way, I just like to experience things and to figure them out for myself. I'm a do-er. So as you might expect, when I learned to knit one cold cold winter in Finland I was quickly moving onto adjusting patterns and eventually writing my own. When asked where I find my inspiration my answer can be different each time. I design with my naturally dyed yarns which immediately connects me to my surroundings. As I gather and harvest the dye plant material from around the farm and my home, I'm constantly finding shapes, patterns and tones that can spur on different thoughts and ideas.

1. jig 2. hoops 3. seedling 4. buddleia all by annie claire
I love how all colour can be found naturally [I'm not kidding] which encourages my thinking that you can never become to far from being inspired if you stay close to the outdoors. A walk through the fields or a stroll on the beach can usually spark up my creativity.  I cannot say if it is the yarn colour that inspires me, or the fiber blend, or a special garment idea which gets new designs going, or, I could say that it is all three. Each pattern's journey is different. I have before now started working a striped a scarf only to end up with a fingerless mittens, and lately, a cowl turned sweater. I find it healthier to not have any limits when it comes to my knitting, I like to allow things to develop as they need.

images by annie claire
Ultimately, considering all my knitting endeavors as one, it is the challenge that keeps me most inspired. Whether learning a new finishing technique, a different heal turn, steeking, you name it - if it's a challenge, I'm all in. Wonder why I chose Umbrellas as my Summer Sweater KAL project? I think you now understand...

images by annie claire
So as I take my yarn and my designs into the fall I am taking on the challenge of designing sweaters and cardigans, and all that comes with it. Luckily I'm no stranger to math, ripping back hours of work, and long evenings wondering where the heck I lost those two stitches, and so far the journey is just as exciting as I had hoped. It's a leap, but sometimes you have to go there to find out... I'll see you on the other side!

images by annie claire
thanks so much annie m'dear!  you are a source of inspiration yourself hun!  i swear one day you are going to wake up one morning to find us all knocking on your door to come hang out and knit :) so purdy!

what are your sources of inspiration?  do you have a fave place or thing that you turn to when you need to get inspired?  i love this topic so come chat peeps!  and don't forget to link up your posts below!

you can find all things by annie claire here:


you can follow along with all things summer sweater knit along:


and a big thank you to our wonderful sponsors! thanks everyone!

additional sponsors:

join our linky party by linking up your "summer sweater kal" blog post!

Picking Up Stitches Tutorial with Guest Jane Richmond

a pic of one of our knit nights
 one of my goals when starting these knit alongs over a year ago was to create a feeling of having a never ending knit night.  that feeling of friends who squeal and get excited about the same things as you, a cheering squad and a sounding board for all your projects and that special bond that comes along with sharing this fun and wonderful creative process with some awesome pals.  it's also a wonderful thing to have so many lovely and talented women to go to for advice and help when something comes up that stumps you.  so i've been slowly trying to build up our list of handy posts in our knit along listing so you can refer to them whenever you need a "friends" help or some knitty advice. 

see all the ribbing? i had to pick that all up!!! talk about my worst nightmare...lol!! 
one of the things about knitting that i detest and hate doing is picking up stitches.  luckily one of the things that one of my besties jane richmond enjoys doing is picking up stitches. she always helps me out when i'm in a pickle and knows that i'm as much of a perfectionist as she is and won't rest until it's done as good as i can get it.  we went through many a trial and error of picking up stitches during last years summer sweater knit along and thankfully this year my sweater requires none! yee haw!  after that cardigan i never wanted to pick up stitches again.  so when i asked jane to come on to do a guest post she thought a tute on how to pick up stitches would be handy to have in our knit along arsenal and boy was she right!  this awesomely talented knitwear designer is joining us today to teach us all her tricks and the why's and how's to picking up stitches. 

ready to pick up some stitches?  let's all hear from jane....

One technique that seems to give some knitters grief is the task of picking up stitches. I know for a fact it's one of Shannon's least favorite things to do. I happen to love picking up stitches and take great pride in a job well done. When Shannon is stuck with a floppy buttonband, instructions that are too vague or faced with an enormous amount of stitches to pick up, I'm always happy to help and we sit down and work it out properly. With a little forethought and preparation, picking up stitches can be painless and easy. Here are the steps to pick up perfectly the first time. 


Measure the Length
You'll need to determine the length of the edge to pick up along. In this case we will be picking up for a buttonband, our edge measures 17 inches. 


Determine your Gauge
If a pattern is not specific on how many stitches to pick up, or gives you a general guide line (ie. pick up 2 stitches for every 3 rows) you can easily determine how many stitches will give you a nice flat buttonband that does not pull in or sag. You'll need to determine your gauge by measuring the pattern stitch to be used. In this case we want to knit our buttonband in 2 x 2 ribbing to match the hem and can easily measure the ribbing along the bottom of the sweater. It is very important to stretch out the ribbing when measuring so that it lays flat rather than pulling in as ribbing naturally wants to do.


Calculate Stitches to Pick Up
Once you've determined your gauge and the length that you will be picking up along, you can determine how many stitches need to be picked up. In this case, our 2 x 2 ribbing measures 3 stitches per inch when stretched flat. Multiply by the length of the edge and you'll have the number of stitches to pick up, in this case  

17 x 3 = 51

Because we are working in 2 x 2 rib our number needs to be divisible by 2, in this case I've rounded up to 52 stitches.


Divide Edge in Half
Now that you have determined that 52 stitches need to be picked up along your edge, take the time to divide the edge into at least 4 sections. In this example I've used chunky yarn, if you are using much thinner yarn or your edge is very long I highly recommend breaking it up even further. 

  
Once you've found the halfway point of your edge place a marker on the fold.


Divide Edge into Quarters
Using your halfway marker to guide you, fold your bottom half in half to determine where to place the 1/4 marker.


Do the same with the top half.


The result is 3 markers dividing your edge into 4 different section.


Calculate Stitches per Quarter
Your final calculation is simply to determine how many stitches to pick up within each quarter section. 

52 / 4 = 13

We now know that we will need to pick up 13 stitches per section.


Pick Up Properly
The key to perfectly picked up stitches is making sure that you pick up in a straight line. Decide where to pick up based on the project. If you are working in a lighter yarn such as DK or fingering you may wish to use an entire stitch as your selvage, this results in a cleaner line. In this case, using chunky yarn, I've decided to only use half a stitch as my selvage to minimize bulk on the wrong side. Be sure to stop every so often and make sure you are staying true to the line you're picking up along.


If you leave the markers in as you go it's easier to rip back to correct stitches that have been picked up out of line without having to recount the entire row. 


Bind Off Evenly
Take the time to bind off evenly. Don't rush through a bind off especially on banding, it makes all the difference in the world if you keep your tension nice and even.


Use the Right Tension
You would be amazed and how important the tension of your bind off can be when working on edges and collars. If an edge is bound off too loosely it can make an otherwise perfect band look sloppy and poorly done. Take the time to redo your bind off if you've bound off too loosely. You'll be happy you did.


The same applies for bands that are bound off too tightly. A collar bound off too tightly can render a pullover unwearable. An excellent way to bind off loosely and maintain an even tension is to use a larger needle to bind off the stitches. If your collar is still too tight try a stretchier bind off such as a sewn bind off.

I hope you've enjoyed my tutorial and that it makes your knitting experience more enjoyable!  Happy Knitting!


you can find all things jane richmond here:


website  |  blog facebook  |  ravelry twitter

thank you so much jane!  ahhhmazing tutorial!  luv ya girlie! this post of jane's is going to be a lifesaver for me and i hope it helps all of you as well.  do you have a dislike for picking up stitches or do you looove it?  let's chat stitches m'dears!  and don't forget to link up your summer sweater knit along blog post in our linky party below....

you can follow along with all things summer sweater knit along:


and a big thank you to our wonderful sponsors! thanks everyone!

additional sponsors:

join our linky party by linking up your "summer sweater kal" blog post!

Knit Like a Nike Ad: Just Do It! (Summer Sweater Knit Along)


it's summer sweater kal day today! yay!!!!  i've got one of my fave knitty pals on board today.  sandra from the blog "three pumpkins little" is here to chat about sweater knitting.  she is one awesome sweater knitter.  she's fast, smart and knows her knitting stuff.  she's also one of our lovely moderators in our ravelry group so some of you prolly already know her skills & pretty photography.  i couldn't resist asking her to come show off some of her handiwork and give you all a glimpse into why and how she started sweater knitting.

here's sandra....


Hi Luvinthemommyhood readers! I’m Sandra from three pumpkins little where I chronicle my crafting, cooking, and parenting adventures.  But today?!  Today I get to be here in Shannon’s beautiful bloggy neighborhood and I could not be more thrilled. Especially because Shannon invited me over as a guest during the current Summer Sweater KAL—I am so honored!

You see, I’m a huge fan of Shannon’s KALs.  They hold a dear spot in my heart because that’s how we met.  It’s hard to believe it was only a year ago when she hosted the very first KAL.  When I saw that she was encouraging knitters to take on my all-time knitting addiction (sweaters!), I knew I was in the right place.
I am a sweater knitter through and through.  In fact, it’s the very reason I decided to learn to knit. And even though I’ve only been knitting for a bit over two years, I’m the proud knitter of over seventeen sweaters!  Of course, hats, shawls, and other accessories might catch my fancy as well.  But sweaters? They are my weakness and I always have one on my needles.

And so, when Shannon asked me to guest blog, I knew exactly what I wanted to share--how accessible sweater knitting can be to even a fairly new knitter.  I wondered whether any readers were out there just like me a couple of years ago: wishing to knit a sweater but feeling overwhelmed at the thought that it would take forever to gain the skills to knit one


If this happens to strike a chord with you, I am here to tell you that given the amazing resources out there, you can do it!  In fact, I tackled my very first sweater as my fourth knitting project, ever.  I know it might sound crazy but we all know that once a crafty momma sets her sights on a certain craft or DIY project, nothing gets in her way, right?


I think this is especially true with knitting.  There has never been a better time to take your knitting to the next level.  Here’s a quick recap of how I went from a complete beginner to a (relatively) experienced sweater knitter in a fairly short time frame.
 

The book that I credit “teaching” me to knit is Stitch ‘n Bitch by Debbie Stoller.  I would have much preferred taking a class but I have three young boys and a rather full schedule as it is—there simply wasn’t time for a class.  This book succeeded where others had failed.

stitch'n bitch
Since I couldn’t get out to a class, I checked in on YouTube regularly.  A simple search of ‘knitting class’ or ‘knitting lessons’ with a keyword (e.g., ‘in the round’ or ‘raglan increasing’) will turn up lots of options.  Grab your needles and knit along!

I committed to practicing 15-20 minutes every day for a couple of weeks.  I didn’t work on a project. Instead, each day I practiced casting on and knitting and purling.  And then I ripped it out.  My goal was to truly learn how a stitch should sit on a needle and train my hand muscles to feel comfortable with the motions (I felt like I had ten thumbs when I started!).

After just two weeks of these short “sessions” I couldn’t believe how much more comfortable I felt. My next goal was to learn how to correct basic mistakes, so I’d drop a stitch and practice picking it up.  I also experimented with different knitting styles to see what felt best.

I think the short sessions were really key for me.  They were short enough to fit in every day but not long enough for me to get frustrated.  After a few weeks, I cast on for my first project: a dishcloth.  My second was another dishcloth and my third was a lacy scarf (I chose a pattern called Branching Out and my notes are here).

I highly recommend picking a small accessory with at least a bit of lace as a “real” project primer to sweater knitting.  It will teach you some basic shaping techniques called for in most sweater patterns—but it will result in a Finished Object (“FO”) quickly.  And nothing motivates and creates momentum like an FO, right?

After finishing up my scarf, I decided to go for a sweater.  Yes, it was ambitious, but I had realized something.  Unlike with sewing, where the act of cutting into my precious fabric can make me break out into hives, there are very few things in knitting that are permanent.  The starting/stopping/ripping sessions had taught me that.  So I picked a sturdy yarn and just went for it.  The result?  A Shalom exactly like I wanted.


And the rest, as they say, is history.

Oh—I should probably mention that I also discovered Ravelry at the beginning of my sweater knitting quest.  It was invaluable and still is!  Just about any question can be answered simply by searching the forums.  And now that the Luvinthemommyhood Ravelry Group is so well established, there is a great group of knitters connected by Shannon’s blog who are online and ready to help whenever a question is posted.
   
So there you go.  I hope that perhaps my trip down knitterly lane might inspire one or two of you out there to join us for the current Summer Sweater KAL even if you don’t quite feel “ready.”  I can promise you that you won’t be going at it alone.  I am so grateful to have this wonderful and supportive knitting circle (I couldn’t get my sweaters done without them!) and can’t help but wish the same for each and every knitter out there.  And when I say “knitter” I mean new knitters, veteran knitters, and future knitters alike—come join the fun!

 Thanks for having me Shannon. Happy knitting everyone!


thanks for coming on the blog sandra!  i heart ya m'dear!  i hope that our little dream of knitting together one day comes true.....xoxox.  you can sandra on her three pumpkins little blog here and on ravelry here.  and don't forget to link up your summer sweater kal blog post in our linky party below :)

 you can follow along with all things summer sweater knit along:


and a big thank you to our wonderful sponsors! thanks everyone!

additional sponsors:

join our linky party by linking up your "summer sweater kal" blog post!

Summer Sweater Knit Along - Knitting with Hand Dyed Yarns with Guest Tanis Fiber Arts!


 i'm so excited to welcome tanis lavallee of the awesome "tanis fiber arts" as part of our summer sweater knit along!!!!  she's one of our rockin' sponsors, the maker of the yarn i'm knitting my project with and an all around sweet & talented canadian gal.  her yarns are to do die for.  scrumptious tones that just scream knit me!  she even designs equally as fab patterns as well.  yep...this gal does it all! 
   when rounding up my list of guest posters i knew i had to ask the lovely tanis to join in.  her post today is all about knitting with hand dyed yarns and it's a good one.  read on my dears and thanks for knitting along with me and don't forget to link up your knit along blog post by using the linky party at the bottom of this post..it's easy i promise! oh...and here's a sneaky peeky of my project as of a few days ago...it's grown since then...
pattern: something silver by veera valamaki yarn: yellow label dk weight by tanis fiber arts in colorway pink grapefruit
 and if  tanis sponsoring our kal wasn't enough she's also joining in!  here's a shot of tanis's gorgeous "nanook" - her summer sweater knit along project.

pattern: nanook by heidi kirrmaier yarn: orange label cashmere/silk weight by tanis fiber arts in colorway
 and now let's here from tanis...

There is so much to say about hand dyed yarns. Obviously, I'm a huge fan, I've dedicated my life to hand dyed yarns! I knit with hand dyes 99% of the time and am always amazed at the nuances in colour, the variety, the subtlety and the magic that happens in each hand painted skein. I think that one of the key factors in what make hand dyes so special is the very fact that they are made by hand. Each skein is unique, and the work of the artist who dyed the yarn is present in each stitch.

Picking the right yarn for each project you tackle involves so many factors; weight, gauge, needle, fiber content... lots of details have to be considered. But beyond that, if you're a lover of hand dyed yarn and you've found the right base for your project, the hard part now becomes picking a colour! Hand dyed yarns come in everything from wild multicoloured skeins, to the most subtle, tone on tone colourways.

Luv-socks

The fancy cable stitch pattern on the sock on the right required a more solid colourway while the pattern for the sock on the left allows the colourful yarn to shine!

Being able to predict how your yarn will behave in your project can be crucial. If you're knitting a pattern with fancy cables or lace and don't want all the details to be hidden by the variegation in the skein, a more subtle tonal colourway is probably a better option. If your pattern is simple and the yarn is to be the star, then go nuts and pick something vibrant and stripy! It's always a good idea to start with a swatch with the motif from your chosen pattern and make sure that you like the way it looks knit up in the colourway you've picked.

Luv-swatches

Always swatch with the colourway you intend to use for your project.

Once you've picked your pattern and yarn, the next step is to decide wether or not you're going to alternate skeins throughout. If you're knitting a large project, like a sweater, and you've got 7 skeins of hand dyed yarn, even though they all come from the same dye lot, it is the nature of hand dyed yarns that they will all be unique, and sometimes there will be a noticeable shift in the way the yarn knits up. In order to avoid having a dark patch of zizags fall right across your bust line, you can knit your entire sweater by alternating skeins every couple of rows, or if the difference is very subtle and you'd just like to feather it out an easier option is to alternate skein every couple of rows every time you join a new ball. I often find that I can get away without alternating skeins for larger pieces, like the body of a sweater, but then when I switch to a smaller stitch count, like for the sleeves, any pooling or striping can become more noticeable and I'll alternate skein from that point on.

Luv-sweaters

The light blue cardigan on the left didn't require me to alternate skeins because the colourway is so subtle. However for the bright Cobalt sweater I alternated skeins throughout, and for the Brick turtleneck I alternated skeins for a few rows ever time I joined a new ball.

Though hand dyed yarns work beautifully for cables and lace, and they add a whole new dimension to stockinette and garter stitch, turning the simple stitch into textural, complex looking fabric. One of my favourite uses of hand dyed yarns is for colourwork! Since the colourways are more complicated then simple solids, a blue is never just a blue, it's got a hint of green and purple and when worked next to a green shade that has hints of blue and yellow, the whole thing just comes to life!

Luv-colour

The colourwork possibilities for hand dyed yarns are endless! With so many tones within each colour, pairing two colours together is more like pairing four!

thanks so much for joining in tanis!  you can find all things tanis fiber arts here:


and you can find all things summer sweater knit along and join in here.

and be sure to check out all our other awesome sponsors...

additional sponsors:

Comfy Knit Ruffle Dress Tutorial with Guest "Me Sew Crazy"


i've got a special guest for you all today!  since my sewing has been at zero right now due to my back i brought in one of my fave sewers today - jessica from "me sew crazy".  she sews like nobody's business..seriously...i swear she sews in her sleep.  when you click on her tutorials page it's like wowsa!  so  much good stuff!  she even sews seasonal collections (tutorials included) for her wee ones! so fun!  jessica was awesome enough to whip up this adorable tutorial for the "comfy knit ruffle dress" just in time for the holidays!  how cute is it!  love it!  this is definitely going to be a staple year round in our closets!

make sure you pop over to me sew crazy where you can find tutorials for accessories....


women's clothes & bags...


and stuff for the kidlets!


love it all!  you are always sure to find something fun and inspiring from this talented momma of 3!  big hugs your way jess for helping this momma out!  you rock!  now onto the sewing peeps..i'm sure you're all dying to know how to make this oh so cute dress because i know i am!

let's hear from jessica...

Hello Luvinthemommyhood readers! I am Jessica from Me Sew Crazy, and I am honored to be here. I think Shannon is one of the sweetest, happiest, and juts downright cutest bloggers I know. When she asked me if I wanted to be a guest on her site, I jumped at the chance!

You see, Shannon has this thing for sewing with knits. She has been so fabulous to teach the blog community and sewists worldwide just how easy it can be, that knits don't have to be 'scary'. She is one of the reasons I picked up the textile in the first place, helping me to conquer my knit fears, and now it is one of my favorite fabrics to work with!!!

With that in mind, I had the perfect dress to showcase for her site...


I have had visions of this oh so comfy knit Christmas dress for over a month now, and Shannon gave me the nudge I needed to complete it! I am so thankful she did too, because I am absolutely in love with how it turned out. It fits like a dream, the ruffles are nice and understated, and my daughter can still run around in it and be a kid!

To make this dress you will need:
  • 1 yard of knit fabric (I like to use a heavier weight interlock knit, as it is typically easier to sew and is better for the colder weather)
  • Basic sewing essentials -thread, scissors, sewing machine (ball point needle when sewing knits)
  • Old T Shirt that fits great for pattern purposes (not too loose, not too tight)
Let's Get Started:

First of all, you will need to determine which direction your knit fabric stretches. Take your fabric and stretch it from left to right, and again from up to down. Interlock knit generally only stretches in one direction. We will want to BE SURE to cut our pattern pieces out with the stretch going from left to right, or widthwise.


Using an old shirt as your pattern piece, lay it out on the fold on top of your knit fabric which is also on the fold. Cut around the top of your shirt, stopping approximately halfway down your shirt. Cut (2) 0f these, one for the Front Bodice and one for the Back.

Alter the neckline on the Front Bodice pattern piece to match your T Shirt, or slightly lower if preferred.

Cut out your sleeves, using the top of the sleeve as your fold line. I wanted my dress to actually be long sleeved, but made an error when cutting the fabric - so 3/4 sleeve it is! But you can make it any sleeve length you want, including sleeveless!

Using your 2 bodice pieces, measure the entire length of the neckline, and cut out a piece of knit fabric that is that length x 2"W. This will be for your Bias Tape Trim. (Be sure your stretch is lengthwise for this piece.)


For your bodice ruffles, cut (4) pieces of fabric that are the same width as your bodice x 3"L.

Lastly, we need to cut our skirt. Depending on how full you want the skirt of your dress to be, that will determine your skirt Width. As you can see, my skirt is not very full for this dress. My skirt is 20"W. The length of your skirt is completely up to you!

I also decided to put a couple of ruffles on the bottom of the skirt, but this is of course optional. To make the ruffles you will need (4) strips of fabric the same Width as your skirt x 4"L.

Let's Start Sewing!!! First we will finish off the bottom hem on all of our ruffles. For this understated ruffle look, I simply put a lettuce edge hem on each ruffle. To do this, set your sewing machine on zig zag stitch and sew the bottom raw edge of each Ruffle. Pulling on the fabric as it is going through the machine will give you the wavy edge, the more you pull = the wavier the hem.


Take your first bodice Ruffle piece and place it right sides together on top of your Front Bodice. The lettuce hem edge will be on top, and the raw bottom edge will be down. Pin the raw bottom edge to the Bodice, I like to start mine around 1" up from the bottom of the armhole. Sew a zig zag stitch over the raw edge securing the ruffle to the shirt.

Press the top ruffle down, covering up your zig zag stitches. Sew a line of edge stitches over the top of the Ruffle.

We are going to now sew each subsequent ruffle underneath your first ruffle, securing the top edge with a zig zag stitch. There is no need to flip the ruffle down as long as you sew the top raw edge underneath the previous Ruffle.

You will have your Front Ruffled bodice when finished. I like the last bottom ruffle to slightly overhang the bodice's bottom raw edge.


Sew the Ruffles on the bottom of your skirt, being sure to mark them exactly the same on the front and the back skirt pieces. Unlike the bodice, for the skirt the bottom skirt's hem is showing, as I will simply lettuce edge that later so that the skirt itself becomes the final 'ruffle'.

Sew a line of gathering stitches along the top edge of each skirt piece. Gather stitches until the top of your skirt is the same width as your bodice.


Pin the bottom of your bodice to the top of your skirt, right sides together, and sew. When doing this for the front of your bodice, be sure your bottom Ruffle is pressed up so that you do not sew it into your skirt.

Press the seam upwards and edge stitch. Repeat for the back bodice and skirt.


You will now have your main Front and Back dress pieces.

Place right sides together and pin both shoulder seams. Sew.

Taking your sleeve, pin the shoulder arc of the sleeve to your shoulder of your dress body, right sides together. Sew and repeat for other sleeve.


You will now have something that looks like this. I like to hem the bottom of my sleeves at this point. Turning the fabric under towards the wrong side and pressing then sewing, either by using a long straight stitch or zig zag stitch.

Fold your dress right sides together, matching up your seams. Pin the sleeve and side seams and sew. Repeat for other side.


We are almost finished! I like to hem the bottom of the dress first, as it is easier. Of course you can go with a traditional hem if you prefer...but we did all of those wonderful Lettuce edges on the Ruffles, why not lettuce edge the hem as well? You remember what to do? Set your machine to zig zag stitch, and gently pull on your dress as the hem goes through the machine, with the stitch going over the raw edge.

Lastly, all we need to do is finished off the neckline. I did not take pictures of this part, as I happen to always refer to a fabulous tutorial by ikat bag whenever binding with knits, which can be found HERE. (I have tried tons of different binding methods, and this is by far my favorite!)

So remember the strip we cut out for our neckline bias tape? First sew that together at the short edge, creating a circle. The circle should be the exact same size as your neckline. Double check now, just in case you need to alter it a bit! Attach your bias knit trim to your neckline using your preferred method - and voila! You are finished!

You now have a super cute, super comfy understated ruffle knit dress for your little one - that can be worn all year round!


As you can see, we made ours for Christmas...do you think she is getting excited or what?!! Lol

Thank you so much for having me Shannon. I am so happy you gave me the opportunity to be here, as well as the incentive to complete this dress! My daughter absolutely loves it.

Wishing all of you luvinthemommyhood readers a very Merry Christmas!


wow! love it and i'm so beyond thrilled that your sewing with knits!! woot woot!  thank you for coming to visit the mommyhood jessica!  you rock hun! and for the record i think you're pretty darn awesome yourself :)  i love this dress and can't wait to make some for my girls!

you can find all things "me sew crazy" here:


i hope you all get inspired and get out those knits! they really are easier to sew with than you think!  have fun with it and happy sewing!!  make sure to add any fun projects you're working on to our flickr group!  i LOVE seeing pics of your handiwork!

Jardain Crochet Coaster Tutorial with Guest Rebecca of Nook


you all know i have a love affair with knitting & sewing but i also adore crochet.  it's the one craft that often get's pushed aside for me though.  it's not that i love it less, or don't enjoy it as much, i just for some reason always have my knitting & sewing battling it out.  so in honor of throwing some crochet love your way i asked one of my good friends rebecca of the blog and shop "nook" to come give us a fun, easy and very fun tutorial over on my other blog "versus" on how to make one of my favorite crocheted things - coasters!
rebecca is one of those people you meet who eats, sleeps and breathes knitting but she also crochets.  i mean seriously people, check out this blanket!!  LOVE!

she knits faster than anyone i know (her hands are like a speedy blur at our knit nights) and i know a lot of knitters. she also seems to have some strange knack for knitting in superhero style...she can be baking bread or making dinner - knitting, talking to me on the phone - knitting, i bet she even knits on the potty..lol. needless to say if there's a chance my bud can pick up her sticks she will.  she's got an adorable etsy shop filled with some of her handmade goodies, a pretty blog and if you live in my city (victoria, bc) she also teaches some pretty rad classes at the cloth castle.  check out her fall listings..where else can you take lessons for jane richmond's super stylish patterns?  plus you get to hang with rebecca and take it from me....she's super fun to be around.  i heart her.  she feeds me and makes me coffee....a lot.


so get those hooks & yarn out and get ready to whip up some jardain coasters!  happy hooking..lol.


click here for the full tutorial over on versus!  come show some love for crochet ladies!!


Macho Man Coaster Tutorial with Marigold from Hideous! Dreadful! Stinky!


last year during celebrate the boy one of the tutorials i loved & included in my roundup was the "make a boy's tie from a man's tie" from marigold of "hideous! dreadful! stinky!" - so cute! so when the talented marigold wrote to me about her new etsy shop "stinky boy!" i was excited! it just opened yesterday so go show her some luv. the shop will be filled with handmade goodies for fellas like the monster tote and toy holster shown below.


when she asked to come on and share a fab tutorial with you all i was even more excited...and i of course, said YES! i mean honestly, check out these friggin adorable macho men portrait coasters! fabulous!!!! i cannot wait to make some!

now let's hear from marigold...

Hello! I'm Marigold from Hideous! Dreadful! Stinky! and I'm excited to share a tutorial on my Macho Men Coasters. The idea for these coasters was born last spring when I made a set of Family Portrait Coasters as a housewarming present for some friends. The Daddy coaster in that set had a full beard, and I thought it would be so fun to make a set of bearded and mustachioed men. I have developed a template where you can mix-and-match hair pieces and facial hair to create the Macho Men of your dreams!


For EACH coaster, you will need:

Supplies:
2 pieces coordinating fabric, at least 5” square
1 piece flannel for interfacing, at least 5” square
scraps of fabric in skin and hair tones, at least 2.5” square each
double stick fusible web (e.g. Lite-Steam-a-Seam 2)
free templates:
PDF of Macho Men Coasters page 1
PDF of Macho Men Coasters page 2

Tools:
sewing machine
coordinating/contrasting thread
marking chalk/marker
iron
permanent fabric marker (in preferred eye color)
turner or knitting needle


Print template pieces onto cardstock and cut them out.
Trace and cut out 5” Circles from your 2 pieces of coordinating fabric and 1 piece of flannel interfacing. For each coaster, you should have (3) 5“ circles.


Lay out the 2.5” paper template and use the paper hair and mustache templates to create the Macho Man of your dreams.


Follow manufacturer directions for your double stick fusible web to apply it to the backs of your skin and hair tone fabrics. For Lite-Steam-a-Seam 2: cut out a piece of the fusible web and peel off one side of the backing. Place it sticky-side down to the back of your fabric and lightly steam iron it on. You can trace onto the remaining paper backing (make sure you reverse any asymmetrical pieces), then cut out your pieces.

You will need (1) 2.5” circle for the face and enough fabric for your chosen hair and mustache pieces.


Recreate your Macho Man using the fusible-web backed fabric pieces onto the front of your coaster. (If using Lite Steam-a-Seam 2, be sure to remove the remaining paper backing. For other fusible webbing, follow manufacturer's instructions.) Iron into place following manufacturer’s instructions for the double stick fusible web.

Use a permanent fabric marker to make two small dots for the eyes (alternately, you can make french knots for eyes using embroidery thread.)

Do any detail stitching by hand or machine. The fusible web should have created a permanent bond, so any stitching you do now is purely decorative.


Place the front and back pieces together, right sides facing, and place the flannel piece on top.


Stitch 1/4” seam around the edge, leaving a 2” opening for turning.


Snip all the way around the circle or use pinking shears and trim as closely as possible to your stitching line. Be careful not to cut the thread.


Turn right-sides out (make sure you turn out the proper two fabrics, not the interfacing) and use a turner or blunt knitting needle to press against the inside seam. Finger press the opening until it looks neat. Press with iron.

Top stitch all the way around the circle, in a contrasting thread if desired.


And that's it! There are so many variations you can do on these coasters. If you make a set, I would love to see it in my Flickr group.

Thank you, Shannon, for having me on your awesome blog!

thank you marigold, for sharing this fun tutorial and for giving us more awesome boy goodies to make & buy for the little fellas in our lives! you rock! look to see more from marigold during "celebrate the boy" month on made and made by rae starting feb. 15th!

what fabric would you use for these? are you planning on making some? i can't wait to make a set with mackenize. #4 reminds me of my hubby when his beard grows in..hahha!

comfy sews vs cozy knits - the final roundup


the battle is over....for this season anyways. i'm sad to see it end, it's been so fun and i am feeling so inspired to create, sew, knit & crochet this winter. how about you? did you get inspired? any new projects you fell madly in love with? just in case you can't remember all the fabulous goodies, guest tutorials, giveaways & roundups that made up "comfy sews VS cozy knits" month i've compiled them all into this post so you can bookmark it and refer to it whenever you need something comfy, cozy or cushy to wear, accessorize or decorate with.

thank you to all the wonderful and amazingly talented guests who joined in on my silly virtual boxing match - you guys are the best! i appreciate you not laughing at my initial email and thinking i was bonkers & for joining in short notice when the idea hit me right at the beginning of the month - i owe ya one! a big thank you to all of you, of course, for voting, commenting, linking and just plain joining in on my silly theme month. i hope you enjoyed it! i'm going to try to bring it back for the spring/summer season so get your dukes up....you can train over the winter :P


would you be interested in seeing a spring/summer month for comfy sews vs cozy knits? should cushy crochet make another appearance? did you make a project from the tutorials this last month and blog about it? let me know and i'll add your link to our list!

Fun Funky Fleece Hat Tutorial with Guest Kelly from Sewing In No Mans Land


i hope you all had a wonderful halloween weekend! we've got our last guest tutorial for you all today and it's coming from the lovely and talented kelly of the blog "sewing in no mans land". kelly joined us a few months ago and shared a great tutorial for the perfect dress to wear post baby or anytime for that matter. you can find the tutorial for the "sunshine, daisies, bottom mellow dress" here.


if you haven't been to kelly's blog yet, go check it out. it's filled with fun sewing tutorials for little boys, little girls (kelly is a busy mom to 2 boys & 1 girl) and women, creative crafts and gorgeous photography (kelly is a professional photographer). the thing i love the most about "sewing in no man's land" is the "the deal" page. click here to find out what is so unique about this fab blog! trust me, it's great :)


thanks for being part of the mommyhood kelly and thanks again for the rockin' coffee you sent me - you're the sweetest :)


now let's hear from kelly...


Happy weekend ladies!!! Kelly here from Sewing In No Mans Land. I am sooo excited to be here at luvinthemommyhood. I have been drooling over all the fun knits and sewn items all month and begged Shannon to give me a turn in the ring. Now, out with the truth, I am a sewer who desperately wishes she was a knitter. There, I said it. BUT I cannot for the life of me figure out how. So, I figure if you can't join 'em beat right? Uh oh that's the envy talkin', better move on. I don't know if the mantra "when mama ain't happy ain't no body happy" is true in your house but in our house it goes a little something like "if mommas havin' fun everyone's havin' fun" and there is a hat in particular that signals to my kiddos that we are about to have some fun! I call it the Fun Funky Fleece Hat.


It is so easy to sew and even more fun to wear!


I particularly like to make them in {team} colors. When I made Finn one for our university's homecoming he ended up on the front of the newspaper AND the school's homepage:


So if you are lookin' for some giggles from your cuties come on over to Sewing In No Mans Land and learn how to whip up the Fun Funky Fleece Hat, it's a TKO haaa! Oh I'm a nerd!

happy hat making folks! so cute! stay tuned this week for a fabulous new giveaway tomorrow, the announcement of the winners for the "magpie patterns giveaway" and the "ysolda teague giveaway" and also, yes, that's right, the winner of "comfy sews VS cozy knits"....who's it gonna be? i'll also be putting all the links and fun stuff from the whole month into one handy post. i hope you have all enjoyed my little theme month and i can't wait to do the next one. i'm planning on not just doing it once a year but possible a spring/summer match and a fall/winter one - it was just that fun for me :)

what was your fave part of "comfy sews VS cozy knits" month? did you make any of the tutorials we had in october? i'd love to see what you made! leave a comment below with the link if you did - it's fun to share :)

City Cowl Vs. Country Cowl Patterns by Guest Anneliese from Aesthetic Nest


whenever i'm in need of a little inspiration whether it be knitting, sewing or crocheting i head over to the aesthetic nest. anneliese has been here before and i love having her guest post. i also love emailing her to whine and share in the joys of mommyhood. she's got 3 gorgeous girls, one of which is a new baby & she still manages to paint, craft, create and throw a darn cute party!


so when you need to stare and drool at some eye candy, find a new project, get inspired and just sit in awe go say hi to anneliese. tell her i sent you and give her a virtual high five for being such a fab mom! but be prepared to want to get out your hooks, needles or sewing machines because for sure you will leave the aesthetic nest with a need to create something handmade.


now let's hear from anneliese.....

Nothing makes my day like an email from Shannon at luvinthemommyhood, and the one titled, "You're gonna hate me..." was no different. I was laughing before the text even loaded on my screen! It didn't disappoint. Shannon was inviting me to participate in a quintessential Fall battle: to sew or to knit?


Of course I couldn't pass it up! She had me instantly. But picking sides was another story.


Call me wishy-washy. Call me conflicted. This is my dilemma every Fall. I am shocked out of my summer projects by cooler weather and the realization that, yet again, I didn't get a jump on things. So then the question is whether to hurry and crank out some sewing or settle in to a knitted project? Do I invest the time in the luxury of a handknit and hope for one or two completed this season? Or do I satisfy my compulsion to cross more things off my list by sewing steadily through the months? There's nothing more frustrating than being forced to chose between two great things!

Well, I usually try to do both. And so it is with this battle. I do kinda hate Shannon ;-) because I have not one, but two projects I'm submitting! Too hard for me to pick, so I'll let you: do you sew a "City Cowl" or knit a "Country Cowl"?


Here is what you should consider. The City Cowl is sleek and a bit sophisticated in the skin print (zebra velboa). It adds some comfy warmth but maintains a bit of an edge.


If you want to really go for the glamorous look it is generous enough (17"x40") to pull up over your head. Perfect for a walk to the office, or the mailbox!


Wear it over a sweater or as an accessory to your tailored coat. It's not too bulky to tuck in around your neck and easier to manage than a scarf if you're running around town.


But, then there is the knitted Country Cowl: Put it on and it feels like the weekend. It makes you just want to snuggle into the couch and slow down. Who doesn't need that? It's like wearing a big hug. And its chunky yarn, rolled edges and textural pattern make a big handknit impact without the commitment a sweater requires.


Plus, I've included a knitted drawcord to up its versatility. Weave it through the holes and you can wear it a bunch of different ways. It can be funky, vintage country, such as this layered sweater collar...


...or cinched under your chin country-Victorian...


...or cinched a bit looser, which may be my favorite.


Both cowls are pretty easy and won't take too much time away from the rest of your to-do list. Decided or not, you can find the full tutorials over at my blog, Aesthetic Nest.

Thanks to Shannon I can have my cowl both ways this Fall--sewn and knit. I guess I'm luvin it!

thanks so much anneliese! i'm so glad i "kinda" made you hate me...hahaha. love the cowls and can't wait to try them out! giant hugs to you my dear!

you can find anneliese on her
blog and on ravlery.

Frosted Glow Cowl Pattern with Guest Melynda from French Press Knits


we've got another knitter in the ring today! please insert my squeals of delight here...i'm super excited to have melynda of "french press knits" here with a new pattern for us all!!! wowsa! now, first off, i have to mention that melynda's infamous french press felted slippers have been haunting my dreams for about a year now and i still have yet to make them. i adore staring at the picture of them in my ravelry faves, posting about them on the blog and just plain daydreaming about wearing them on my chubby toes. in fact, i love these slippers so much they are on my new year's resolution list for 2011.


but don't just stop at her gorgeous slippers. this talented, and might i add gorgeous momma to be, yep, she's preggers with her first baby (due very soon) has a heck of a lot of other goodies to knit up as well. need a cowl, hat, or wrap, french press knits has got you covered. modern, stylish and yes, COZY. it's all about the cozy today folks. so go brew yourself a cuppa tea...curl up on the couch and get a knittin.....


now let's hear from melynda.....

Comfy Knits vs. Cozy Sews. Nothing fires up designers and crafters more than a good old fashioned blog 'battle royale.' I can't tell you how excited I am to be here today. As a knitter, summer is my training season- I've spent months preparing for my time in the ring.

Of course, as a knitter, I already feel like we have the 'one up.' You see, knitting allows us to create our own fabric, taking one dimensional natural fibers and creating two or three dimensional garments. And with just one simple knitted garment, an entire ensemble can so easily be endowed with a touch of luxury.

Let's jump right in, shall we?


Today I have prepared a pattern that is perfect for the colder weather lurking around the corner. Even on a drab day, this 'Frosted Glow Cowl' will be sure to add that touch of luxury (not to mention warmth) to your outfit.


What You'll Need:

1 skein Rowan Alpaca Cotton

Size 8 US needles

Buttons

Needle and Thread

Scissors


Gauge: 4" = 16 sts

Abbreviations:

K: Knit

P: Purl

k2tog: knit two together

yo: yarn over

ssk: slip slip knit

rep: Repeat

RS: Right side

WS: Wrong Side


Cast on 27 stitches.

Rows 1-6: Work in moss stitch pattern (*K1, P1, rep from * to end)

Row 7(RS): K1, P1, K2, *k2tog, k4, yo, k1, yo, ssk, k1: rep from * to last three stitches, K1, P1, K1

Row 8 and every following WS row: K1, Pl, K1, purl to last 3 sitcthes; K1, P1, K1

Row 9: K1, P1, K2, *k2tog, k3, (yo, k1) twice, ssk, k1; rep from * to last three stitches, K1, P1, K1

Row 11: K1, P1, K2, * k2tog, k2, yo, k1, yo, k2, ssk, k1; rep from * to last three stitches, K1, P1, K1

Row 13: K1, P1, K2, *k2tog, (k1, yo) twice, k3, ssk, k1; rep from * to last three stitches, K1, P1, K1

Row 15: K1, P1, K2, *k2tog, yo, k1, yo, k4, ssk, k1; rep from * to last three stitches, K1, P1, K1

Row 17: K1, P1, K2, *k2tog, (k1, yo) twice, k3, ssk, k1; rep from * to last three stitches, K1, P1, K1

Row 19: K1, P1, K2, * k2tog, k2, yo, k1, yo, k2, ssk, k1; rep from * to last three stitches, K1, P1, K1

Row 21: K1, P1, K2, *k2tog, k3, (yo, k1) twice, ssk, k1; rep from * to last three stitches, K1, P1, K1

Row 22: Purl

More of a chart person (me too!)? This one's for you:


Repeat rows 7- 22 until scarflette measures 24". End how you started, with 6 moss stitch rows, and then bind off.
Add buttons, you can use the yarn overs within the pattern as buttonholes.

If you are on Ravelry and want to add this to your project page, you can find "Frosted Glow" here.
You can also take a look at my project page for this project done in a different yarn/gauge for more ideas. While you're there- make sure you say hi!

you can find more about melynda on the following:

blog - http://frenchpressknits.blogspot.com/
facebook - http://www.facebook.com/pages/Hartland-MI/French-Press-Knits/81531969165

and you can find me on ravelry (the best knitting website ever) here.

a huge thank you to melynda for coming to join in the battle, you're the best. it's been so fun chatting with you and so exciting to have one of my favorite knitting designers on the site. best wishes for your new baby and a wonderful birth experience for you and the hubs!


ok folks....are you knitting? inspired yet? i hope you've been finding lots of patterns to whip up this month whether it's knitted, sewn or both. we've got our last round of boxing tomorrow and it's a big one so stay tuned!

The Cup Cozy Tutorial with Guest Andrea from The PomPom


i heart knitting. i heart etsy. when you put those two things together you've got a dangerous combination for me. i spend a lot of time on etsy. drooling. daydreaming. spending imaginary money and just plain getting inspired. i ran across the shop "the pompom" and knew right away that i loved it. bright, crisp photos and fresh, clean designs make for a great shop in my mind. the icing on the cake in this case was that the lovely andrea is from my neck of the woods. that's right, she's canadian and lives in the same province as me as well (bc). so you know i couldn't resist asking this rockin' canadian knitter to come join in the competition to represent right?


i asked andrea to come up with a quick, easy project for "cozy knits" that she would use in her home and she came up with a fun, cup cozy that is the perfect project for any seasoned knitter (embellish your heart out) and especially great for someone looking to take on their first project knitting (don't worry, it's not scary). oh, and you all know i LOVE a cozy. remember the big tea cozy roundup? and teacup month? yeppers...good times. cozies go good with cozy. so get out your sticks or go buy or borrow some, heck your secondhand shop should always have needles kickin' around as well, just some and dive in to the wonderful world of handmade knits...it's cozy here folks :)


now let's hear from andrea......


For me, nothing says "cozy" like snuggling up in my favorite chair with a cup of hot tea, a ball of yarn and a pair of knitting needles.
Ahhhh, the soft yarn breathes comfort to my fingertips as the gentle clacking of the needles drums their rhythm to my soul. My favorite aroma infuses the air around me as I break for a sip of hot, steaming liquid that warms me to my very core. This is comfort.

This is also the inspiration for this post- the "Cup Cozy" tutorial. A simple project, with endless possibilities for variation and creativity. This pattern is basic, so feel free to use it as a starting point and let your mind wander into creative realms of intriguing stitches and unique embellishments.

CUP COZY
(should fit almost any standard size mug)
Supplies:
-pair of sz. 3.5mm knitting needles
-worsted weight yarn

Gauge:
4sts = 1"

Pattern:
Cast on 18 sts.
Row 1: k across. Turn.
Row 2: k2, p14, k2. Turn.
(Repeat rows 1 and 2 until piece measures 9 1/2" (24cm).)
Cast off.
Fold in half to match ends; stitch the first two
stitches together at either end to form band for mug that will fit over handle. Enjoy!

To see more adorable patterns by The PomPom visit our Etsy Shop:

thank so much for joining in andrea! i really appreciate it! don't forget to sport our button to show your support for either comfy sews or cozy knits :) you can find it on our sidebar.


alright knitters, who else out there loves to knit up a cup cozy? have you made one before? what's your fave pattern to use?

*all images copyright andrea the pompom

Shawl Collar Sweater Tutorial with Guest Lindsay from The Cottage Home


you guys all ready for another great tutorial today? i am! the oh so talented lindsay from the etsy shop "the cottage mama" and the blog "the cottage home" is here today with a fabulous tutorial marrying knits & sewing together to make a lovely shawl collar sweater. how about curling up outside or inside for that matter in this felted comfy & cozy sweater.


i spotted lindsay's blog a while ago and just swooned when i saw her blog and her shop. ohhhhhh, all i have to say is the clothes are to die for! the fabrics, the personal touches, the flawless sewing....i want it all for my girls. so precious. she has this knack for putting together such modern and fresh pieces that still feel timeless.


lindsay is a busy mom of 2 girls and i have to say i just luv her. i like to say her and i were just meant to cross paths in life. one day, whether it's a year or 10 years from now i'm going to that gorgeous cottage house of hers and i'm gonna sip on her hubby's award winning bear, drool over her large fabric stash and plant my butt in her sewing room and maybe never leave..hahaha. she's one of my fave people to chat with online, whether by email, facebook or yes, once i even phoned her to squeal in her ear about how much i adore her when some beautiful goodies of her's arrived for my girls. to this day this dress (pic on the left) is one of my prized possessions. when i found out maggie (whom i adore from smashed peas & carrots) and lindsay live in the same town it brought tears to my eyes. hopefully the 3 of us will be able to meet up, sip some coffee, talk about sewing and let all our kiddos play together but in the meantime, hanging in this blogging community is almost as fun!


make sure you stop by lindsay's blog to see what she's up to whether it's a yummy new recipe, a fantastic new tutorial or a craft to brighten up your home, the cottage home's got it all. happy sewing and shopping i cannot wait to make this! i'm off to find some wool to felt :)

now let's hear from lindsay....


I'm so excited that Shannon asked me to be part of this month long battle she is having - Comfy Sews vs. Cozy Knits. Guess which side of the ring I'm on?


For those of you that know me, you know I am all about the sewing over on my blog, The Cottage Home. On a rare occasion I pick up my crochet hook and maybe someday I'll learn how to knit, but for now, the sewing needle is my tool of choice.


As of lately I've been slightly obsessed with felted wool. I thought this would be a great project to bring some of those on the "Cozy Knits" side of the ring over to the dark-side, "Comfy Sews". Surprisingly this project has minimal sewing and does not even require a sewing machine (though there is some hand-sewing involved). So if you have ever thought about trying a sewing project, trust me, this will be right up a beginners alley!


I don't know if you'll believe me, but this is just one large oval of fabric! You can use regular fleece fabric, recycled felted wool sweaters or, if you knit, you could simply knit your own fabric oval and felt it. If you have never felted wool before, click here to view my latest tutorial.

Let's get started..........


Click here for the full tutorial and happy felting!

thanks so much Lindsay!!! hugs!

tomorrow we've got a giveaway and a knitting tutorial so come pop in! join in on the fun! sport our button (on the sidebar) and show your support for either comfy sews or cozy knits....only one week left...who's it gonna be?

have you felted wool before? what did you use it to make? was it fun? i've never done it but i sure am going to try now!

The Billy Cardi Tutorial with Guest Katy from No Big Dill


when i opened my inbox the other day and saw what katy from the addictive blog "
no big dill" had whipped up for comfy sews VS cozy knits i swear i squealed and ran around the house doing a happy dance! wowsa! when she told me she was planning a cardigan i thought great, but this is fantastic. so simple yet so fabulous!!!!!!!!!!!!! comfy, stylish and easily personalized. i've been so excited to show you all!


if you haven't been over to visit no big dill, make sure you go. katy is a busy mom of 5, yes i said 5, gorgeous kiddos. i have to admit that katy's blog is one of the blogs that i am a lurker on. i never comment, just stare in awe at all she creates and of course, how gorgeous and stylish she is. i would like to know how she stays so slim after 5 babies and how she has the time to sew & blog. i find it hard enough with 2 nevermind 5! i'm always so busy cleaning up my drool after staring at all the goodies she makes that i can't manage to type my thoughts to her posts.


katy, i bow down to you. thank you for all of your lovely & amazing tutorials, inspiring photographs, humour, wit and the power you have to make me want to drop everything i'm doing and become a better sewer. and thank you for actually answering my first email ever to you asking you (while crossing my fingers you would say yes) to come join in on the fun over in the momyhood - you rock! i hope it's only the beginning and we can share many more emails in the future.

now let's hear from katy....


The Billy Cardi

I'm gloved and ready for my time in the ring!

Thanks, Shannon, for letting me duke it out here at luvinthemommyhood today.


I never knew my cardio kickboxing VHS would actually come in handy for using my uppercut, thanks, Billy Blanks.


What do the sews have that the knits don't? Well, a lot. But one in particular is the ability to snip here and there without redoing the whole thing: raw edges, of course! So I thought we sewists could use that to our advantage in this piece. Not only raw edges, but inside out seams. Whoa. We're getting crazy over here!


What I chose as my muse? Ribbed knit.

Ribbed knit is so stretchy and forgiving and COMFY!

You can see the ridges in the fabric that give it that extra s t r e t c h.

You'll need:

2-3 yards [depending on size and width]

Thread*

A long sleeve t-shirt pattern OR an old t-shirt cut along the seams that is pre-washed/dried, we don't want any shrinkage after we've put all this effort into our new cardi.

Butcher or freezer paper

and

just a bit of courage ;)


*Let's talk thread before we begin throwing punches.

I used a regular polyester for the primary sewing

For the decorative stitching [more on that later] I used Sulky thread which you should not use for seams as it is a very weak thread, but provides some shine to your stitches. I used a shade darker for even more of a statement, but you can certainly use the same thread as your seams if you'd like.


If you are using an old t-shirt, trace each piece on some paper, adding 1/2" seam allowance around the whole thing, but don't cut it out yet. This is basically what you should end up with:


Next, we're going to add some COMFY changes:

lengthen the sleeve 2-3 inches

extend the front neck up at the stitching line (1/2" from edge) and out 8-10" and down

extend the back neck up and out and down to other side


This might hurt as you do it and cause great anxiety, but you're going to put WRONG SIDES TOGETHER for the shoulder/neck seams. Bare with me. Stitch with a very slight zig-zag [as in you can barely tell] which will still allow stretch for the fabric. This seam allowance will be visible on the outside of the garment. Hang in there! Trim seam allowance to 3/8" on both sides, pin flat and use a decorative stitch on the very edge.


Test this decorative stitch on a scrap! Trust me, those decorative stitches are like teeth knocked out to remove. Trust me. Really, just trust me on this one. I chose a blanket stitch [#9 on my machine.] But I also increased both the length and width of my stitch to the maximum to make it a big stitch.


I would suggest not using a plain zig-zag stitch, though. We want it to look homemade in a good way. Next stitch the sleeve cap in with RIGHT SIDES TOGETHER in the arm hole. No need to do a double basting stitch on the sleeve cap. Just match notches, pin in place and stretch it to fit. Your final stitching will be the sleeve seam, keep your needle in the "down" position at the armpit, pivot and stitch the side seam as well. Repeat on other sleeve/side seam. All other edges are left raw and provide some nice draping effects.


I tested a couple different stitches to see which one I like.

You can wear it belted and open.


and those extra long sleeves? So comfy and warm.


Or, for a more sophisticated look, fold one side over the other and pin in place


I love how the decorative stitching looks like a faux epaulette. Who doesn't love an epaulette?


GO COMFY SEWS!!


You up for the challenge, knits?

ohhhhhhhhhh, so fun! in the words of rachel zoe...."I. Die."

make sure you sport our button to help join in the battle! who's gonna win? who are you rooting for? i've got a lot more fun coming your way next week! some new tutorials (some from guests & maybe some from me), a giveaway, and our last round of boxing.


i know there hasn't been a weekend wishes lately (hope you all don't mind) and i wanted to let you know they will be back :) this weekend i'm hoping to get some wrist warmers done, a tutorial finished, a sewing gift complete and to find that perfect pair of dark wash skinny jeans. cross your fingers for me! what are you guys up to? anyone recommend a great, inexpensive pair of jeans to buy while in between sizes? i'm still losing that baby weight and don't want to spend too much.