it's monday ladies...time for some sewing with knits and i've got a new tutorial that i've been super excited to show you all!

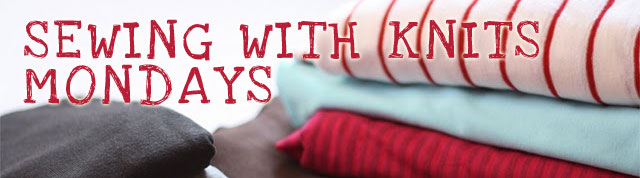
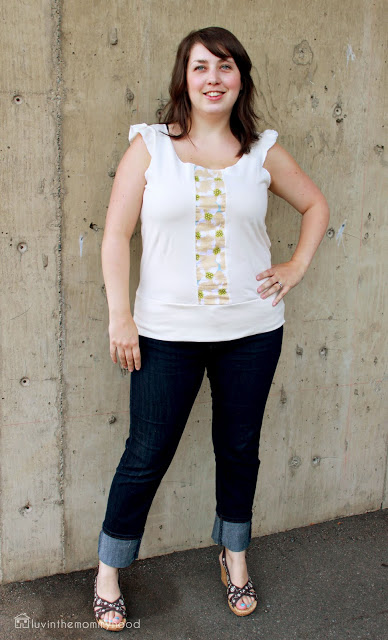
it's the "jane with a pop top"! a soft, comfy top sized to fit you that has a special POP of fun in the front to add some spice to our mommy life! and seriously, we all know that when we are at home with the kidlets a lot a little spice goes a long way :P this top is named after the lovely jane richmond, knitting designer extraordinaire & friend of mine. she's got what i like to call "casual flair". she's always stylish & hip and also always looks comfortable in her clothes. there's that one thing on jane that seems to pop even if she's just in jeans and a tank so i only thought it fitting to name this one after her. i spend a fair bit of time with my knit night gals and will be doing a few tutorials in the next few weeks that will be named after these special women but i'm not spilling the beans on who's next...
so go find some knit fabric in a bit of a thicker weight, you want something not too flimsy or thin but not as heavy as sweatshirt material and then coordinate it up with a fun print or solid for some sass!
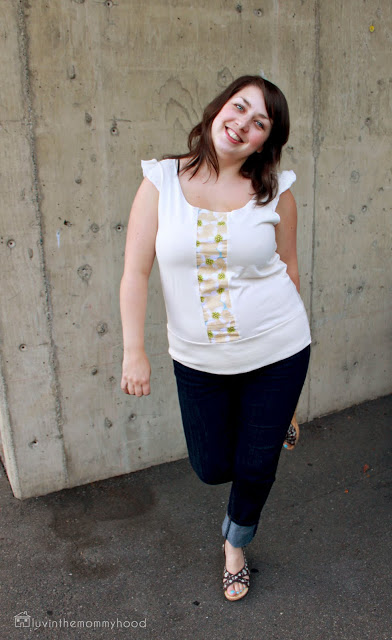
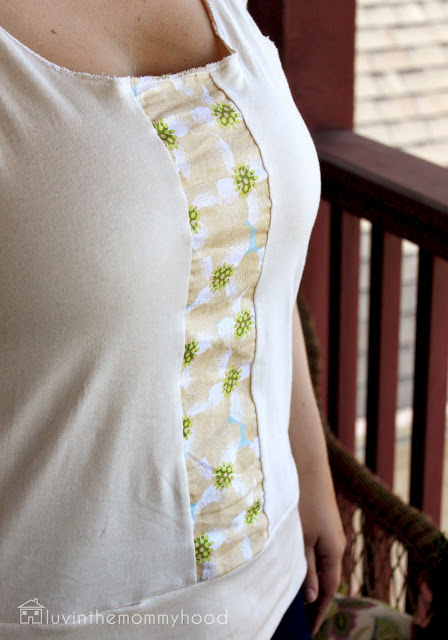
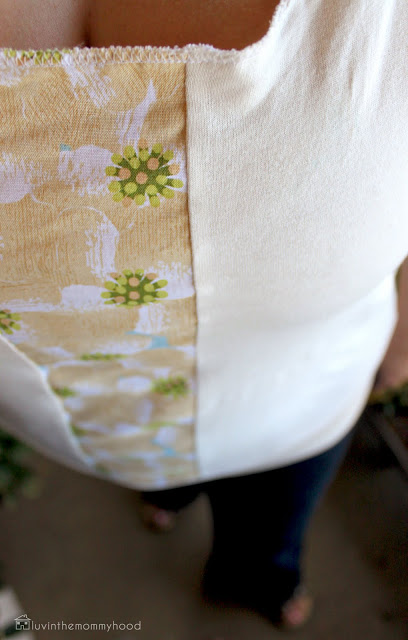
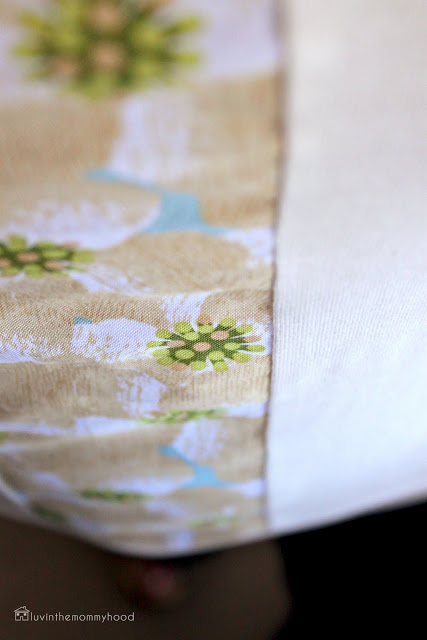
i decided to go with the same cream i used for the "poppy top"...i know i'm daring...a white top with kids...am i nuts? nope...just living on the wild side..haha. then i added a pretty flower print in the middle for some color. see that little bit of turquoise in it? yep, there's turquoise in it and it matches my toenails. love.
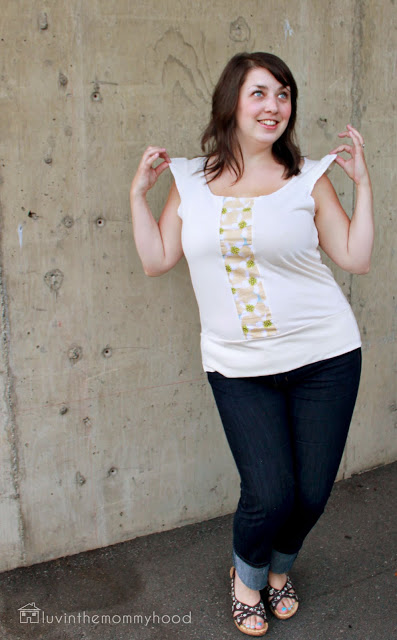
i'm really into designing tutorials right now that are open to a lot of customization for you guys so you can still add your own personal flair, style and special touches to suit your body shape, size & make it flattering. this top is simple in construction and easy to wear. super comfy, stretchy and it fits in all the right places without accentuating those dreaded extra post baby pounds. a big coup in our household. it's also good for us busty and non busty gals.
this is a great project for an advanced beginner and up and is something that would be fun for even an advanced sewer to customize and play with! so let's get ready....
***Copyright 2011 www.luvinthemommyhood.com
All rights reserved. For personal use only. Please do not sell items made from this tutorial unless permission has been given.
materials:
- stretch/knit fabric that will fit the size of your body and your pattern pieces (approx 1 yard)
- piece of quilting cotton (or other light material) to use as center fabric (should be long enough for the length of your top and as wide as you would like your strip).
- sewing machine
- scissors or rotary cutter
- paper for tracing pattern (optional - i like to use freezer paper for tracing my pattern pieces on. if you choose not to trace your pieces you could pin the top you are using directly onto your fabric and cut but i find this really hard to get accurate cutting when using knits...they are slithery little buggers)
- coordinating thread
- needle for your sewing machine for sewing with knits. a lot of people recommend using a ball point needle.
instructions:
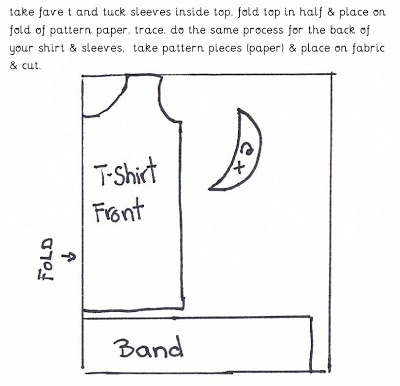
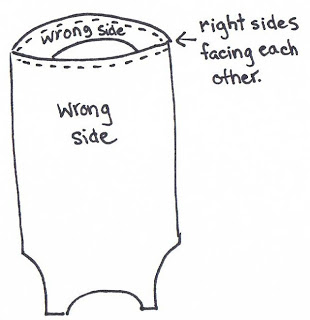
1) taking a favorite tee/shirt lay out your top to use as your template. see the picture below to show you how to trace this out or follow one of the many online tutes showing you how to do this. you could also follow the instructions for the "MODify Dress tutorial" and just not make it as long as the dress. this is basically what I did to get my base pattern pieces.
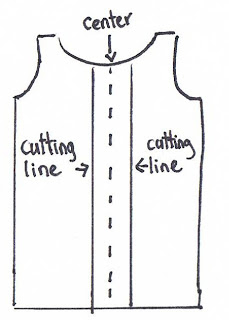
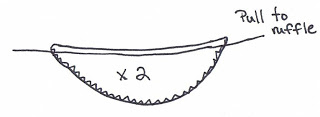
4) we're now going to make that pretty front of your new top. getting your cotton out pin your strip of cotton to one side of your front with right sides facing and sew with a 1/2" seam allowance. now depending on your machine and it's bells and whistles you can do what i did and use a sewn overlock stitch and just go for it, trimming your excess off after or you can stitch down with a zig zag stitch (if this works for your machine for stretch), or use a straight stitch with settings to match your machine for sewing knits. you could also just use a serger if you have one. take care to make sure your cotton is straight if you are using a print and that the stretch of your cotton goes from left to right not up and down.
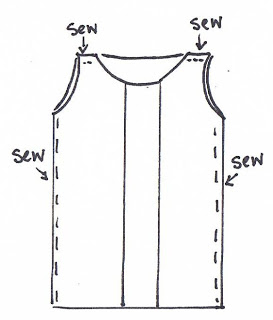

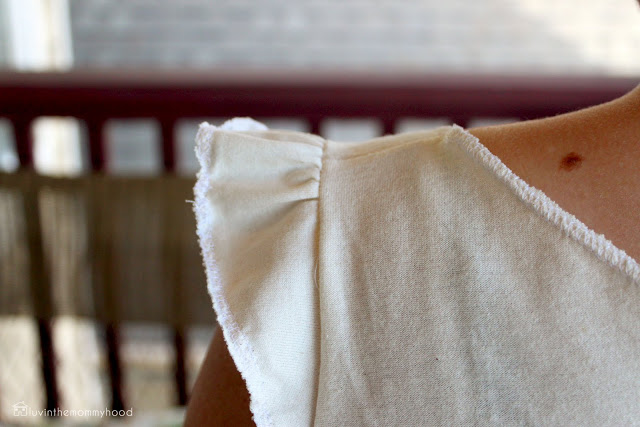
6) now that you have the back/front joined and the shoulder seam done you can attach your band (make sure if you have made any adjustments to the sizing of your front/back during the sewing process that you also adjust the width of your band). take your band and fold in half (top to bottom) and press. pin your short ends together and stitch this so that the band is equal to the overall width of your entire shirt (the measurement you found in step 2).

***Copyright 2011 www.luvinthemommyhood.com
All rights reserved. For personal use only. Please do not sell items made from this tutorial unless permission has been given.
i can't wait to see what you guys come up with! there are so many different ways to do this top! get creative and most of all have fun!!! happy sewing! go get those knits :) make sure to check out the goodies anna's got over on noodlehead today as well!
have you been enjoying sewing with knits mondays? have you been inspired and made some knits projects yourself? make sure to add your pics to our new flickr group for "sewing with knits mondays"! anna and i can't wait to see what you've been making!