

i know i've been talking a lot about sewing on here the last year or so, but that's because it's new and exciting for me. truly though, my very first crafting love affair is with knitting. it's my old pal. the one i go to when i need to de-stress, escape with my thoughts and cozy up with my wool and a worn pair of needles. an old friend. one that stuck with me through bad breakups, illnesses, lonely nights, high school, and even childhood. you can wear it, hold it, decorate with it, make art with it, heck do what you want with it - now where can you find a friend like that? that being said, this bonanza just wouldn't have been complete without one of my fave knitting designers - jane richmond, to come join in.

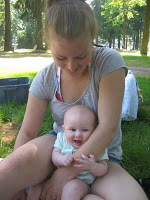
jane's work is fresh, fun, and timeless. she's a total sweetheart and even lives in the same city as i do now! finally, i get to meet a fellow crafter/blogger who inspires me in person! wowsa! i flipped out the first time i spotted jane's patterns on ravelry and then saw she lived on vancouver island as well. she was one of our early "moms in the mommyhood". you can read her interview with me here. since then i've been hooked and a faithful follower of her patterns. my baby sister wanted a new hat for xmas last year and guess who's won out? you bet - jane's. pasha was made. ahhhhh, lovely...take a peek at my finished pasha here.
so are any of you itching to get knitting? wanna learn how? wanna join in on the addiction? come on....you know ya wanna....it's fun! you can find jane on ravelry, her etsy shop, her blog and her facebook page. happy knitting! i promise your sewing machine will forgive you :)
now let's hear from jane......
Hi all, my name is Jane and I design knitting patterns. I am so excited to be included in this never ending Baby Bonanza! Let me just say that when I received the invitation from Shannon I thought surely I was on the wrong mailing list because the talent of this crafty Mommy line-up is frankly quite intimidating!
 A little about our birth story...
The moment Chris and I began the discussion of babies we were pregnant, it happened so quickly I barely had time to mentally prepare. I had one of those miracle pregnancies where I never had morning sickness, no stretch marks (according to one nurse it’s a redhead thing?), I felt great, my body even put a halt to my cup a day caffeine habit (I couldn’t even stand the smell of coffee!). Being induced 3 weeks early was an entirely different story. I’ve learned so much from my 2 ½ years as a Mommy and Elsie amazes me everyday. Is it just me or do they just get progressively more fun?
Two golden nuggets I’ll pass down to anyone expecting their first...
• don’t have any expectations of how things are going to go because the likely hood of things going as planned is slim to none and you’ll only set yourself up for disappointment.
• if you start planning your second too soon you won’t truly be able to enjoy your first. Once I stopped “planning” I started living more in the moment.
Enough about me, let’s move onto the tutorial I have planned...
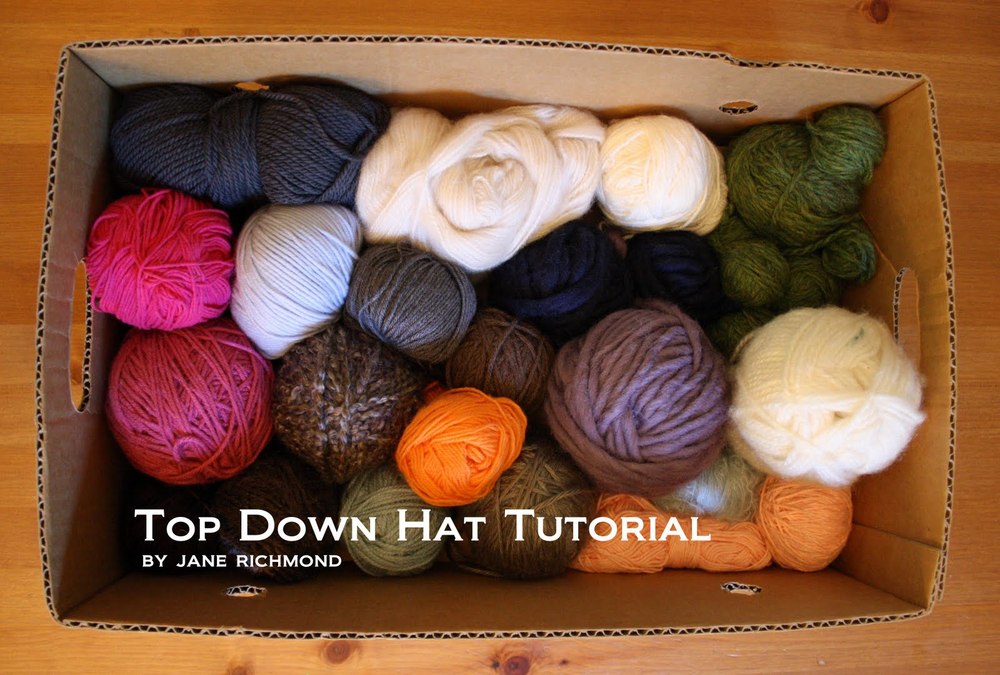
A really easy way to use up odd balls of yarn is with a top-down hat. You don’t need a pattern and you can use any yarn you have lying around because there is no recommended gauge to follow.

You will need:
• One random ball of yarn
• Set of 5 double pointed needles
• Yarn needle
Abbreviations:
K – knit
Kfb – knit into the front and back of the stitch
Rnd(s) – Round(s)
Instructions:
Using one of your double pointed needles cast on 8 stitches. Divide these stitches evenly among 4 of the needles, 2 stitches per needle.
Rnd 1: kfb to the end of the rnd.
Rnd 2: (and all even rnds): Knit to end of rnd.
Rnd 3: [k1, kfb twice, k1] to end of rnd.
Rnd 5: [k2, kfb twice, k2] to end of rnd.
Rnd 7: [k3, kfb twice, k3] to end of rnd.
Continue to work as established by adding 2 stitches to the repeat like so:
[k__ + 1, kfb twice, k__ + 1], for example the next rnd will look as follows... Rnd 9: [k4, kfb twice, k4].
Continue these increases until the desired circumference is achieved, it’s a good idea to stretch your work a little when measuring for a fitted hat that isn’t going to fall off. If you are making the hat as a gift or you don’t have access to your model, below is a chart of average head measurements.

Knit every rnd until the desired length is reached.
*Note: Once you’ve established a few inches of length you can do a fit test, this is of course if you have the recipient on hand. To do this transfer the stitches to scrap yarn or a long circular needle and give it a try on.

Bind off loosely.
Using yarn needle, thread the tail from cast on into the 8 stitches of the cast on row and cinch to close the hole.
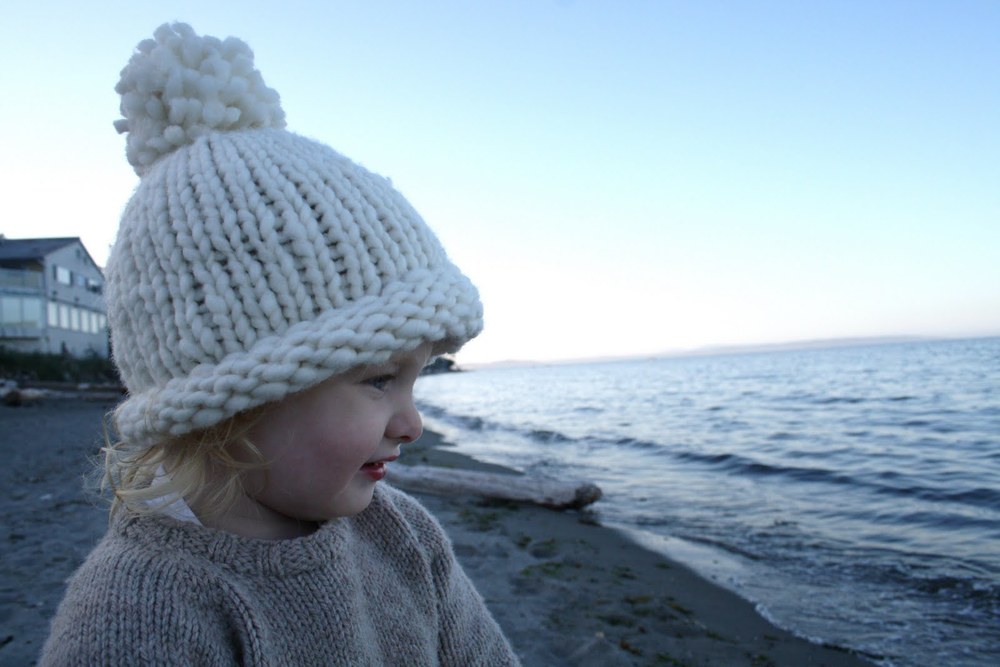
Fun Suggestions:
• Stop short of the desired length by a few inches and work a ribbed, garter stitch, or seed stitch brim.
• Instead of closing the hole at the crown add a fun pom-pom to cover it up.
• Use more than one colour to make fun stripes
• Use up odds and ends in your stash by applying simple embroidery
• Add ear flaps for an extra toasty toque
Thanks for having me Shannon, it was a lot of fun putting together!
You're welcome jane! thank you!!! can't wait to meet you and your little lovely in a week or so!
guess what folks, it's the last week of the babyhood bonanza! i'm sad...but i promise to have lots of fun goodies coming up this week! so stick around!
are you on ravelry? leave me a comment below! i love finding you ladies on there! you can find me under "imstitched".