
Note: This post went up over on the lovely blog "see kate sew" earlier this month for "ruffles 2012" - (awesome stuff in this theme month so make sure you pop over and say hello) and I thought it would be fun to repost over here on the mommyhood for those who missed it. I've been using mine non-stop and LOVE it. Happy sewing!
I love little handmade treasures that are fun to make, interesting in construction, easy to personalize and add a big pop of pizazz to your sewing notion repertoire! Anytime I can pretty up my notions and supplies I'm in! Add a ruffle to it and I'm sold. I've got a thing for needlecases and I thought I would show you all how to ruffle up the style of needlecase that I use. I've noticed lately that the booklet style has become very popular but there is something about the size, shape and construction of this one that I just adore. It's one of my fave go to gifts for special little pressies and also a good project for beginners to work on there topstitching and hand sewing. Want to know how to make one too?

Materials:
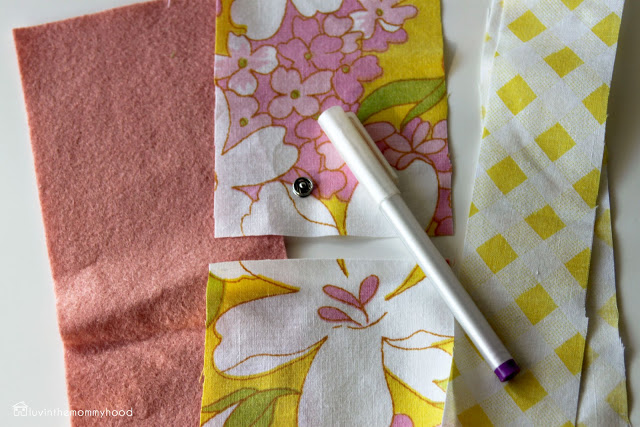
- Scrap of outer fabric big enough to fit dimensions below (fat quarter is more than enough) I used a vintage sheet but any quilting cotton would work.
- Scrap of coordinating fabric for ruffle to fit dimensions below.
- Scrap of felt for lining to fit dimensions below.
- 1 sew on snap (size of your choice).
- Fabric Marker
Cutting Directions:
Keep in mind if you are using a print it will be shown vertically on your finished product so cut your rectangle with the longest length going from the top to bottom of your fabric (height wise) not from left to right (width wise). See pic below.
- Cut (1) rectangle out of your outer fabric at 4 3/4"H x 3"W *see notes in next line.
- Cut (1) rectangle out of your outer fabric at 3 1/4"H x 3"W (if using a print make sure this matches up with the rectangle above if you'd like the print to flow). *I chose to cut one large rectangle at 8"H x 3"W and then cut the small rectangle off of the bottom of it so the print matched up great.
- Cut (1) rectangle of felt at 7 1/4"H x 3"W
- Cut (1) rectangle of fabric for ruffle at 10"H x2"W
Instructions:
Note: All seam allowances are 1/4" unless otherwise stated.
1. Prep and cut fabrics as per the cutting directions listed above and gather supplies.
2. Let's get that ruffle ready! Take your coordinating piece of fabric that you are using for your ruffle and fold it so your right sides are facing each other as shown above. Pin and sew along the long open edge (you are only sewing this one side). Turn fabric right side out by pulling through either one of your open short ends. I use a loop turner to do this but a knitting needle/crochet hook work great too. Press your tube with your seam on the center bottom so when it is ruffled you will not see the seam. You ready to ruffle?

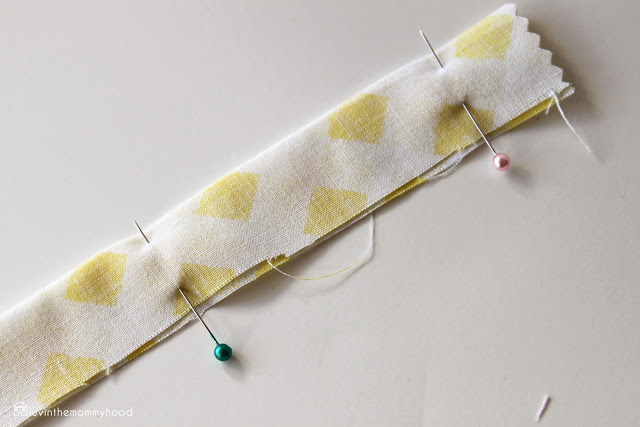
3. Let's get ruffling! Set your machine to a basting stitch on a long stitch length. Remember that you don't need to lock any of your seam ends so no back stitching. Also it's helpful to leave long tails on either end of your tube. On some machines the stitch length can be set so it will just ruffle your fabric right up for you. But if yours doesn't follow these steps: take the tube you just made and with the right side up you are going to sew one straight line down the center of the tube starting at your short end and working down to the other short end (see image above). Remember do not back stitch and leave a long tail.
You are now going to use that long tail to make your pretty ruffle. Using your bobbin tail end only (this will be the thread tail on the wrong side of your fabric) pull this thread gently while sliding your fabric along your thread as it ruffles. Do this until you get your desired amount of ruffling and the length you need for our needlecase. In this case I did very tight ruffles and I also have a thing for making my ruffles longer than needed so I have room to play around with how tight I want them. I left my ruffle long until I pinned it on so I had room to move the ruffles and make any adjustments before I cut off the remaining ruffle length.
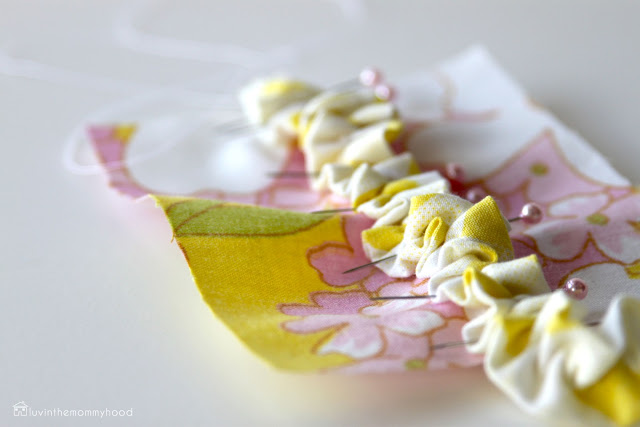
4. The next step is to pin the ruffle right side facing up on your larger fabric rectangle (right side facing up) from one short end to the other short end as shown in pic (2) above with your ruffles spread evenly. I use a lot of pins when stitching down ruffles as they move and they can be tricky sometimes to keep straight when you have as many ruffles as I do on my needlecase.

5. Get ready to sew! Go slow here and remember to set your machine settings back to your normal settings and normal stitch length. I forgot until half way through my seam - oopsie..lol..so I knew I should remind you guys as well. You can now back stitch and lock your ends as well. Trim that ruffle up so it's even with your rectangle as well. See image above. You can now choose to take your basting stitch out but I always manage to rip out the wrong one so I got a tad lazy and left mine in. My ruffle is so tight that you can't tell unless you really inspect it ;)
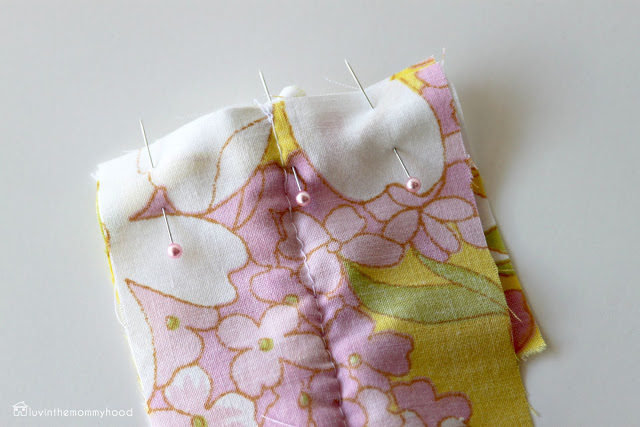
6. Good job! We're half way there! Now grab the small fabric rectangle and your large fabric one and place them right sides facing each other and pin across the bottom short end so your ruffle is still in the center. See where my sewing line (and my bigger stitches..oops) is in the pic above? *Hint: make sure if you are using a print and cut it to match that you have placed your fabrics so that these ends match up good because these are the ends we are sewing back together. Sew theses 2 rectangles together using a 1/4" seam allowance.

7. You should have one fabric rectangle now as shown in the image above. Press your fabric so your seam allowance lays flat.

8. Get your fabric marker out. We're going to mark the placement of the snaps on your felt and outer lining piece. With your felt lining and outer lining wrong sides facing each other measure in 1" from the bottom outer edge (the edge of the rectangle that you just stitched onto your outer rectangle in step above) of the right side facing of your outer fabric lining (see the image after step #12 for a finished shot). Mark the center point here. *Hint: this is the part of your outer that has no ruffle on it. Now measure in 1" from the top of your felt lining (right side facing) and mark the center here for the other part of your snap (see image 2 after step #14 for another finished shot). Trust me, this sounds & looks above way more complicated than it is. It's one of those things you just have to put into action. Once you have the fabric/felt together you can imagine how it will be folded and where your snaps go following the diagram above. *Note: the dashed lines represent the outer lining.
9. Using the two parts of your snap attach the female one to your outer lining and the male one to your felt lining by hand stitching or using a snap tool. Double check that your snaps line up.

10. Now that your snaps are sewn in place we can sew the case together. Place your outer fabric and your felt pieces right sides facing each other. Pin & sew around the entire perimeter with a 1/4" seam allowance taking care to leave a 2" opening on one of your long sides to turn the case right side out through.

11. Trim your corners so your needlecase will lay nice and flat with a nice corner when turned right side out. Now turn the needlecase right side out. Press your needlecase. Pin your opening shut and topstitch close to your edge around the entire needlecase. *Important: when you get to your ruffle lift the edges up and topstitch as far as in as you can without sewing on the ruffle itself and then backstitch and end your sewing there. Start back up again doing the same thing on the other side of your ruffle. It looks prettier that way and then you don't lose any of the ruffliness of your ruffle (see image above).

12. Measure down 1.5" from the top of your needlecase (the part with the ruffle) and mark this with your fabric marker. Stitch a line across the case here to form your top flap.

13. Measure 2.75" from the bottom of your case (the part without the ruffle) and mark this with your fabric marker as well. Stitch a line across the case to form your bottom flap.


14. You will now have two lines stitched across your needlecase which will help in the folding of your flaps to form your needlecase. Test your pretty new needlecase out! Isn't it cute? So adorable right?


Now grab all those pesky needles and load your needlecase up. I like to keep all my needles, a few pins and some safety pins in my case. You never know when you are going to need any of these and since I keep my needlecase in my zippered pouch with my knitting notions I use it for both sewing and knitting.
The fun thing about this needlecase is that you could totally play with the fabric combinations! Go ahead and quilt it, embroider it, use floss and handstitch the topstitching, add more ruffles just have fun and go nuts with it! Personalize it....it's yours after all :) I couldn't resist the combination of that pretty pink with bright sunny yellow vintage sheets to brighten up my rainy spring days. Makes me smile just looking at it.

Want to show off your needlecase too? Make sure you add your ruffled needlecase to Kate's Ruffles 2012 flickr group and our luvinthemommyhood flickr group. I can't wait to see all the fabrics and the ruffles ladies! You can find all the rest of Ruffles 2012 on See Kate Sew here!
What fabrics would you use for yours? Do you have as soft spot for little treasures and vintage sheets too? Happy sewing & ruffling! And don't worry...there's another tutorial coming your way this week :) Yay! The hubs has a day off today for the first day after tax season so I'm taking the day off. See you on Wed!