


now let's hear from lindsay......
Wow, I'm thrilled to be back at luvinthemommyhood as part of the "Babyhood Bonanza". My name is Lindsay and I am here from The Cottage Home (blog) and The Cottage Mama (etsy shop).
 I have two darling little ladies of my own - Savannah Rose (2 years) and Matilda Jane (11 months). Being a mother is the best thing to ever happen to me. It has grounded me, created a very clear direction for my life and has given me the drive to follow my dreams. If it weren't for my girls, I would not have started my blog, I would not have started my children's clothing business, and I would not be here sharing my Dress Shirt Sleep Sack Tutorial with all of you. My girls are the world to me and have definitely shown me the meaning of true love.
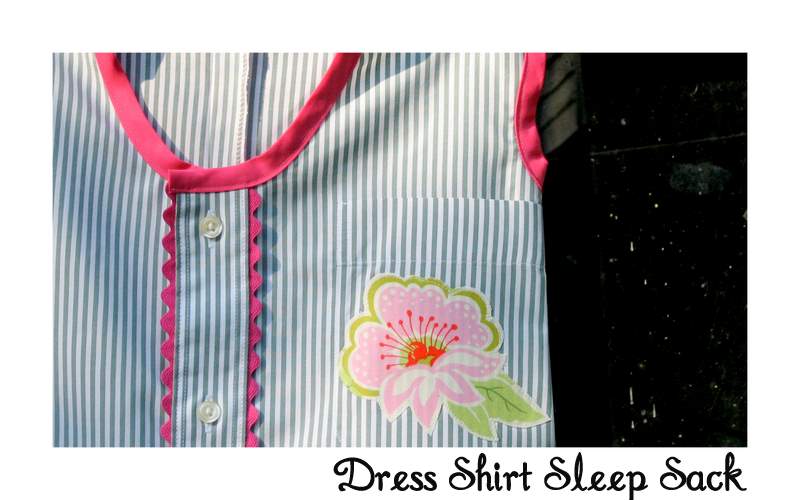
I don't know about you, but for the first year or so of my girls life they spend most of their time sleeping in a sleep sack. I never have enough sleep sacks - they always seem to be in short supply, but they are pretty expensive at $20 a pop. So that's where today's tutorial comes in........Dress Shirt Sleep Sack Tutorial.
I have seen so many tutorials for men's dress shirt refashioned into little girls dresses, which are SO adorable and I've been meaning to make one (or two) for my girls. But here's a new twist - make your little lady or little man a sleep sack out of their Daddy's shirt. Use a 100% cotton dress shirt for a light-weight, summer sleep sack and use a flannel, button-down for a cozier winter sleep sack.
The idea of my little baby Matilda all cozy in her crib, wrapped up in her Daddy's shirt, just warms my heart.........can you feel the love?
Supplies:
1 Large Men's Dress Shirt
Bias Tape
Scissors
Thread
Sewing Machine
Iron
Baby Sleep Sack (to use as a pattern)
Rick-Rack, ribbon or other trim (optional)
Fabric for applique (optional)
Fusible Interfacing - I like Wonder Under (if doing applique)
Directions:
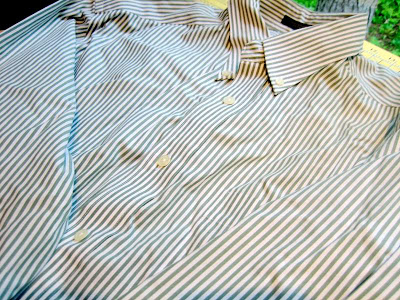
Grab a men's button-down dress shirt - preferably from your little one's Daddy or Grand-Daddy. But if your hubby doesn't have an extra one, just pick one up at your local thrift store.
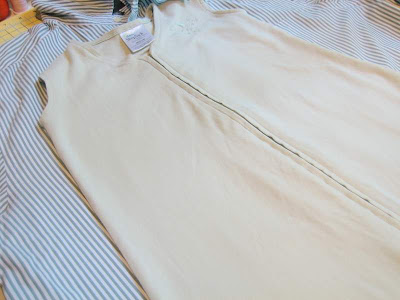
Lay your regular sleep sack on top of the dress shirt. Line the zipper of the sleep sack up with the buttons of the dress shirt. A large men's shirt is the perfect size for a 6-12 month sleep sack.
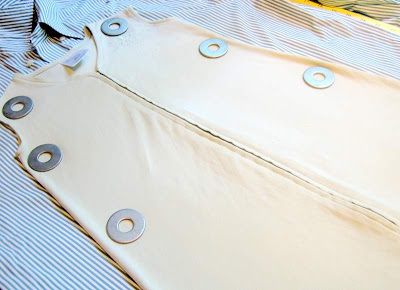
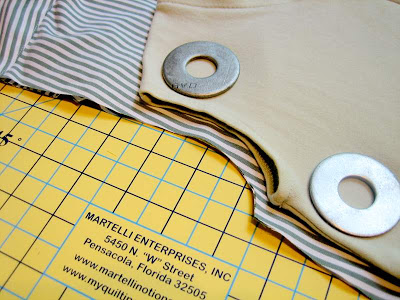
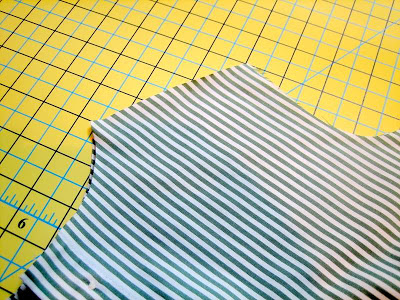
I am a big fan of using hardware-store washers as pattern weights. Place your weights onto the sleep sack to ensure no slipping during cutting.
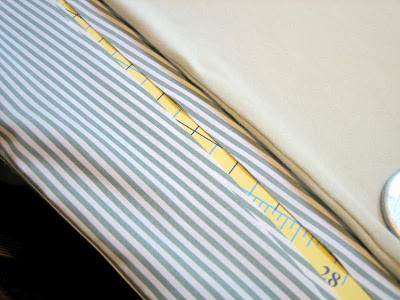
Cut around the sleep sack leaving 1/2"-3/4" border. I always use a rotary cutter because I am usually very short on time - makes for much quicker work!
You will leave this border to allow for your seam allowance, which is 1/2" in this case.
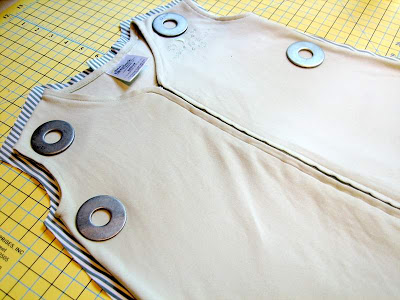
Cut all the way around the entire sleep sack - through both layers of the dress shirt.
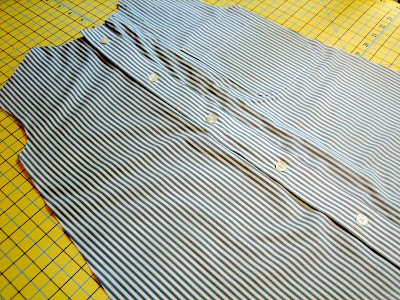
Here's what the sleep sack will look like after you have cut it out. I left the pocket, but feel free to remove it with a seam ripper.
Sew the top of each shoulder - right-sides together.
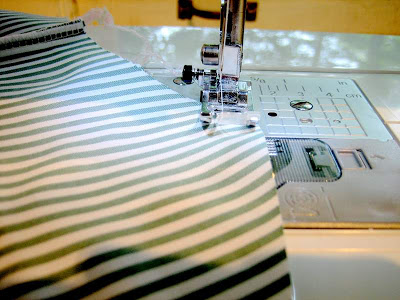
Stitch away.
Press your seams with an iron.
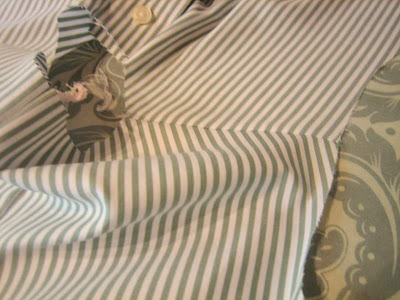
Now cut out the neck (only cut the top layer). Use your sleep sack as a guide. I just free-hand drew mine with a water-soluble fabric pen - approximately 3" wide by 3" deep.
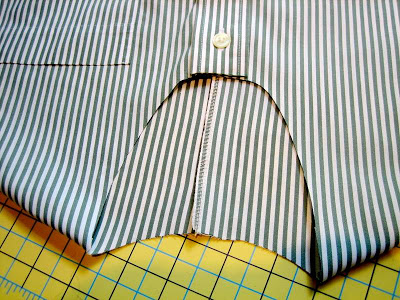
Here is the sleep sack with the neck removed.

This part is TOTALLY optional. I wanted my Matilda's sleep sack to be a little more girly so I added some trim. Get creative with this and use whatever trim you have on hand.
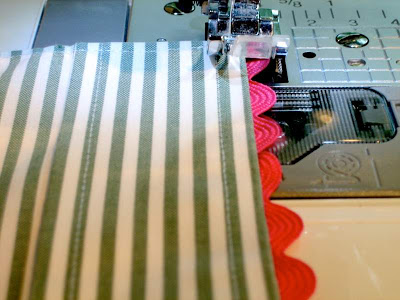
Stitch your trim to the sleep sack.
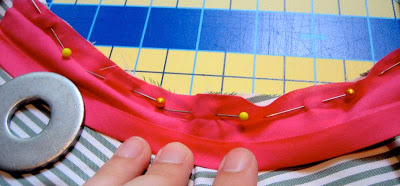
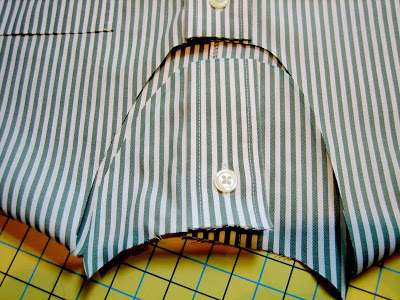
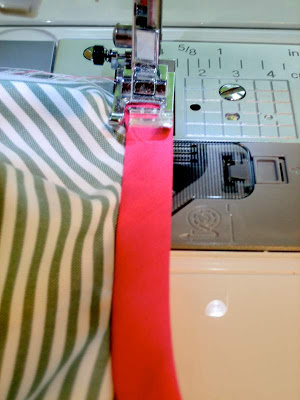
Pin your bias tape around each arm hole. Open it and pin it to the RIGHT side of the garment.
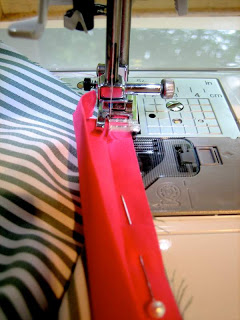
Stitch the bias tape.
Now fold over your bias tape and stitch again on the RIGHT side of the garment.
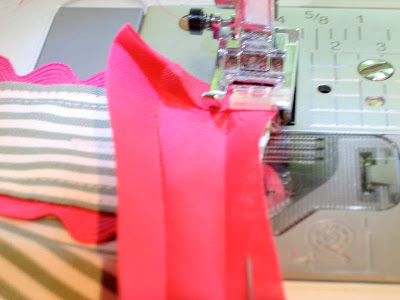
Do the same thing around the neck opening, but make sure you fold over the edges as this will show and you do not want any raw edges against baby's skin.
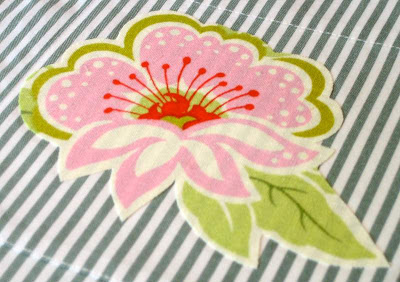
This part is entirely optional as well. I cut out a flower from some fabric (Heather Bailey's Nicey Jane) and used fusible interfacing to adhere it to the sleep sack. Follow the manufacturers instructions for interfacing to do this step.
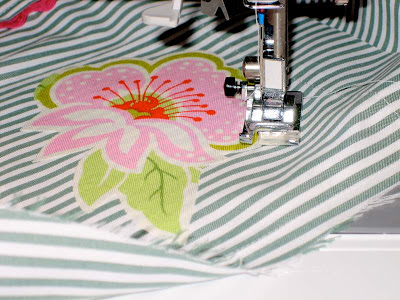
Then stitch around your flower. I used a straight stitch, but if you do not like the frayed look, I would suggest using a tight zig-zag.

Now to finish. Pin the sides and the bottom - right sides together. Stitch the three sides closed. Turn right-side out and press.

And there you have it - A Dress Shirt Sleep Sack

And here's my sweet baby girl wearing her new cozy sleep sack.

Checking it out, making sure Mama did it right.

Yes! I LOVE my new sleep sack!!

Time for a nap!
Cottage Mama's Note: Please, please check all of the buttons on your shirt and make sure they are sewn on very securely. I suggest reinforcing them, just to be extra cautious.
Thank you so much, Shannon, for having me! I'm so glad we have gotten to know each other - I feel like we were just meant to be friends. Hope you are having fun with your two sweet girly girls!
thank you linds! i'm so glad we have gotten to know each other as well and agree that we were meant to be friends! i can't wait for the day that we can meet in person and hang out and sew! thanks for all of your emails, wisdom and advice - you're the best!
i'm super excited for you all to see our next tutorial this week...it's one i've been meaning to make myself but could never do as fabulous a job as our next guest blogger is going to - so stay tuned!
are you guys having fun yet? are you enjoying the bonanza? i am! i only wish i could do some sewing...haha! what are you planning to make from our tutorials so far?
are you guys having fun yet? are you enjoying the bonanza? i am! i only wish i could do some sewing...haha! what are you planning to make from our tutorials so far?