moments in the mommyhood - it's august...say what?!


we've been busy trying to fill our summer with fun little outings.  with a low budget resource for summer camps i've been busy planning activities to keep us busy during our last summer before kindergarten starts (sob/yahoo).  we've been hitting up the royal bc museum (one of our fave places) to check out the highly entertaining dinosaur exhibit (i had a blast in there & learned a ton) and the kids had a riot too.  We also saw a lovely collection of the diamond jubille pictures of queen elizabeth II by cecil beaton. i really enjoyed this part and found it so interesting to see such personal pictures of the queen and her family. !  if you live on vancouver island or are stopping in victoria for a vacay check it out!  the imax is also lots of fun!


we've also been to the shaw ocean discovery center (thank you groupon for your great deals) & got into all sorts of mischief there as well.  i love the fact that we get to touch and hold all the sea anemones at the end.  i think that is my fave part.  i'm a nervous nilly but always find it so cool when i get the courage up to stick my hand in and feel them all!


we've also been hanging out in the sunshine, playing at the park, hitting the waterparks with daddy so mommy can sew and just plain trying to enjoy our summer during one of the most stressful times for our wee family.  i figure the more fun we can have the more we can take our minds off of what's actually going on this next month or 2 (the hubs big 3 day exam for his CA designation).
 

the fun didn't happen though until both my wee ones got over a bad stomach bug the last few weeks.  it was one after the other with lots of bathroom trips if you get my drift.  needless to say this momma will be happy not to deal with that much s&*t anytime soon..muahaha.  i mean look at my poor little baby.....


cute little thing...ok...i digress...lol.  anyhoo, it's been a busy summer so far and it just hit me that it's already august and i'm starting to panic about the fact that in a few weeks my oldest baby won't be home with me anymore and will be in kindergarten full days!!!! a part of me is so happy for her as she needs the stimulation and activity and i know she will LOVE it but another part of me is feeling like i'm losing my best little buddy.  i mean she's home with me 24 hours a day 5 days a week.  she's always with me so it's weird to think of not chatting with her during the day.  i think harper and i are going to be a bit lost without her for a while.  harper will definitely miss her big sissy and i'll miss her too.

anyone else a bit in shock of the upcoming kindergarten arrival? are you busy prepping for school and relishing these last few weeks with your baby at home with you?  such a change to our little lives, it makes me so wistful and sad but also hopeful and excited.  how are you all feeling about it? how's your summer so far?  come chat....the keurig is in overdrive and i've got iced coffees here for all of ya :) come....pull up a chair <3

Picking Up Stitches Tutorial with Guest Jane Richmond

a pic of one of our knit nights
 one of my goals when starting these knit alongs over a year ago was to create a feeling of having a never ending knit night.  that feeling of friends who squeal and get excited about the same things as you, a cheering squad and a sounding board for all your projects and that special bond that comes along with sharing this fun and wonderful creative process with some awesome pals.  it's also a wonderful thing to have so many lovely and talented women to go to for advice and help when something comes up that stumps you.  so i've been slowly trying to build up our list of handy posts in our knit along listing so you can refer to them whenever you need a "friends" help or some knitty advice. 

see all the ribbing? i had to pick that all up!!! talk about my worst nightmare...lol!! 
one of the things about knitting that i detest and hate doing is picking up stitches.  luckily one of the things that one of my besties jane richmond enjoys doing is picking up stitches. she always helps me out when i'm in a pickle and knows that i'm as much of a perfectionist as she is and won't rest until it's done as good as i can get it.  we went through many a trial and error of picking up stitches during last years summer sweater knit along and thankfully this year my sweater requires none! yee haw!  after that cardigan i never wanted to pick up stitches again.  so when i asked jane to come on to do a guest post she thought a tute on how to pick up stitches would be handy to have in our knit along arsenal and boy was she right!  this awesomely talented knitwear designer is joining us today to teach us all her tricks and the why's and how's to picking up stitches. 

ready to pick up some stitches?  let's all hear from jane....

One technique that seems to give some knitters grief is the task of picking up stitches. I know for a fact it's one of Shannon's least favorite things to do. I happen to love picking up stitches and take great pride in a job well done. When Shannon is stuck with a floppy buttonband, instructions that are too vague or faced with an enormous amount of stitches to pick up, I'm always happy to help and we sit down and work it out properly. With a little forethought and preparation, picking up stitches can be painless and easy. Here are the steps to pick up perfectly the first time. 


Measure the Length
You'll need to determine the length of the edge to pick up along. In this case we will be picking up for a buttonband, our edge measures 17 inches. 


Determine your Gauge
If a pattern is not specific on how many stitches to pick up, or gives you a general guide line (ie. pick up 2 stitches for every 3 rows) you can easily determine how many stitches will give you a nice flat buttonband that does not pull in or sag. You'll need to determine your gauge by measuring the pattern stitch to be used. In this case we want to knit our buttonband in 2 x 2 ribbing to match the hem and can easily measure the ribbing along the bottom of the sweater. It is very important to stretch out the ribbing when measuring so that it lays flat rather than pulling in as ribbing naturally wants to do.


Calculate Stitches to Pick Up
Once you've determined your gauge and the length that you will be picking up along, you can determine how many stitches need to be picked up. In this case, our 2 x 2 ribbing measures 3 stitches per inch when stretched flat. Multiply by the length of the edge and you'll have the number of stitches to pick up, in this case  

17 x 3 = 51

Because we are working in 2 x 2 rib our number needs to be divisible by 2, in this case I've rounded up to 52 stitches.


Divide Edge in Half
Now that you have determined that 52 stitches need to be picked up along your edge, take the time to divide the edge into at least 4 sections. In this example I've used chunky yarn, if you are using much thinner yarn or your edge is very long I highly recommend breaking it up even further. 

  
Once you've found the halfway point of your edge place a marker on the fold.


Divide Edge into Quarters
Using your halfway marker to guide you, fold your bottom half in half to determine where to place the 1/4 marker.


Do the same with the top half.


The result is 3 markers dividing your edge into 4 different section.


Calculate Stitches per Quarter
Your final calculation is simply to determine how many stitches to pick up within each quarter section. 

52 / 4 = 13

We now know that we will need to pick up 13 stitches per section.


Pick Up Properly
The key to perfectly picked up stitches is making sure that you pick up in a straight line. Decide where to pick up based on the project. If you are working in a lighter yarn such as DK or fingering you may wish to use an entire stitch as your selvage, this results in a cleaner line. In this case, using chunky yarn, I've decided to only use half a stitch as my selvage to minimize bulk on the wrong side. Be sure to stop every so often and make sure you are staying true to the line you're picking up along.


If you leave the markers in as you go it's easier to rip back to correct stitches that have been picked up out of line without having to recount the entire row. 


Bind Off Evenly
Take the time to bind off evenly. Don't rush through a bind off especially on banding, it makes all the difference in the world if you keep your tension nice and even.


Use the Right Tension
You would be amazed and how important the tension of your bind off can be when working on edges and collars. If an edge is bound off too loosely it can make an otherwise perfect band look sloppy and poorly done. Take the time to redo your bind off if you've bound off too loosely. You'll be happy you did.


The same applies for bands that are bound off too tightly. A collar bound off too tightly can render a pullover unwearable. An excellent way to bind off loosely and maintain an even tension is to use a larger needle to bind off the stitches. If your collar is still too tight try a stretchier bind off such as a sewn bind off.

I hope you've enjoyed my tutorial and that it makes your knitting experience more enjoyable!  Happy Knitting!


you can find all things jane richmond here:


website  |  blog facebook  |  ravelry twitter

thank you so much jane!  ahhhmazing tutorial!  luv ya girlie! this post of jane's is going to be a lifesaver for me and i hope it helps all of you as well.  do you have a dislike for picking up stitches or do you looove it?  let's chat stitches m'dears!  and don't forget to link up your summer sweater knit along blog post in our linky party below....

you can follow along with all things summer sweater knit along:


and a big thank you to our wonderful sponsors! thanks everyone!

additional sponsors:

join our linky party by linking up your "summer sweater kal" blog post!

The Greyling Tablet Case Tutorial


it was my lovely pal mandy's (of sugar & candy handbags) birthday a few weeks ago and i knew i wanted to spoil her.  i posted the business card holder i made her but i also made her another pressie - a handmade tablet case for her new tablet.  woot woot!  mandy is a whiz when it comes to making her gorgeous handbags for her business so i knew i wanted this tablet case to have a purse like feel to it. a mandy vibe so to speak.  i even named it after her.  her maiden name is greyling - thus the "greyling tablet case tutorial" was born.


mandy has a great eye and a flare for prints and i knew she had been eying my pat bravo stash of summerlove for art gallery fabrics. i used "naivety berry" for the upper curved portion (the faux flap) and "beyond bliss ginger" for the main body print. the tablet case has a tab closure that buttons on the front with a curved faux flap.  it's interfaced and padded so it will keep those trusty tablets safe and cozy :)

this tutorial is a great one for practicing your buttonholes, curves and edgestitching skills.  you guys know how addicted i am to topstitching right?  well i just can't get enough.  it's like drawing to me and i love the intricacy of it.  it adds that special touch to just about any and everything if you ask me :)  and a turquoise button never hurt anyone right??


you ready to make one for your tablet or ipad?  let's get sewing!!!

THE GREYLING TABLET CASE TUTORIAL

*Copyright 2012 www.luvinthemommyhood.com All rights reserved.  This tutorial is for PERSONAL USE ONLY.  Please do not sell items made with this tutorial unless permission has been given.  Thank you.

MATERIALS

**Important: Please note the dimensions used for this tablet match a Samsung Galaxy Tablet that is sized 10"H x 7"Wx .3799"D.  In order to calculate the dimensions for other tablets please measure the size of your tablet as accurately as possible or refer to your product's website for specific dimensions.  I added 3" to the tablet height (that actually is your cases width) and 2" to the width (that becomes your cases height) to accommodate for the depth of the tablet and also for the batting/interfacing that you will be using.  The tablet slides into the case sideways so your width actually becomes your cases height and the tablet height becomes the cases width when cutting your fabrics. This is not a perfect science.  I strongly suggest adding the seam allowances that will work best for the fabric and tablet that you are using.

* Outer Fabric Bottom Portion - (2) pieces @ 13"W x 9"H
* Outer Fabric Upper Portion - (2) pieces @ 13"W x 4 1/4"H (to cut pattern piece out of)
* Lining Fabric - (2) pieces @ 13"W x 9"H
* Interfacing (medium to heavy weight) - (2) pieces @ 13"W x 9"H
* Batting - (2) pieces @ 13"W x 9"H for lining and
   (2) pieces 6.5"H x 2.25"W for tab.           
* Loop (lining fabric) - (1) pieces @  4.75"W x 2"H
* Tab (outer fabric) - (2) pieces @  6.5"H x 2.25"W
* Coordinating thread
* Scissors or rotary cutter/mat
* (1) Button

PATTERN PIECES

- Pattern piece for the curved faux flap (upper portion) of case.

TABLET CASE FAUX FLAP PATTERN PIECE - DOWNLOAD HERE
*Please set your printer to "no scaling" or "actual size" before printing your pattern piece.

INSTRUCTIONS


*All seam allowances are 1/2" unless otherwise noted.

STEP ONE: ASSEMBLE YOUR OUTER FABRIC

Print out your Faux Flap Pattern Piece.  With your lining fabric cut out out your pattern piece and press.  Take your (2) Outer Fabric Upper Portions and press well a 1/4" seam around bottom curved edge.  This can be a tad tricky but just take your time, go slow and press well.  I'm a bit of a perfectionist so I pinned mine down as I ironed. See images below.  Note: There are other ways to attach the faux flap but for time, style and materials on hand this was the way I chose to assemble my case.


With (1) of your Outer Fabric Bottom Pieces right side facing up pin an Outer Fabric Upper Piece right side facing up matching both long straight upper edges together.  I removed my pins that were on the wrong side of the fabric as I pinned to the Bottom Piece. Edgestitch along the curved edge as close to the outer edge of your curved piece as possible.  Press flat.  See images below. Repeat with the other Outer Fabric Upper & Bottom Pieces.  Take both of your Outer Pieces and iron your interfacing onto the backs of both pieces. You now have two tablet case outer pieces.


STEP TWO: MAKE YOUR TAB AND LOOP

Match your two pieces of batting for your tab with your two tab pieces.  We're now going to sew together your tab and make a bit of a sandwich so to speak.  Lay your pieces together in this order:  batting, fabric right side up, fabric right side down, batting.  Basically your fabrics will be right sides facing each other and the batting pieces will go above and below them.  See images below.


Sew 3 sides (both long and one short) using a 1/4" seam allowance leaving one short end unsewn.  Clip your corners taking care not to cut through your sewing.  Turn right side out and press.  Edgestitch along perimeter of the tab except for your unsewn short end.  Press again.  See image below.  Nice work! 


Now we are going to make your loop.  Take your loop piece and press in half matching both long sides together.  See image below.


You are going to sew using a 1/4" seam allowance starting at one short end all along one long edge ending on the other short end but leaving an opening big enough to pull your loop through along the long edge.  See image below.  Mine was about an inch wide.  Trim your corners being careful not to clip your stitching.


Turn your loop right side out.  Press flat and edgestitch around the entire perimeter of your loop taking care to close the opening you used to pull your loop through.  Remember, go slow and steady and you'll do great!!!  Grab one of your Outer Case Pieces and turn right side up and find the center of your case. Mark this with your fabric marker.  Measure about 1 - 1 1/2" up from the bottom of your faux flap and mark again with your fabric marker.  Now find the center of your loop and mark it as well.  Place and pin your loop down matching the center of your loop with the center of your case where you marked your 1 1/2" measurement.


Starting on the left side of your loop sew a box about 1" wide.  Now stitch an "x" through it.  Repeat for the right side.  This will keep your loop attached and look purdy.  See diagram above.  Now take both your Outer Case Pieces and place them right sides facing each other.  Pin along 3 edges leaving your long top edge unpinned.  Sew along your 2 short sides and the one long bottom edge with a 1/2" seam allowance.  Clip your corners. Turn right side out and press. *Note: this would also be a great time to add a label to your case if you are using one.


Next find the center point of your case on the side without the loop attached.  Mark with your fabric marker.  Now find and mark the center of your tab.  Match these up and place a pin at least 1" down from the top edge with your nice side of your tab facing down and pointing towards the bottom of your case.  This will keep your tab from moving and shifting around while you assemble your case.  See diagram above.

STEP THREE: ASSEMBLE YOUR LINING

Place both of your Lining Pieces right sides facing each other.  Then place your batting on both sides of your fabric pieces sort of sandwiching them together just like you did when you made your tab.  So you will have: batting, lining right side facing down, lining right side facing up, batting.  See images below.  Pin along 3 edges leaving your top edge unpinned.


Sew along your 2 short sides and the one long bottom edge with a 1/2" seam allowance.  Clip your corners and trim your batting accordingly.

STEP FOUR: ASSEMBLE YOUR CASE

Ready to put your case together? Yay!  Grab your Outer Case and turn it right side out.  Now with your Inner Case still inside out simply put the Outer Case inside of the Inner Case.  Trust me, it sounds trickier than it is.  Just put one inside the other. It really is that easy.  When looking at it you will see the wrong side of the Inner Case and the wrong side of the Outer Case.  See image below.


Pin around the entire top perimeter of the case.  Sew along the top edge with a 1/2" seam allowance making sure to leave at least a 3-4" opening to pull your case through.  Turn your case right side out being careful not to poke yourself with your pin that is holding your tab in place.  You will now have what you see in the image below.  Press your case.  Now push your lining pieces inside the outer pieces.  Before we finish please try the tablet out to see if it fits.  If you need to make adjustments to it now is the time. 


If your sizing is all good press down your case again especially around your top edges.  Topstitch your entire perimeter down taking care to close up the opening you used to pull your case through.  Press again.  Looking good!!!! 


STEP FIVE: MAKE YOUR BUTTONHOLE & ATTACH BUTTON

We now get to put those buttonhole making skills to work :)  Don't be scared - you can do it.  Place your tablet inside your case if possible and grab your tab and pull it under your loop.  Mark with your fabric marker where you would like to have that perfect button on your tab.  Now following your machines instructions make your buttonhole where you marked.  Remember to always, always do a test for your buttonhole.  Trust me on that one.  I used to be scared of buttonholes but now find them a joy to make (if you need more help making a buttonhole please see this post).


Once you are done your buttonhole pull your tab through your loop again with your tablet in your case.  Mark with your fabric marker exactly where your button should be stitched on to match up perfectly with your new buttonhole.  Hand sew your button on being careful to only go through your outer fabric - not your lining as well. 


You're done!!!! Looks awesome!!!! Your tablet is going to be riding in style!!! So fun!  This case would be great to showcase some of your fave prints or go with bold solids instead!  Even a faux leather would look awesome!  Experiment...try out different combos and have some fun!


thanks for sewing with me!  be sure to add your greyling tablet case to our flickr group! i love seeing your projects when they are done! if you have any questions about this tutorial please feel free to email me at luvinthemommyhood@yahoo.ca.

love the fabrics i used?  you can find all things pat bravo & art gallery fabrics here:


zephyr sundress - kids romper revamp craftsy class review part deux


my little one was a feeling a tad better today so we had an impromptu photo shoot of her new zephyr sundress from figgy's patterns.  i'm smitten with this whole dress and seriously would love to be able to wear this myself.  mackenzie is absolutely over the moon with it.  the print i used is pat bravo's retro harmony sugar from her line summerlove (art gallery fabrics).  it's made with 100% pima cotton and is soooooo soft and has a lovely hand/drape. i knew it would be lovely with this pattern and perfect for the summer weather.  the yoke is natural by harmony art and is a 100% organic cotton sateen from www.stitchsimple.com (where your fabrics come pre-washed and pressed! amazing!).  and those buttons....yes, the buttons....dug deep into my button stash jar for those lovelies and i think they pull the whole dress together.  perfectly purdy!


i think the braided straps and bodice detail are my favorite part of the zephyr pattern.  shelly shows you in detail how to make all of these steps in her "kids romper revamp class" on craftsy.  it was wonderful to sit down and sew the bodice while watching her.  i'm a visual learner so i completed the dress way faster than i would have if i had just read the instructions.  it was also a lot more fun.  the yoke pairs so nicely with the little gathered details of the front and back and really this sundress is a great beginner-intermediate project!  you learn a lot of skills in this one pattern so i highly recommend it for those of you looking to bump up your skill level. 


the only mod i made to the whole pattern was to topstitch the entire yoke.  i believe in the pattern you only edgestitch the bottom of the yoke to close your facings (encase your seams etc.) but that topstitching fiend in my came out and i just had to do it.  i love the feeling of things not moving about after i'm done with something as purdy as this yoke.  i would have had to press it big time every time it came out of the wash to keep it all crisp and lovely so this way it will stay where it's supposed to and be way less high maintenance for this momma. that is just my personal preference though :)

mackenzie chose the length of the dress.  she normally goes for knee length so it was cute to see her ask for it to be more mid calf this time round.  she said she loved it like that so i followed the instructions exactly for my hem.  i even added my little label to it :)


shelly's lesson on measuring and making pattern adjustments was very helpful.  my wee one is a tiny thing so i knew ahead of time that i would have to take the chest in a wee bit.  i ended up tracing the size 4/5 because my wee one was sick and i couldn't measure her properly.  it all worked out fabulously though because all i did was do a 3/4" seam allowance instead of a 1/2" and it fit her perfectly!  good thing my guessing on her strap length worked out too.  it's sure hard to make a dress for your kidlet when they are too ill to move.  i won't do that again...lol.


it did brighten her mood though when she saw it all done.  she couldn't wait to get better so she could wear it.  she hasn't taken it off since.  it's her new fave and if you knew my daughter you would know that is a huge accomplishment.  she's hard to please.  so thank you figgy's for designing clothes my kids will love to wear!  harper is very sad she doesn't have one so it sounds like a size 2 is on the horizon.  i can't wait to see them both out and about running in their zephyr's! so adorbs!


if you would like to take the kids romper revamp class you can for 50% off right now!!!!! yee haw!!! woot woot! seriously though.  i'm not kidding 'round here....that is a mighty fine deal.  that's almost just the cost of the pattern! say what?! yes.....it's a steal of a deal!  for $20 you get the zephyr pattern, all the perks that come with the class (and there are some goodies) and the class - forever!!!!  you can buy your discounted class by clicking on the link below, you know you wanna...
click here for the 50% off kids romper revamp craftsy class


you can find all things shelly and figgy's patterns here:


Figgy's Kids Romper Revamp - Craftsy Class Review

zephyr pattern from figgy's
i love figgy's and i also adore shelly figueroa, one of the masterminds behind figgy's.  figgy's style & effortless designs speak right to my sewing soul :) every time a new pattern comes out i go nutso obsessing over it and i know i'm not alone.  serious sewing eye candy.  the zephyr pattern is one of my favorites.  that darling romper and sundress just make me swoon!
zephyr pattern from figgy
the fact that shelly is doing a class called "kids romper revamp: creative pattern adapting" in combination with craftsy for her zephyr pattern is pretty exciting.  if you're anything like me and sometimes wish the designer could sit down beside you while you're sewing then your wait is over!  with this course you pretty much can!  this pattern has so many lovely details and shelly walks you through them all as well as lots of tips & techniques.  you can take your time, go at your own pace, make notes right on your video and post pics/ask questions all during the class as well.  my favorite thing about having taken a class on craftsy - it's mine forever! that's right.  i can make as many zephyr patterns as i would like with this class....till i'm 90 if i'd like...lol.  and shelly and craftsy even threw in the zephyr sundress pattern with the romper! sweet!!!!

zephyr pattern from figgy's
i set out to make the romper originally but i had promised whichever garment i make next to be for mackenzie and when she saw the romper and the sundress pics she cried for the sundress.  she really, really wanted it so who am i to deny her right? lol!  so sundress it was.  i still watched the entire video for the romper because the techniques are mostly the same and i intend to make harper a romper asap.  i love this pattern. adorable!!!  i only ran into one glitch in my sewing adventures....the pictures.  my poor little girl is sick and can't model for me and i was up very, very late last night taking care of her.  so the pics of my zephyr sundress will hopefully be up sooner than later :)  i'm hoping tomorrow.  but in the meantime here's my lo'down scoop on the "kids romper revamp" class!

kids romper revamp class on crafsty
  what do you get with this class?  awesomeness!!!

honestly!  i was blown away by how well done the video is.  there are so many wonderful functions that come along with the layout/design and functionality of craftsy with this type of instructional video.  shelly is a natural and it's like sewing with a friend.  i learned so many wee tips from shelly, she seriously filled this class with little sewing jewels.  i'm a very visual learner and it was great to follow and sew along with shelly.  she goes over everything and i mean everything about sewing this pattern.  from how to tape your pdf pages together, which needles to use on your machine for what type of fabric, what all the lines and doo dads mean on a pattern page, how to sew the steps & even down to the right techniques & tools to use.  it really was educational and i learned a lot of things that i didn't even know.  well worth the time and i highly recommend it.  

the lessons on how to measure your child accurately and adapt your pattern for the perfect fit were really handy for me - especially for mackenzie.  there is even an adorable measuring chart you get to print out that goes along with your class info.  she even goes over which fabrics to use for what season! hello!!! genius!

the purchase of the kids romper revamp class includes:

+zephyr romper pattern +zephyr sundress pattern
+instructions & diagrams +tips & techniques +supplies & resources

* your class after purchase is available forever (how handy is that!!!)
* clear, bright, professional video.
* ability to take video notes.
* ask questions anytime and during any lesson during your class.
* post your own photos to ask questions/help.
* shelly provides in depth tips & techniques that help to make sewing that much easier and fun.
* class is broken up into lessons so you can easily find/watch exactly what part you are looking for.
* learn more about shelly and her background.
* lessons include videos for:

 + intro  +proper measurements +the zephyr romper & sundress pattern +fabric +interfacing +braiding technique +gathering & main yoke attachment +completing the romper top +romper short pockets +completing the romper +custom options +bonus

what you'll learn:

* make a stylish romper for girls ages 18mths to size 8/9. 
* learn how to adjust the romper for a perfect fit.
* adapt the basic pattern to create four pattern variations from pants to a dress.
* learn tips for adapting the romper for different seasons & fabrics.

zephyr pattern from figgy's
all in all it was a really fun and enjoyable experience.  i would definitely take another craftsy class.  and guess what?  if you would like to take the kids romper revamp class you can for 50% off right now!!!!! yee haw!!! woot woot! seriously though.  i'm not kidding 'round here....that is a mighty fine deal.  that's almost just the cost of the pattern! say what?! yes.....it's a steal of a deal!  for $20 you get the zephyr pattern, all the perks that come with the class (and there are some goodies) and the class - forever!!!!  you can buy your discounted class by clicking on the link below, you know you wanna...

click here for the 50% off kids romper revamp craftsy class

you can find all things shelly and figgy's patterns here:


a special thank you to shelly for being so darn inspirational, sweet and just plain awesome.  also let me just say you made my month when i spotted little ol' luvinthemommyhood mentioned in the supplies & resources section for blogs! i nearly peed myself!!!! you rock girl!

have you all taken a craftsy class before?  did you enjoy it? are you a fan of figgy's? what's your fave pattern? let's chat sewing m'dears! and stay tuned for my zephyr dress!


follow along with the whole tour:
July 31   All Buttoned Up
August 1   Sarah Jane
August 4   Sew Much Ado
August 6   Noodlehead
August 7  Betty Crocker Ass
August 8  Imagine Gnats 
August 9  A Sewing Journal
August 10  Susan Beal
August 11  Such Designs

Winner, Winner....Chicken Dinner!

simpatico by cloud 9 fabrics
are you all ready to find out who the winner is of the fat quarter bundle giveaway of the awesome new line simpatico by cloud 9 fabrics? our lovely sponsor fat quarter shop so generously put the fat quarter bundle up for grabs for all you simpatico lovers!  i'm so excited to see who won....here goes.......

 commenter #166 - melissa (adorable shop issa.ino handmade


congratulations melissa!!!! we'll be in touch soon about your prize!!!  have fun and happy sewing!!!

a big thank you to fat quarter shop for the generous and amazing prize!  you can find all things fat quarter shop here:

summer sweater knit along - ohhhh the garter of it!

pattern: something silver by veera valimaki yarn: yellow label dk by tanis fiber arts in colorway pink grapefruit

it's summer sweater knit along day today!  i'm so close to being done the body of my sweater...i cannot wait!  i've got about 12 rows of garter stitch left and i can bind off!  so exciting!   this part is either where it drags on for me or where it gets really exciting.  i'm stuck in the middle of both at the moment.  i'm feeling like i've been knitting garter for ages but yet i'm super excited to bind off. 


one of the fun things i got to do with this cardigan was to make pockets.  i haven't done a pocket on an adult garment before and i was really interested to see how veera was going to do it.  this pattern has been so nice to work and so intuitive and the pockets didn't disappoint.  easy!  the cardigan also fits perfectly!  i'm beyond happy. i didn't have to make any mods and the neckline, bust and arms so far seem spot on.  i am one happy knitty momma.


you likey?  i likey....all that grapefruit goodness is so addicting!  i can't wait to wear this instead of just hold it in my lap.  i've been so proud of everyone in our kal. people are having so much fun, conversations are a plenty and the pics.....oh....so many gorgeous pics of wip's and fo's.  some of you are casting on for project 2 and 3!!!! go ladies go!!!!  does my heart good!  i can't even begin to tell you how fun it is to see this little dream of mine come into reality.  i'm so glad you are all having so much fun and are all knitting - in the summer!!! yay summer knits!!!! just think how awesome it's going to be this fall when you have sweaters galore all ready to snuggle up in! fabulous!


it's never too late to join in!  you can find all the deets here and you can follow along with all things summer sweater knit along here:


how's your summer sweater project coming along?  are you a fan of garter or stockinette?  what's your fave portion of a sweater to knit? most exciting?  come chat!

and a big thank you to our wonderful sponsors! show them some luv!


additional sponsors:

join our linky party by linking up your "summer sweater kal" blog post!

quilting 911 - the zig zag quilt reveal!


i finally got around to getting some shots of the zig zag quilt i finished up.  took me long enough...lol.  i never realized how tricky it can be to get shots of a finished quilt top..lol.  luckily this one isn't too big and i def will be planning out shots for future quilts way in advance.
 

since i finished this quilt for mackenzie it has been well loved and used by all of us in the family.  it's one of the best feelings in the world to see your wee one snuggled up in a quilt made with love. i've even snuggled up with this quilt more than a few times on the couch with my knitting :)


i'm so glad after weeks of humming and hawing about the bias and the backing that i decided to stick to my guns and original plan and keep the white bias and still use my fave print  balloon in aqua from children at play by sarah jane. mack loves it and so do i.

i kept the quilting simple yet fun.  i did a line following the zig zags 1/2" on either side of the seam.  i love the way it looks from the front and the effect is nice and subtle on the back :)  it's also soft and squishy.


just like harper's quilt mackenzie requested her first initial be on the quilt.  i made a patchwork "m" that i stitched on before making the quilt sandwich.  i love the effect the quilting has on it.  so fun!  i then hand embroidered her full name along the edge of the letter.  it's not perfect but i love it anyways.


our current fave place to use our zig zag quilt is curled & cuddled up on our balcony.  so cozy!


i now have quite the addiction to hst's and have 2 more quilts on the go.  i think i am definitely smitten and bit by the quilting bug. if you are looking to jump into quilting this was a fun pattern to start using hst's.  it was quick and a lot of fun to make.  i can see many more of these in my future!


and i think she loves it too.  we call the quilts i've made my girls "love blankies".  i tell them they are filled with love from momma and that no bad dreams or anything can hurt or scare them while they have them.  i tell them as long as they have their love blankie mom is always close by watching over them.  they adore it and it really has helped with bedtime and cut down on mack's nigh time issues.  mack knows and understands how long the quilt took to make and how much i enjoyed making it for her.  does a momma's heart good i tell ya :)


you can read the rest of the posts from the making of this quilt here:

have you taken up quilting recently?  what is your fave quilt pattern to make for a special child in your life?  do you have a fondness for hst's too?  let's have some quilty chat ladies :)

fabrics used for quilt:
prints: oliver + s city weekend
solid: organic white by harmony arts (from www.stitchsimple.com)
backing: balloon in aqua - children at play by sarah jane

moments in the mommyhood - too much fun


hi ladies! i hope you all had a wonderful weekend :)  we did.  it was a fun one and this momma had a great time but boy oh boy am i beat this morning.  i'm taking the day to hang with my girlies and relax, read, drink some coffee, and knit (and maybe squeak some sewing in as well).  too much fun can wear a girl out ya know...lol.


i'll be back tomorrow with some goodies for the rest of the week.  we've got a giveaway and a new sewing tutorial so stay tuned!!!! in the meantime i hope you all have a great day today <3

what projects are you hoping to work on this week?  are you sewing, knitting, quilting, crocheting? fess up...i wanna hear about it! c'mon...coffee's on...let's have a wee chat :)

weekend wishes

to finish decorating my new sewing wall so i can finally reveal it all to you guys...


to one day make the kids an awesome doll house...


to make dana's drool worthy ice cream cookie sandwiches for the kidlets...

image src: ice cream cookie sandwiches tutorial from made
that this chair finds a way into my home...


that i could steal the pillows and quilt from this room...


that you all smile after you see this adorable hipster bunny...
Source: 9gag.com via PiscesOlya on Pinterest

and to get to enjoy the opening ceremonies with my hubs & knitting tonight.

img src: olympic ring candy jars from nobiggie

ahhhhhh yes...it's the weekend!  i cannot wait.  i'm so excited to watch the opening ceremonies tonight!!!!  i love the summer olympics!  so exciting!!  i can't wait to sit down with a cold bevvie, my knitting and the hubs after a very long week.  i also have a soft spot for london.  i was lucky enough to go to london & paris on a school trip when i was a teenager and since then have always wanted to go back.  i loved it there.

we had a sick wee one here all week.  poor little harper had a really bad bout of diarrhea this week (not too be gross).  it was a rough one on her and on me and our house.  needless to say i spent a fair amount of our day this week cleaning. yuck.  she's doing a bit better now today and no longer has a fever.  we've stayed pretty close to home all week and have been in survival mode as it was also the hubs first week of very intensive studying for his exam.  he has to study full time all summer for a giant 3 day exam in september.  to say he is tired is an understatement.  he's exhausted.  so i'm just trying to keep the house afloat and the kids happy.

i'm also busy trying to madly whip up some lovelies to sell at fibrations next month.  there will be some handmade goodies and also my knitting & sewing patterns.  i'll be there sharing a table with my pal arika as well as jane and rebecca (nook) will be there with tables as well.  so if you live in town or on the island pop on over - it's a gorgeous location!  what better place to have a fibre festival than in a beautiful orchard?!  here's some pics from last years event.

we're hoping this weekend to have a tiny bit of family time amongst the studying/working and grocery shopping :)  we may...just may get a chance to hit up the beach.  it's been wayyyyyy too long.  i'm looking forward to it and hope it's a relaxing weekend - i could use it :)

wishing you all a ice cream, beach, sunshine, laughs, crafty, family & good friends, olympic excitement kinda weekend!

what's your fave sport of the summer olympics?  have you always wanted to go to london?  what are your weekend plans?  anything fun going on?  fill me in on your week.....what have you been crafting?  i've got a nice iced coffee here with your name on it <3

p.s. make sure to get your name in for the simpatico (cloud 9 fabrics) fat quarter bundle giveaway from fat quarter shop!!!!!  seriously!!! awesome giveaway for this lovely organic fabric line!!!! love!


Knit Like a Nike Ad: Just Do It! (Summer Sweater Knit Along)


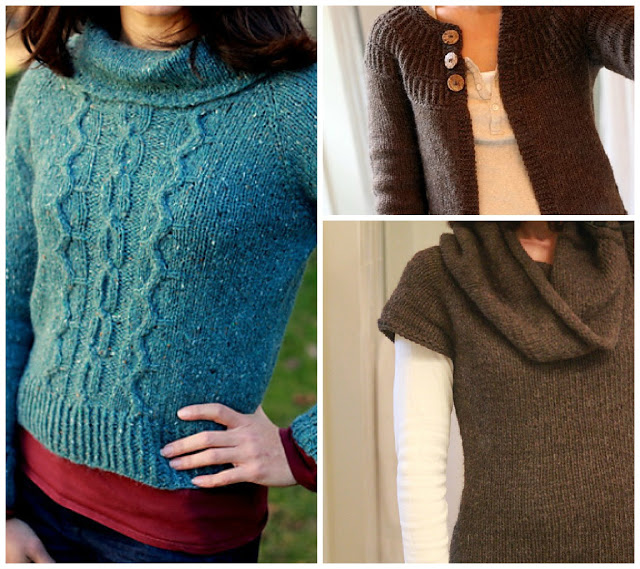
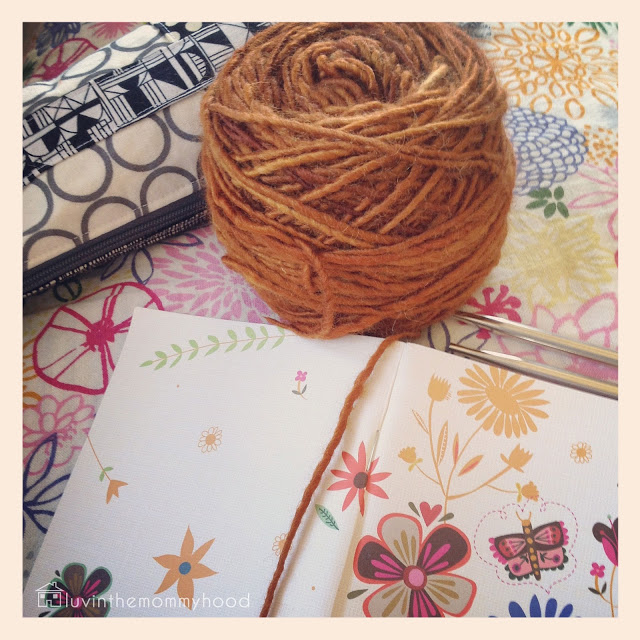
it's summer sweater kal day today! yay!!!!  i've got one of my fave knitty pals on board today.  sandra from the blog "three pumpkins little" is here to chat about sweater knitting.  she is one awesome sweater knitter.  she's fast, smart and knows her knitting stuff.  she's also one of our lovely moderators in our ravelry group so some of you prolly already know her skills & pretty photography.  i couldn't resist asking her to come show off some of her handiwork and give you all a glimpse into why and how she started sweater knitting.

here's sandra....


Hi Luvinthemommyhood readers! I’m Sandra from three pumpkins little where I chronicle my crafting, cooking, and parenting adventures.  But today?!  Today I get to be here in Shannon’s beautiful bloggy neighborhood and I could not be more thrilled. Especially because Shannon invited me over as a guest during the current Summer Sweater KAL—I am so honored!

You see, I’m a huge fan of Shannon’s KALs.  They hold a dear spot in my heart because that’s how we met.  It’s hard to believe it was only a year ago when she hosted the very first KAL.  When I saw that she was encouraging knitters to take on my all-time knitting addiction (sweaters!), I knew I was in the right place.
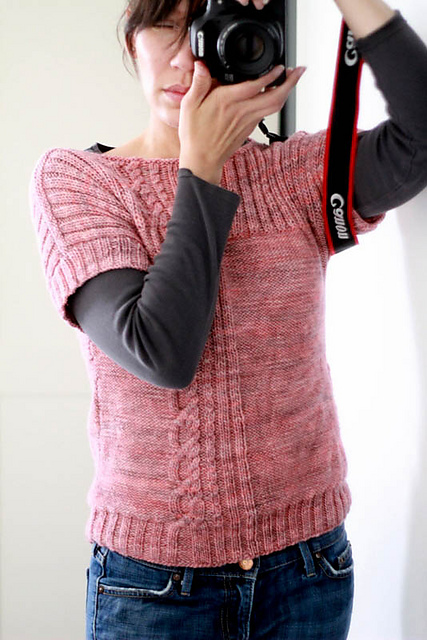
I am a sweater knitter through and through.  In fact, it’s the very reason I decided to learn to knit. And even though I’ve only been knitting for a bit over two years, I’m the proud knitter of over seventeen sweaters!  Of course, hats, shawls, and other accessories might catch my fancy as well.  But sweaters? They are my weakness and I always have one on my needles.

And so, when Shannon asked me to guest blog, I knew exactly what I wanted to share--how accessible sweater knitting can be to even a fairly new knitter.  I wondered whether any readers were out there just like me a couple of years ago: wishing to knit a sweater but feeling overwhelmed at the thought that it would take forever to gain the skills to knit one


If this happens to strike a chord with you, I am here to tell you that given the amazing resources out there, you can do it!  In fact, I tackled my very first sweater as my fourth knitting project, ever.  I know it might sound crazy but we all know that once a crafty momma sets her sights on a certain craft or DIY project, nothing gets in her way, right?


I think this is especially true with knitting.  There has never been a better time to take your knitting to the next level.  Here’s a quick recap of how I went from a complete beginner to a (relatively) experienced sweater knitter in a fairly short time frame.
 

The book that I credit “teaching” me to knit is Stitch ‘n Bitch by Debbie Stoller.  I would have much preferred taking a class but I have three young boys and a rather full schedule as it is—there simply wasn’t time for a class.  This book succeeded where others had failed.

stitch'n bitch
Since I couldn’t get out to a class, I checked in on YouTube regularly.  A simple search of ‘knitting class’ or ‘knitting lessons’ with a keyword (e.g., ‘in the round’ or ‘raglan increasing’) will turn up lots of options.  Grab your needles and knit along!

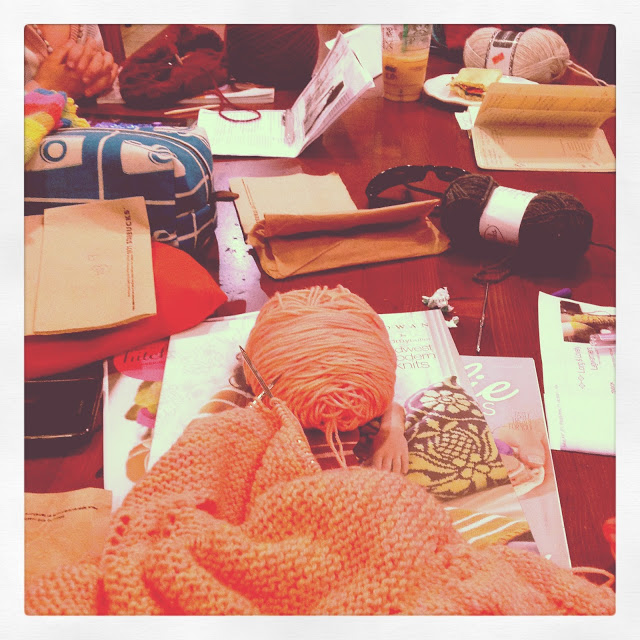
I committed to practicing 15-20 minutes every day for a couple of weeks.  I didn’t work on a project. Instead, each day I practiced casting on and knitting and purling.  And then I ripped it out.  My goal was to truly learn how a stitch should sit on a needle and train my hand muscles to feel comfortable with the motions (I felt like I had ten thumbs when I started!).

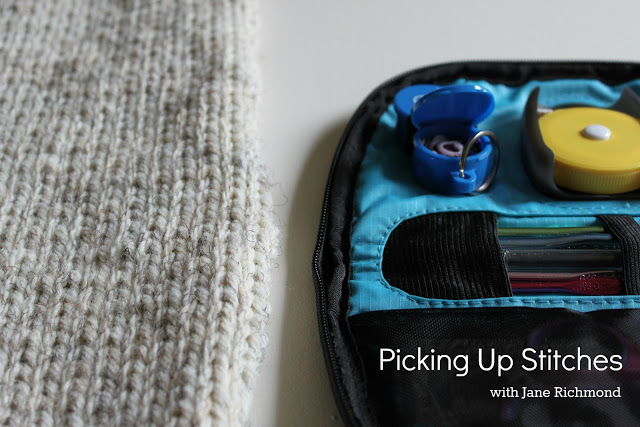
After just two weeks of these short “sessions” I couldn’t believe how much more comfortable I felt. My next goal was to learn how to correct basic mistakes, so I’d drop a stitch and practice picking it up.  I also experimented with different knitting styles to see what felt best.

I think the short sessions were really key for me.  They were short enough to fit in every day but not long enough for me to get frustrated.  After a few weeks, I cast on for my first project: a dishcloth.  My second was another dishcloth and my third was a lacy scarf (I chose a pattern called Branching Out and my notes are here).

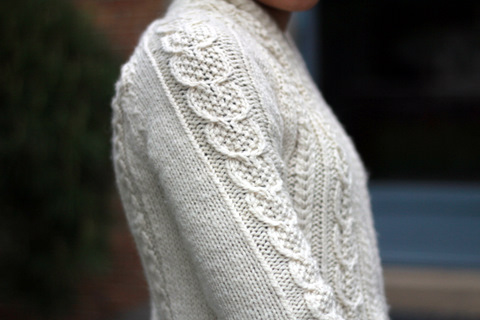
I highly recommend picking a small accessory with at least a bit of lace as a “real” project primer to sweater knitting.  It will teach you some basic shaping techniques called for in most sweater patterns—but it will result in a Finished Object (“FO”) quickly.  And nothing motivates and creates momentum like an FO, right?

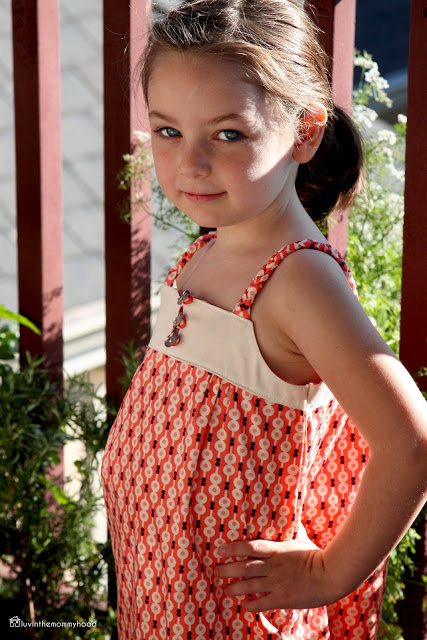
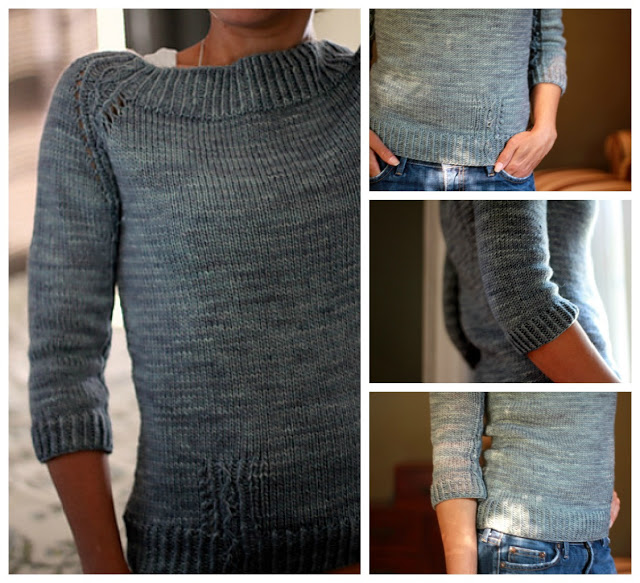
After finishing up my scarf, I decided to go for a sweater.  Yes, it was ambitious, but I had realized something.  Unlike with sewing, where the act of cutting into my precious fabric can make me break out into hives, there are very few things in knitting that are permanent.  The starting/stopping/ripping sessions had taught me that.  So I picked a sturdy yarn and just went for it.  The result?  A Shalom exactly like I wanted.


And the rest, as they say, is history.

Oh—I should probably mention that I also discovered Ravelry at the beginning of my sweater knitting quest.  It was invaluable and still is!  Just about any question can be answered simply by searching the forums.  And now that the Luvinthemommyhood Ravelry Group is so well established, there is a great group of knitters connected by Shannon’s blog who are online and ready to help whenever a question is posted.
   
So there you go.  I hope that perhaps my trip down knitterly lane might inspire one or two of you out there to join us for the current Summer Sweater KAL even if you don’t quite feel “ready.”  I can promise you that you won’t be going at it alone.  I am so grateful to have this wonderful and supportive knitting circle (I couldn’t get my sweaters done without them!) and can’t help but wish the same for each and every knitter out there.  And when I say “knitter” I mean new knitters, veteran knitters, and future knitters alike—come join the fun!

 Thanks for having me Shannon. Happy knitting everyone!


thanks for coming on the blog sandra!  i heart ya m'dear!  i hope that our little dream of knitting together one day comes true.....xoxox.  you can sandra on her three pumpkins little blog here and on ravelry here.  and don't forget to link up your summer sweater kal blog post in our linky party below :)

 you can follow along with all things summer sweater knit along:


and a big thank you to our wonderful sponsors! thanks everyone!

additional sponsors:

join our linky party by linking up your "summer sweater kal" blog post!

makin'it in the mommyhood - fabric business card holders & treats


it was one of my besties bday recently and i couldn't resist whipping her up a special pressie i had promised her a while ago.  remember these business card holders i made for me and the gals when we went to fibers west in the fall?  while i promised mandy i would make her one too and i'm happy to say i can finally cross that bad boy off the list.  mandy is the uber-talented lady behind "sugar and candy".  she is the queen of bags.  she's awesomely talented and a super friend too.


i tried to pick fabrics that reminded me of mandy but also matched her business tones.  i pulled out more than a few fabrics and hummed and hawed and just kept finding myself coming back to an anna maria horner print.  so i bit the bullet and went with my gut and i love it.  for some reason it just screams mandy to me.  i hope she likes it.the outer print is "shattered" in punch from innocent crush by anna maria horner,  the lining inner is "dottie cream" in coral by jay-cyn for birch fabrics and the pocket inner is "maybe" in tangerine from innocent crush by anna maria horner.


i used this tutorial again from "the crafty cupboard" and this time cut my fabric to the right size.  only mod i made was to use interfacing instead of the fleece.  worked perfect on the ones before so i went that route again this time.


i'm working on another pressie for mandy as well and that will be a tutorial coming your way very soon!  you guys will hopefully love it as much as i know mandy and i will!

i also knew that since mandy's bday was coming up i wanted to try out this new website i had been hearing about called Treat.  they have the cutest birthday cards and it's "where cards get personal". it's soooo fun!  i'm one of those gals who loves me a card.  i like mail.  snail mail folks. you know...the real kind :)  Treat allows you to go in and custom make any card you want!  they give you great layouts/sayings and you can customize to your hearts content! change the wording, design, phrasing - all of it!  best thing is they are fun, fresh & modern and it's lots of fun to put together.  then you choose to either mail the card direct to them or to yourself (to redirect) and you can top it off with a gift card!!! can you say one stop shopping?!!!!! LOVE!!!!!  i spent many a hour fiddling in there whipping up cards for mandy.  here's a few of my faves:


in the end this was the card i would have chosen.  Treat is available for all you lovely folks in the US and will hopefully be open for canadian peeps like me sometime this year! i can't wait!


if you love cards this site is for you.  go Treat yourself...wink wink :)   for first time customers you get YOUR FIRST CARD FREE using code: FREETREATclick here for more details.  you can find all things Treat here:


website  |  facebook  |  twitter  |  pinterest  | blog

i hope you had a wonderful bday mandy & you love your pressie! it will be here waiting for you when you get back! i luv ya long time...lol...and hope you had a wonderful, special and fabric filled bday!!! hugs!!!!

have you made your own business card holder?  what fabric would you make yours out of? do you have a soft spot for "real" cards too? coffee's on...come chat <3


Fat Quarter Shop Giveaway - Simpatico by Cloud 9!!! Fabrics

image src: cloud 9 fabrics
i recently bought some of one of my favorite fabric lines of the year - simpatico by cloud 9 fabrics and am so in love with it!  i know you all have heard me ranting and raving about the awesomeness of this lovely 100% organic line so i thought it would be perfect to have a giveaway from our fabulous sponsor fat quarter shop so you can all share in the simpatico love! 


i've only been able to get the minty colorway so far and these lovelies are going to be a duvet cover my sister's baby that is due in september.  we don't know if it's a boy or a girl but i do know that these prints would be lovely in any bedroom - including my own!  i'd love a duvet cover in simpatico!!!


simpatico comes in 4 yummy colorways and each colorway has 3 prints.  i adore them all.  i think i'm going to be digging into my piggy bank and ordering the rest of the line to treat myself.  i cannot resist the lure of simpatico any longer...lol.   what about you guys? are you loving cloud 9 fabric's newest line as much as i do?  wanna win some???  it's your lucky day!  here's the prize....


- (1) lucky winner will a FAT QUARTER BUNDLE of simpatico by cloud 9 fabrics!!!!! woooweeee!!!!!! i'm so excited about this prize and i can't even win!!!  thanks fat quarter shop!!!


 - simply leave a comment below stating which colorway is your fave and what you would love to make with your fat quarter bundle! (our numbered comments are back! yippee!)
*bonus entry - like fat quarter shop and/or luvinthemommyhood on facebook and leave another comment letting us know you did that too :)


- you must have a valid email address or you will be disqualified.
- giveaway is open until july 30th, 2012, midnight (pacific standard time).

image src: cloud 9 fabrics
good luck everyone and happy sewing!!!!! a big thank you to fat quarter shop for the awesome giveaway and for having such a wonderful & inspiring shop! head on over to the fat quarter shop and show them some love ladies!  you can find all things fat quarter shop here:


ps...what do you guys think of the new blog layout?  i was up till the wee hours of the night on the weekend drowning in html and boy do i think it was worth it.  i'm loving the new layout and all the new things i'll be able to do on the blog again.  thanks for your patience over the weekend while we looked not so hot 'round here.  please remember it's a work in progress and i'm still tweaking things.  it will prolly be the end of the weekend when it's complete so bear with me :) i hope you all like it <3

weekend wishes

that my blog doesn't crash this weekend while i do some online housekeeping...

Source: flickr.com via Jonathan on Pinterest

to have a wonderful & romantic evening with my hubby...


that i can figure out why i all of a sudden enjoy watching golf on tv???

img src
that the housekeeping fairy cleans up and unpacks our laundry...

img src: luvinthemommyhood.com
that i get to do some more sippin' and knittin'...

img src: luvinthemommyhood.com
it's friday! yeehaw! this week felt sooooo long to me.  it just dragged and dragged.  i've got post mini vacay hangover fo'sure.  i did manage to find a new bathing suit at superstore (joefresh) of all places on the weekend so i conned my sister into coming swimming with me so i could soak in the pool and let the kidlets have a splash.  my boobies didn't fall out so all is good on the suit...lol.  i've also been busy making some plans for this weekend that involve the blog.  i'm going to be doing some housekeeping and some revamping around here so cross your fingers that the html gods are shining down on me and the blog doesn't crash.  if you pop by excuse the mess k?

we have a pga tour golf game for our ps3 system and the hubs and i like to play it together when the kids are asleep and for some reason now i adore watching golf on tv.  it scares me...lol.  usually i'll only watch tennis and some hockey but i keep getting really into the golf...i mean full on yelling at the tv and everything.  i'm like a drunk fan but minus the drunk...lol.  not sure why because i've never even played golf just mini-golf and i suck. so who knows.....it will remain an unsolved mystery.

i'm also super excited to watch project runway today.  it killed me last night to see all the chat going on about it and having to avoid social media.  i still haven't had a chance to watch yet so i'm avoiding FB & twitter right now so I don't find out what happens.  i hope it was good cause i've been missing pr.  i heart that show.

one of my fave pics of our wedding - we call it our harlequin cover

it's also my wedding anniversary today.  yeppers. (love you honey!!!) we got married 4 years ago on mackenzie beach in tofino, bc.  it was gorgeous and very romantic and a such a special day for us (more pics here on this post). the hubs and i are going out on a date tonight to celebrate!!!!!  first one on our anniversary in years.  it's going to be awesome.  we're planning on going out for a nice dinner.  i owe my pal baljinder for hooking me up with an awesome babysitter - thanks bal!!  we've been searching for one that our wee family could afford since we moved here 4 years ago and we finally found one.  she helped me out when my back was bad the other week and the girls loved her.

the hubs also has a baseball tournament this weekend so rebecca (nook) and i will be on the sidelines with our kiddos and knitting cheering our men on.  i'm hoping for sun :)  we also get to have a yummy team bbq on sunday as well and somewhere in there i need to get some sewing done so it should be a busy one this weekend.  at least it's busy with fun stuff and not chores....but wait...i need to do those too..bah - life's too short for chores :)

what are your weekend plans?  what are you up to?  anyone else hoping the cleaning fairy visits their house? do you choose fun over chores too?  i hope i'm not alone...lol...wishing you all a yummy, sunny, cuddly, cozy, crafty, lovey, happy, kinda weekend! now let's have coffee & chat! come say hi!

moments in the mommyhood - ice cream soothes the soul


i thought i would share with you all a few more shots from our weekend.  the friends we stayed with in campbell river have an adorable dog named bailey.  the kiddos love him.  i think harper has a brand new friend now that she's old enough to play with him.  she looooves animals so it was a treat to see her play with a doggie.  the shot above was just way too cute not to post.  i might have to frame that one.


while there we got to indulge in backyard fire s'mores, yummy cocktails, bbq, and best of all.....delicious ice cream on a very hot day.  that day also included golf for the hubby and a nap for momma.  yep, you heard me....a nap!!!!!! it was a miracle! lol!  but the ice cream......delish!  we all walked down to the ocean to indulge in a delicious cone and some sights like the view you see below.


i don't think i have ever seen my kiddos eat ice cream so fast! it was so hot out the ice cream was melting like crazy!!!  even though we were all sticky and covered with it i swear it was my fave part of the whole weekend.  the looks on their faces while they were eating it was priceless.  we had to rinse them off in the shower when we got back they were that dirty.  poor little harper's curls were blowing every which way due to the wind down by the water and the ice cream was just everywhere....but really.....even covered in ice cream how cute is she???


....we couldn't resist getting this shot on the walk back to the house.  what a little sweetheart.  i def think eating that cone was her fave thing the whole weekend.  mack's was getting to run through a friends sprinkler and of course running her beans out in the backyard. there was a lot of soccer playing.  she just couldn't get enough.  i couldn't get enough of watching the smiles and yes, i could go for another cone.  that ice cream was delish - it definitely soothed the soul. 


i feel like i am still in weekend vacay mode.  i can't seem to quite get my groove back for work and sewing.  i feel sort of lazy still and the weather has been soooo gorgeous out it sure makes it hard to sit inside and work.  we are also still adjusting to the hubbies new study schedule and with him home a bit more in the evening i haven't even touched my poor sewing machine.  i did get a tiny bit done the other day but it was def short lived.  i'm hoping to change that this weekend :)  any of you suffering from the same thing?  it's hard when you work for yourself some days to get motivated ya know?

SewSet. See.Save.Sew.

in other news make sure you pop over to brand new site created by my pal jessica from the blog "me sew crazy" called "sewset"!!! it's awesome!  it's your online sewing source!  a directory of all of your favorite sewing tutorials and patterns that is user based.  the more content we upload of our own the better the site is!  it's clean and modern layout is easy to navigate and it's already filled with some awesome content!  so upload your own tutorials and patterns!  it's free for you to do so and all of your content links directly back to you the user.  you can upload patterns/tutorials that are free and for sale. you can also favorite patterns you love on there as well.  i think jessica & her hubby did a fabulous job!  come check it out!  you can find me on there under "luvinthemommyhood".  have fun!!!

what's your fave flavor of ice cream? have you ever made your own?  i rotate between chocolate chip mint and anything else that's loaded with caramel/chocolate kind of mixes. yum! hmmmm...all this ice cream talk has made me hungry on this hot morning....lol.  i'll have to whip up an iced coffee instead.  wanna join me? come chat!

summer sweater knit along - grapefruits galore


grapefruits are yummy.  they are also purdy.  i especially love that my sweater is made out of yarn called pink grapefruit and looks just like the color of one.  it screams summer!  it's so cheerful, bright and daring for a gal like me who used to only wear black and neutrals (must have been the hairdresser in me).


i've also been thinking that it's sort of like fate that i am knitting my summer sweater kal with a yarn that is grapefruit colored.  in the fall i picked up some cute grapefruit stitch markers and then my pal arika gifted me some equally adorable grapefruit earrings she found at a market!  how perfect that a few months later and i have yarn to match?  awesomeness!

pattern: something silver by veera valimaki yarn: yellow label dk by tanis fiber arts in colorway pink grapefruit
i'm truckin' along on my "something silver" by veera valimaki.  i've got about 2 more lace pattern repeats (about 20 rows) and then it's all garter baby!!! wahoo!!! cannot wait to start on that and the pockets. yessssss...pockets!!!! i heart this cardi.
again, this pattern has been very intuitive to follow along with, the lace pattern is sooooo easy and super simple to read your work and memorize.  it's quite addicting actually.  you all know how i love a good yarn over...lol.  i've tried it on about 4 times now and it fits perfectly from what i can tell.  i had my fair share of nerves about the neckline at the start.  i have a small back compared to my bust size and my shoulders are small and sloped so sweaters tend to not fit me great in that area but veera's simple garter boat neck garter neckline looks fab!!! i adore it.  and that's the beauty of knitting on interchangeables...you simply connect your long cable with your connectors and slip that bad boy on. it's very, very addicting.  i heart my knitpicks.

tanis's yellow label dk is squishy, soft, delectable and just plain awesome.  i can't get enough of this yarn and it will definitely not be the last time i knit with tanis fiber arts yarn.  gorgeous!!!  it think it shows off the stitch pattern beautifully and it's a joy to knit with. i can't wait to see how lovely it will look after a  nice blocking as well.  i'm excited to give it a little bath..lol. perfection.


how's your summer sweater kal project coming along?  i know more than a few of you are onto your 2nd projects already!!!! wowsa!!!!! some awesome projects and knitting going on in our ravelry group so be sure not to miss out on the convo! pics to come on the blog soon! also remember it's never too late to join in.  tell your knitty pals.  you can start along with us anytime.  the more the merrier :)

you can follow along with all things summer sweater knit along:


and a big thank you to our wonderful sponsors! show them some luv!


additional sponsors:

join our linky party by linking up your "summer sweater kal" blog post!

The Stella Collection Giveaway Winner!!!!


ohhhhh....someone is a lucky knitter today!  who was the winner of a copy of the stella collection from tanis lavalee and julie crawford?  was it you?  let's find out......

commenter #20 - monica morales of sweet purls

congratulations!!!!!  such a gorgeous collection!  i hope you enjoy it! happy knitting!  i'll be in touch soon with your prize.

thank you to tanis and julie for the lovely giveaway.  you can find all things tanis here:


and all things julie here:


and be sure to check out the rest of the stella collection tour below:

wee weekend peeks

waiting for the whipped cream!
we had a wonderful road trip this weekend.  we got to relax, enjoy the sunshine, visit with good friends and family and most fun - hang out in a lovely back yard. i cannot even begin to tell you how nice it is to let your kids play in a yard.  living in a condo really, really makes you miss the little things like opening a door and letting the kids run wild in a backyard.  ours loved it. in and out, in and out...they couldn't get enough of the freedom poor things..lol.  we had a short trip but we made the most of what time we had.  we're back to reality now though...laundry, unpacking and studying/work.  needless to say we are already counting down till the next one :)  here's a few peeks from our wee weekend getaway.  

sampling the whipped cream complete with homemade crepes from our lovely hostess :)
mmmmmm! yummy!
and best of all the hubs passed his latest exam so we are feeling more than happy about that! one less weight lifted off of our little shoulders.  we celebrated...me more so than others..  i'm hoping to be reunited with my sewing machine this week!  i miss poppy the pfaff so much :)  she doesn't know why i'm mad at her...lol.  i'm hoping that i'll be able to do a bit a day again to work back up to sitting i my chair and sewing again.  in the meantime i'm knitting and knitting some more.  what a shocker right? muahaha...

lots of skinny girl pina coladas and other yummy bevvies sipped in the backyard along with fire pit s'mores!! yum!
....i'm also sitting in my sweltering hot condo filled with the plants and decor off my deck so the side of our building can be painted.  i'm choking on the overwhelming scent of cilantro..for'reals...i can't breathe...lol.  can't open the windows either and to make things worse the painters aren't even hot...c'mon give a girl a break dude...couldn't i have just a bit of ryan gosling....or channing tatum?  just a wee bit?  spice up my day??? a little six pack action out my window??? please? purdy please? oh and if you are my hubby don't read this post...muhahaa.

how was your weekend?  any of you loving the skinny girl coktails too? i'm a big fan of bethenny frankel's and have been enjoying her ever since the real housewives of new york (yes, i watch those shows and no i do not feel one ounce of guilt over it...lol).  do you like her new show?  did you get to eat some s'mores this summer yet?  come chat :)

p.s. all pics via instagram. you can follow me under luvinthemommyhood :)

the cottage mama giveaway winner!


we've got a winner for the cottage mama ruby ruffle dress pattern for part of the "cottage mama pattern tour"!  this adorable dress pattern is sure to be a big hit for a long time in our house!  wanna see who won?  here ya go.......drumroll please.....


commeter #88 - jacinda cote (sew seraphic designs)

congrats jacinda!  happy sewing! 


and thank you so much to my talented and oh so lovely pal lindsay of the cottage home!  you can find all things cottage mama below:


weekend wishes

to head out on our roadtrip...


that we actually pack just the right amount...


to finish working on my new knitting pattern...


and to get a bit of rest in our friend's awesomely comfy bed :)


keeping this one short and sweet this week.  we're hitting the road today for a little mini road trip.  we're heading up island to visit with some good friends.  i'm hoping we can teach our oldest that road trips really are fun and that you don't need to cry and wail the whole time...lol...but ya never know with her.  we're looking forward to it regardless and hoping my back hold out and allows us to do a few fun things while we are gone.  the hubs gets to go golfing and this mama gets to spend some time chillaxing, talking with friends, basking in the sun and of course - knitting :)  wishing you all a friend filled, giggly, sunshiny, toes in the grass, drinks in your glass and crafts galore kind of weekend.

what are you all up to this weekend?  any fun plans?  any crafty projects you're excited to whip up this weekend?  what's your fave thing about road trips? come keep me company! i'll be bringing the ipad along on the road and hope to get some fun snapshots of our journey.  you can follow me on instagram under "luvinthemommyhood".

p.s. don't forget to enter our "Stella Collection" giveaway from tanis fiber arts and knitted bliss!  those shawl patterns are not to be missed!